


Startup
8482_en_03
PHOENIX CONTACT
59
6.3.4
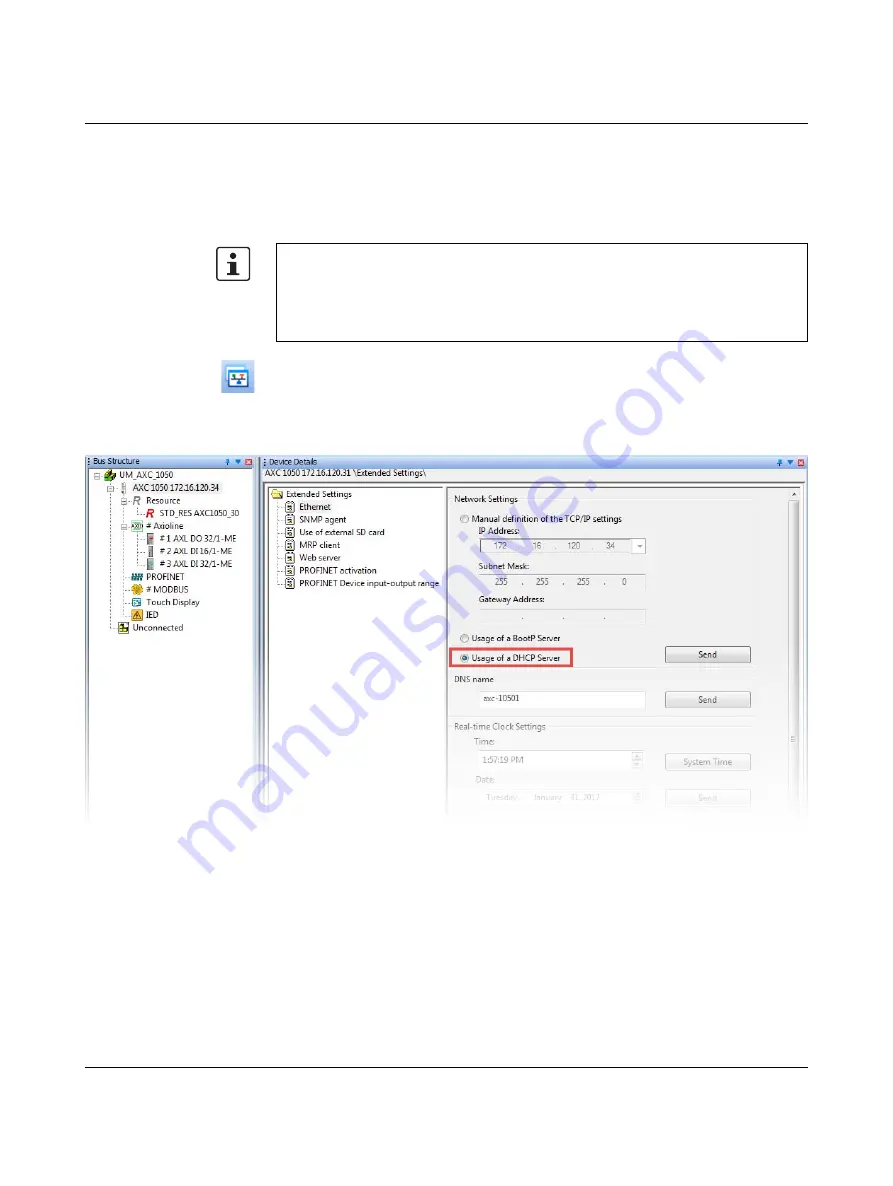
Dynamic Host Configuration Protocol (DHCP)
The controller supports the Dynamic Host Configuration Protocol (DHCP). DHCP enables
IP address assignment via a DHCP server. To do this, the setting for IP address assignment
via DHCP must be activated in PC Worx.
Follow these steps to assign the controller a new IP address via a DHCP server:
•
Open the Bus Configuration Workspace.
•
Select the controller in the "Bus Structure" window.
•
In the "Device Details" window, switch to the "Extended Settings" tab.
•
Select "Usage of a DHCP Server" in the network settings.
Figure 6-17
Network Settings: Activate DHCP
•
Click on the "Send" button.
•
In the "Settings Communication Path" dialog box, confirm the suggested IP address or
the one you have set according to your application with "OK" to transfer the settings to
the controller.
Successful execution of the service is displayed in the status window.
Please note:
The controller must already have a valid IP address so that you can activate the setting for
IP address assignment via DHCP in PC Worx.
•
Assign the controller an IP address via DCP, BootP or manually, as described in the