


AXC 1050 (XC)
56
PHOENIX CONTACT
8482_en_03
6.3.3
Assigning the IP address via the USB interface
The advantage of assigning the IP address via the USB interface is that you do not have to
change the network settings of your PC.
•
Connect the controller with your PC using a USB cable.
If you selected to install the USB driver when installing the
AUTOMATIONWORX Software Suite/PC Worx (see Figure 6-1), the PC will immediately
detect the AXC 1050 (XC) as a USB device. No other settings are required.
Follow these steps to assign the IP address manually:
•
Open the Bus Configuration Workspace.
•
Select the controller in the “Bus Structure” window (in the example: "AXC 1050").
•
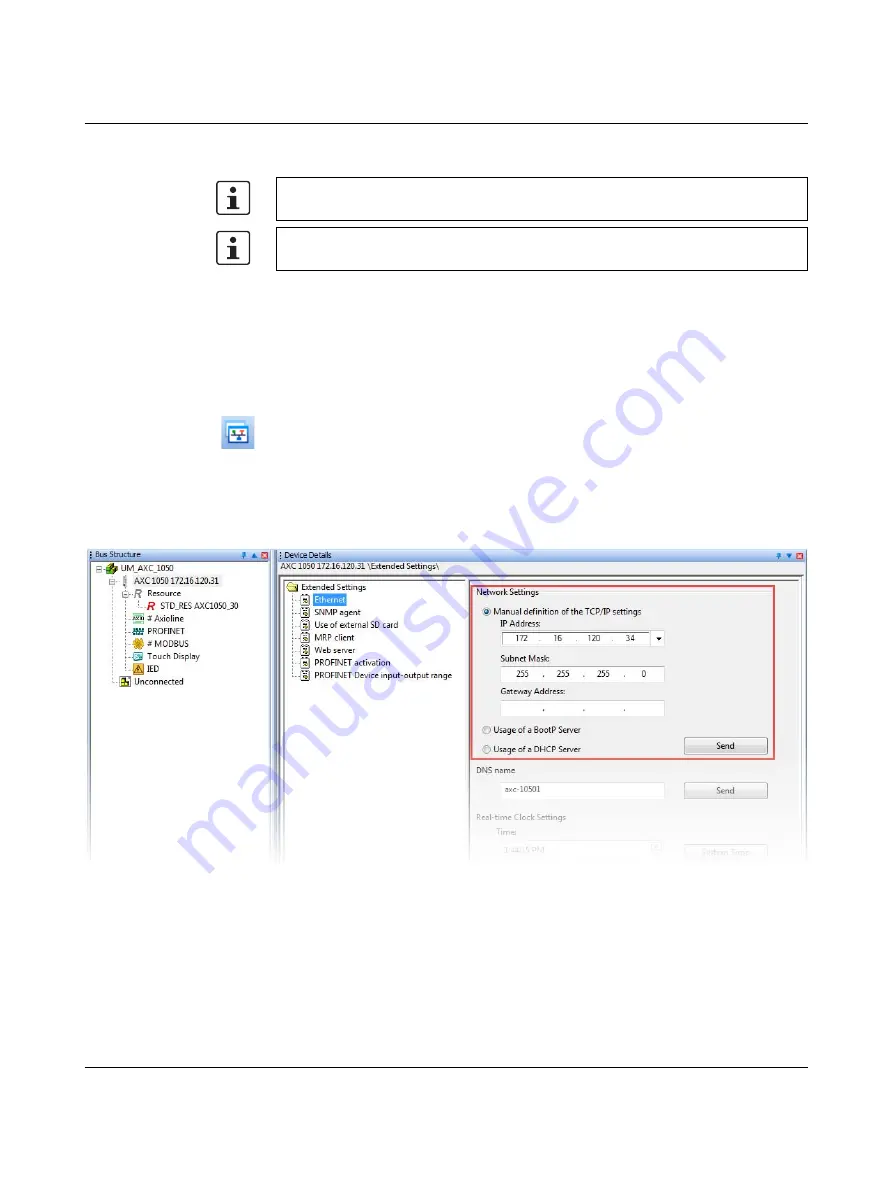
Select the "Extended Settings" tab in the "Device Details" window.
•
In the network settings, select "Manual definition of the TCP/IP settings".
•
Enter the required IP address (in the example in Figure 6-11: IP address:
172.16.120.31; subnet mask: 255.255.255.0).
Figure 6-11
Network settings: "Manual definition of the TCP/IP settings"
The CAB-USB A/MICRO USB B/2.0 M USB connecting cable (Order No. 2701626) is
available as an accessory for connecting the controller to a PC via the USB interface.
In order to use the USB interface of the AXC 1050 (XC), the "Phoenix Contact USB to
UART Interface" driver must be installed; see Section 6.1 on page 47.