background image

ProntoEdit User Guide

17

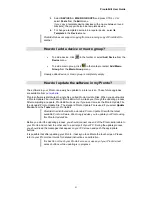
How do I copy all bitmaps from one button to
another?

After creating a button and putting a few actions into its action list, you may want to change the
appearance of that button without having to recreate the action list. You can easily do this by
copying all bitmaps from another button to this button.

1. 

Open the panel view of the panel with the button to which you want
to copy bitmaps.

1. 

To copy bitmaps from a button in another panel, open the panel
view of that panel.

2. 

To copy bitmaps from a button in the gallery, open the gallery
(see 

How do I add a button to a panel?

 for instructions on how to

open the gallery).

2. 

Press and hold an ALT key, click the button from which you want to
copy icons, drag it to the button to which you want to copy bitmaps,
and drop the dragged button.

How do I assign an IR code to a button?

1. 

Open the panel view of the panel with the button to which you want
to assign an IR code.

2. 

Double-click the button you want to assign an IR code to, or select
the button by clicking it and press the INSERT key.
The button property sheet appears.

3. 

Select the 

Action 

tab.

4. 

If the list of actions is not empty, select an action and press the
DELETE key until the list is empty (merely to ensure that this button
will only have a single IR code assigned to it).

5. 

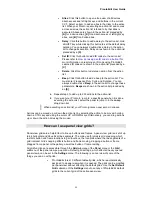
To assign an IR code from the IR database:

1. 

Click the 

Set IR 

button.

The Add IR dialog box appears.

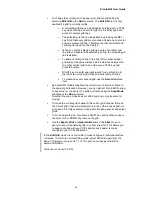
2. 

Select the 

Device

 and 

Brand

 for which you want to set the IR

codes in their respective group boxes.

Note that you can also select 

Non Applicable 

 from the

Brand drop-down list. This allows you to use the BRAND
mode on your Pronto to program buttons.

3. 

From 

Functions

, select the function you want the IR code to

perform.

4. 

For some brands the IR codes are divided into different subsets.
Select the appropriate set from the 

Code Set

 drop-down list.

5. 

Click the button in the 

Name

 section to enter a new name for the

button.

6. 

Click 

OK

 to confirm the new IR code settings, click 

Cancel

 to

quit the procedure or to change the current IR settings.

Summary of Contents for TSU2000099

Page 1: ...Philips Philips Philips Philips User Guide User Guide User Guide User Guide ...

Page 2: ...ONICS N V SHALL NOT BE HELD LIABLE FOR INCIDENTAL OR CONSEQUENTIAL DAMAGES RESULTING FROM THE SUPPLYING OR USE OF THIS INFORMATION PHILIPS ELECTRNONICS N V SHALL NOT BE HELD LIABLE FOR INCIDENTAL OR CONSEQUENTIAL DAMAGES RESULTING FROM THE PERFORMANCE OR USE OF THE MATERIALS DESCRIBED IN THIS MANUAL The information in this manual may be subject to changes without prior notice The Pronto logo is a ...

Page 3: ...guration from a CCF into ProntoEdit 12 How do I save the configuration in ProntoEdit in a CCF 13 Basic Tasks 14 How do I start with the factory default CCF 14 How do I open a panel view 14 How do I add a button to a panel 15 How do I remove a button from a panel 15 How do I move a button in a panel 15 How do I copy a button 15 How do I rename a button 16 How do I change the font used in a button 1...

Page 4: ...23 How do I resize a button or a frame 23 How do I use my own bitmaps 23 How do I create a macro 24 How can I use panel view grids 25 How can I better select in a panel view 27 How can I make ProntoEmulator faster 27 How can I make a screenshot in ProntoEmulator 27 How can I create my own gallery 27 How can I create my own default panels 27 How can I write protect a configuration 28 How can I crea...

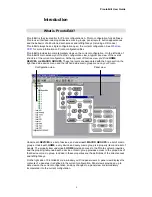
Page 5: ...ROUPS These top levels are associated with the home section the right hand side device menu and the left hand side macro group menu on your Pronto Configuration view Panel view Underneath DEVICES is a list of devices and underneath MACRO GROUPS is a list of macro groups Underneath HOME every device and every macro group is a property item and a list of panels The property item underneath HOME prov...

Page 6: ...n launch ProntoEmulator from ProntoEdit by clicking in the toolbar or selecting Run Emulator from the Tools menu When the cursor is over ProntoEmulator s window press the right mouse button to display a pop up menu to get access to the following ProntoEmulator functions Help About Transparent Minimize and Close The Transparent function is discussed in How can I make ProntoEmulator faster 1 The spe...

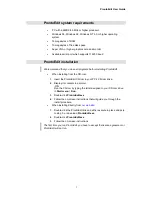
Page 7: ...the CD rom 1 Insert the ProntoEdit CD rom in your PC s CD rom drive 2 Display its contents in explorer OR Run the CD rom by typing the letter assigned to your CD rom drive in Start menu Run 3 Double click ProntoEdit exe 4 Follow the on screen instructions that will guide you through the install procedure When installing directly from our web site 1 Double click the ProntoEdit link and either execu...

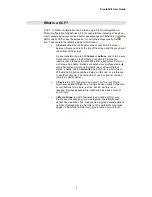
Page 8: ... bitmap and a name Buttons are active user interface elements with a background color or a bitmap for each of four different states a name and an action list An action list is a list of up to 255 actions An action can be a delay an IR code or a reference to another action list The last action of every action list can be a jump to a specific panel A Device is a list of panels plus an action list fo...

Page 9: ...ces Adding new devices Using your own bitmaps Creating your own custom devices Making any button into a macro Creating macros within macros Letting any button take you to any panel Replacing the home panels with your own panels How can this guide help me use ProntoEdit This guide provides step by step instructions for a range of common ProntoEdit tasks and is only intended to get you started with ...

Page 10: ... the Troubleshooting section 4 After connecting to your Pronto ProntoEdit will upload the configuration from your Pronto and load it into ProntoEdit If ProntoEdit s current configuration is not empty ProntoEdit will ask you if you want to Merge with current configuration or replace it If you decide to merge ProntoEdit will add all home panels devices and macro groups uploaded from your Pronto to t...

Page 11: ...which your Pronto is connected you can either try another serial port or have the other application release the serial port 2 If ProntoEdit was able to open the serial port to which your Pronto is connected but still could not connect check to see if both ends of the cable are properly inserted and if Pronto s batteries have not run out Then wait a few seconds and try again If after a number of tr...

Page 12: ...and drop it on ProntoEdit OR Click in the toolbar or select Open Configuration from the File menu and select a CCF ProntoEdit now loads the selected CCF If ProntoEdit has a non empty current configuration ProntoEdit will ask you if you want to Merge with current configuration or replace it If you decide to merge ProntoEdit will add all home panels devices and macro groups from the loaded CCF to th...

Page 13: ...ration Files Pronto Configuration Files Note that saving the configuration as a Pronto Configuration File will discard all Universal Database information Old Pronto Configuration Files Note that saving the configuration as Old Pronto Configuration file will discard all timer and beep actions If a saved configuration does not fit in your Pronto ProntoEdit will tell you it is too large and cancel th...

Page 14: ...mplates Templates don t appear in Pronto s device menu but when you add a new device on the Pronto these are the devices you can select from If you use ProntoEdit instead of your Pronto to add new devices you can remove all templates This speeds up saving and loading and leaves more room in your Pronto s memory for real devices be sure not to overwrite default ccf so you can always get the templat...

Page 15: ...it A red frame will appear around the selected button 3 Press the DELETE key How do I move a button in a panel 1 Open the panel view of the panel with the button you want to move 2 Select the button you want to move by clicking it A red frame will appear around the selected button 3 Hold down the left mouse button and move the cursor to drag the button to a new location The status bar shows the cu...

Page 16: ...ess the ENTER key when you re done How do I change the font used in a button 1 Open the panel view of the panel with the button of which you want to change the font 2 Double click the button of which you want to change the font or select the button by clicking it and press the INSERT key Alternatively right click the button and select Properties from the context menu The button property sheet appe...

Page 17: ...ssign an IR code 2 Double click the button you want to assign an IR code to or select the button by clicking it and press the INSERT key The button property sheet appears 3 Select the Action tab 4 If the list of actions is not empty select an action and press the DELETE key until the list is empty merely to ensure that this button will only have a single IR code assigned to it 5 To assign an IR co...

Page 18: ...r Pronto please refer to the Troubleshooting section See How do I create a macro for information on how to assign more than one single IR code to a button How do I assign an IR code to a direct access or left right key The Pronto has two kinds of key definitions global and per device Whenever there is no per device definition or an empty per device definition the global definition is used There is...

Page 19: ...ouse mode in which your Pronto s touch screen acts as a DVX8000 compatible touch pad SCROLL UP scrolls up to the previous panel exactly like the scroll button at the top of your Pronto s screen would do SCROLL DOWN scrolls down to the next panel exactly like the scroll button at the bottom of your Pronto s screen would do Your Pronto has to be updated to APP V4 4 or later in order for SCROLL UP an...

Page 20: ...up you want to move in the tree view on the left side of the ProntoEdit window 2 Hold down the left mouse button and drag the device or macro group to its new location If you drop a device or macro group on another device or macro group it will be inserted before the device or macro group you drop it on If you drop a device or macro group on DEVICES or MACRO GROUPS it will be appended to the list ...

Page 21: ...les When you double click a Pronto Update File it will launch ProntoEdit which will take you through the updating process After completing an update ProntoEdit will ask you if you want to make the Pronto Update File the standard Pronto Update File The standard Pronto Update File is used if you select Update Pronto from the Tools menu in ProntoEdit ProntoEdit is distributed with a standard Pronto U...

Page 22: ...ar 3 Select the option Is TimerGroup The Macro Group will now be displayed between brackets How do I create add a Timer Action A Timer Action like any other Pronto action can be added in an actionlist of a button a key or a device using the properties box Only an alias action can be assigned as the START STOP action of a timer Pressing the action key will open the Alias dialog box from which an al...

Page 23: ... the button or frame The status bar shows the current size of the selected button or frame Alternatively you can use the cursor keys to resize the button or frame 4 Hold down a SHIFT key to move the top or left edge and hold down a CTRL key to move the bottom or right edge To move an edge faster press SPACE bar first and hold it while moving the edge with the cursor keys You can only resize a butt...

Page 24: ...p up menu to save the bitmap 6 Click the OK button to accept the new bitmap or the Cancel button to decline it If a button has one or more bitmaps the width of the button is fixed to the smallest width of all its bitmaps and the height of the button is fixed to the smallest height of all its bitmaps The same is true for frames except that a frame can have at most one bitmap How do I create a macro...

Page 25: ...If you want your Pronto to jump to a specific panel when it is done executing the action list select the panel to jump to in the Jump drop down list When executing an action list your Pronto ignores panel jumps in aliases Actions can be moved up or down the action list by selecting the action to be moved holding down a CTRL key and using the cursor UP or DOWN keys Alternatively you can drag action...

Page 26: ...l grid lines To create an evenly spaced grid use the Auto Grid menu item By default ProntoEdit snaps the top left corner of a button or frame to the nearest grid location However you can instruct ProntoEdit to snap to any corner or the center of a button or frame using the Snap Mode submenu of the Grid submenu Note that the snap mode does not affect resizing only placement or moving To make the cu...

Page 27: ...ProntoEmulator in a Windows bitmap file ProntoEmulator will tell you the full path of the file it saves the screen shots usually go into directory C ProntoScreens ProntoEmulator saves up to 100 screenshots before it starts using the same filenames again How can I create my own gallery ProntoEdit loads the gallery from install gallery ccf where install is the directory where ProntoEdit has been ins...

Page 28: ...es in Pronto s device menu If you don t need these aliases you can create your own home panels Your Pronto automatically puts aliases on the home panels if all of the following conditions are met There is at least one home panel The first home panel is named home all lowercase The home panels are write protected see check box in Pronto System Properties If you make sure at least one of these condi...

Page 29: ...ication release the serial port ProntoEdit was able to open the serial port to which my Pronto is connected but still cannot connect 1 Check to see if both ends of the cable are properly inserted 2 Check to see if Pronto s batteries have not run out 3 Wait a few seconds and try again 4 If after a number of tries ProntoEdit still cannot connect try resetting your Pronto 5 Wait until it beeps twice ...

Reviews: