31
The search results are then listed at the bottom of the screen, organized on the following tabs:
•
Day
displays a single result for each camera for each day of the search period. If the search period was two days
long for 16 cameras, 32 results are listed (assuming all 16 of the cameras recorded video both days).
•
Camera
displays a single result for each camera. Each result represents a video segment containing all video
captured by an individual camera input during the search period.
•
Events
displays a single result for each one-minute period that contained a motion or alarm event.
•
Alarms
displays a result for each camera that recorded each alarm event. Results contain the alarm name, the
camera name, the type of alarm (hardware or software), and the times the alarm was activated and deactivated.
Except on the
Alarms
tabs, the information displayed on all tabs includes the camera name, the date and time of the
start and finish of the video segment, the number of motion and alarm images, the total number of images captured,
and the location of the video (on disk or removable media). Click on a column title to sort search results based on
that column's information.
Viewing Search Results
After you have located the video you want to view, you can play it back on the
Search
page with full VCR control.
1. Double-click the name (or other information) of the video segment you want to view. A frame of the selected
video appears in the view screen, and the VCR controls (rewind, play, pause, frame-by-frame advance, and so
on) are activated below the view screen.
2. Use the VCR controls to view the segment of the video that you want to see. Below the view screen is a clock
that indicates the time that the video was captured. When viewing entire segments of
Free
mode video, this
clock runs uninterrupted until the video segment is completed. When viewing motion or alarm events only,
the clock skips ahead in step with the video. When playing back alarm events, the actual time during which
the alarm occurred is indicated on the counter by the color blue. Other video that may have been captured
during each one-minute segment of video is indicated on the counter by the color white.
The video that appears in the view screen window is also being sent out the analog video export output (i.e., the BNC
cable connection from the
System4
Server Interface cable). If a conventional security VCR or other analog video
recording device is connected to this output, the video can be recorded on it.
Video Authentication
The
Authenticate
button on the
Search
page allows you to verify that a video file has not been changed or tampered
with in any way. To authenticate a video segment, perform a search, select the appropriate search result, then click the
Authenticate
button. A progress bar is then displayed until the whole segment has been examined. A message box
then appears, indicating whether the authentication succeeded or failed.
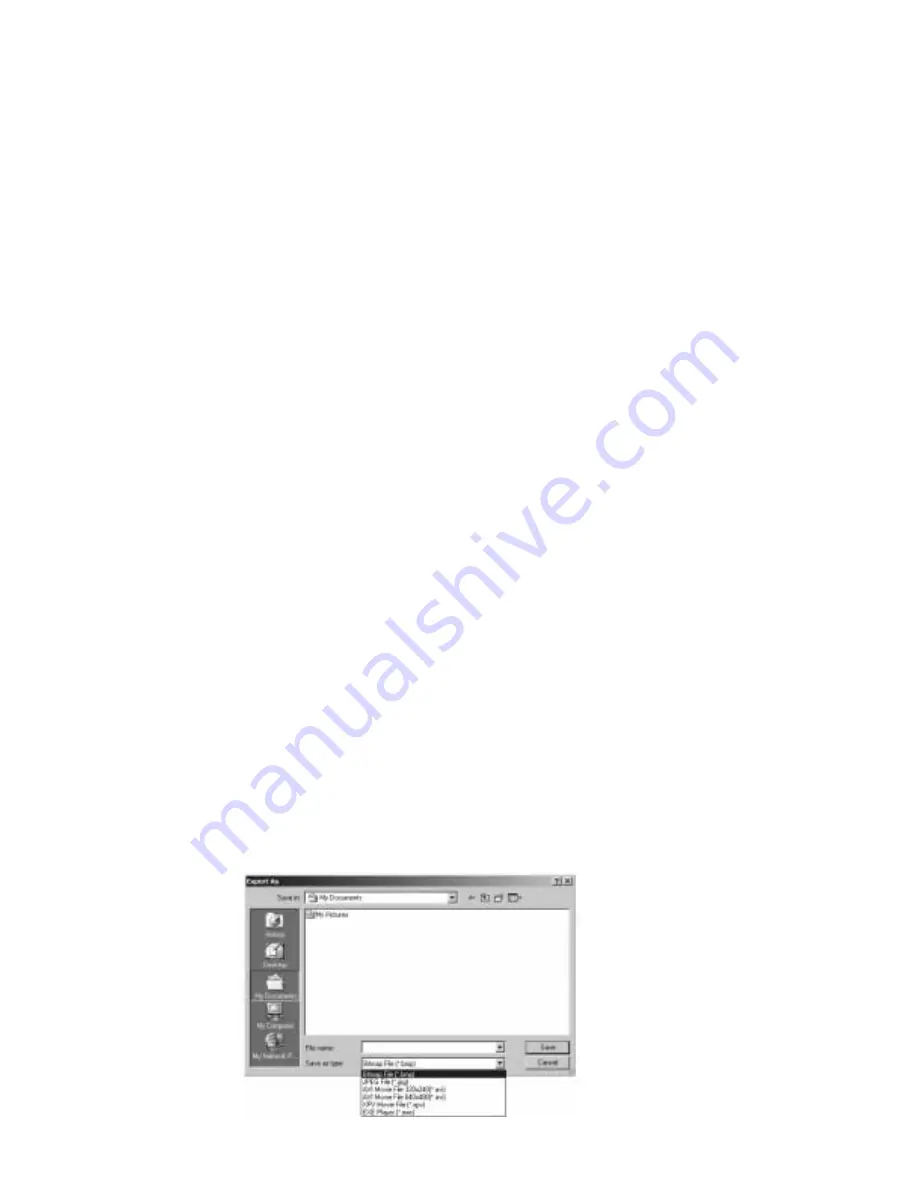
4.5 Exporting Captured Images and Video
The system also allows you to export captured still images and video to other locations. To do this, double-click
the search result that contains the image or video you want to export and then click the Export button (the blue
circle to the right of the VCR controls). This displays an Export As window (see below) that allows you to save a
single image as a bitmap or JPEG or the entire video segment as a Windows AVI file (320 ¥ 240 or 640 ¥ 480),
XPV file (which you can play back using supplied XPVPlayer, which is installed on the system by default), or EXE
file (a completely self-contained file that you can play on any computer).
Summary of Contents for System4 Seriver
Page 1: ...Server Philips Communication Security Imaging Installation Instructions Eng ...
Page 2: ...2 ...
Page 47: ...47 ...


