22
{Primary} - Designate this display as the primary
display for remote control operation. Only this
display can be operated by the remote control.
{Secondary} - Designate this display as the
secondary display. This display cannot be operated
by the remote control, and will only receive the
control signal from the primary display via the
RS232C connection.
{Lock all} / {Lock all but Volume} / {Lock all but
Power} - Lock the remote control function of this
display. To unlock, press and hold the [DISPLAY]
button on the remote control for 5 (five) seconds.
Keyboard control
Choose to enable or disable the display keyboard
(control buttons) function.
{Unlock} - Enable the keyboard function.
{Lock All} / {Lock all but Volume} / {Lock all but
Power} - Disable the keyboard function.
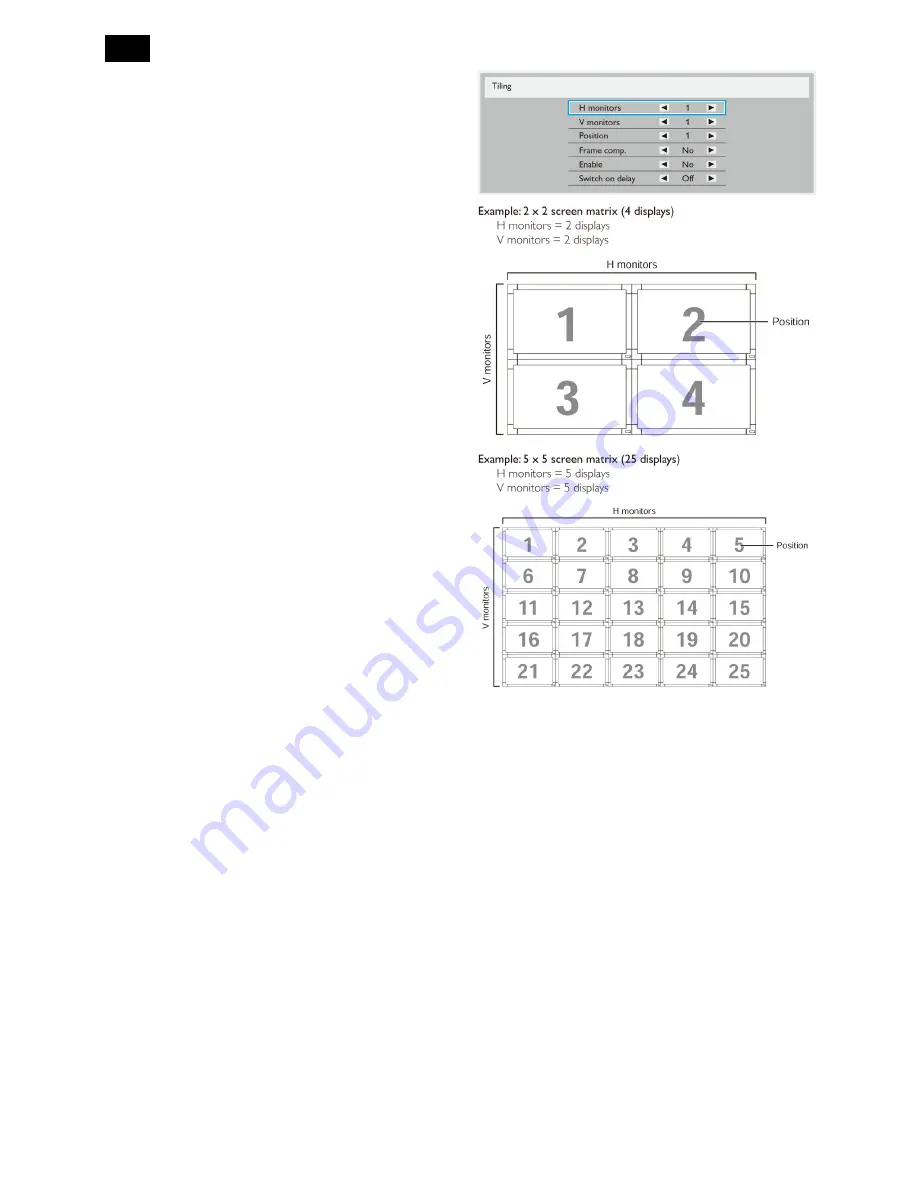
Tiling
With this function you can create a single large-screen
matrix (video wall) that consists of up to
25
sets of this
display (up to 5-set each on the vertical and horizontal
side). This function requires a daisy-chain connection.
H monitors - Select the number of displays on the
horizontal side.
V monitors - Select the number of displays on the
vertical side.
Position - Select the position of this display in the
screen matrix.
Frame comp. - Choose to turn the frame
compensation function on or off. If selected {Yes},
the display will adjust the image to compensate for
the width of the display bezels in order to accurately
display the image.
Frame comp. – on
Summary of Contents for Signage Solutions E-Line Display BDL5551EL/00
Page 33: ...33 Meridian 1 5 Block Diagram 5 1 Scaler Board ...
Page 34: ...34 Power Board ...
Page 66: ...66 Remark Parts position can be searched by using FIND function in PDF ...
Page 75: ...75 3 Remove all the screws as follow ...
Page 76: ...76 76 4 Remove the main frame from the panel ...
Page 81: ...81 3 Set the parameters as below figure ...
Page 83: ...83 6 Click Commands batch to load the file isp_psi_ext txt ...
Page 87: ...87 ...
Page 89: ...89 ...
Page 92: ...92 92 5 Click Auto to upgrade 6 Update processing ...
Page 96: ...96 96 2 Tick the Analog DVI and click Loadfile to set the parameters 3 Select the EDID folder ...
Page 115: ...115 ...
Page 121: ...121 Service Kit Description Part No Picture ISP tool 715GT183 A DDC TOOL 715GT034 B ...


