3
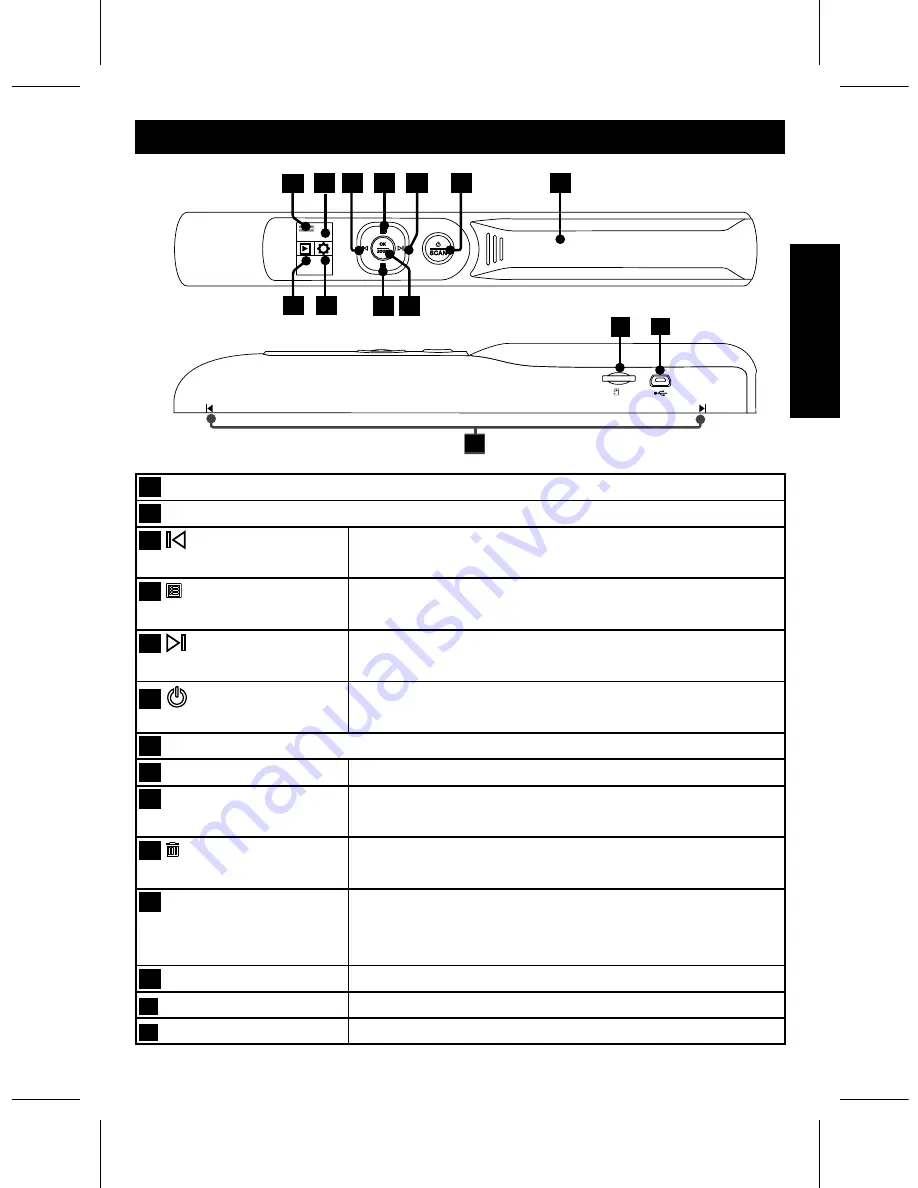
Product Overview
1
Battery Indicator
2
LCD Screen
3
Left button
• Moves left in the menu.
• Moves to the previous scanned image.
4
Menu button
• Moves up in the menu.
• Brings up the Mode menu.
5
Right button
• Moves right in the menu.
• Moves to the next scanned image.
6
Power/Scan
button
• Press and hold to turn the power on/off.
• Press slightly to start/stop the image scan.
7
Battery cover
8
Playback
• Select to view the scanned images.
9
Setting
• Select to make Scan Setting and System
Setting.
10
Delete button
• Moves down in the menu.
• Brings up the Delete menu.
11
OK/Zoom button
• Press to make or con
fi
rm the selection in the
menu.
• Zoom the scanned image.
12
MicroSD card slot
• Compatible with a microSD card up to 32GB.
13
Mini USB port
• Connects to PC for
fi
le transfer.
14
Alignment guide
• Alignment reference before scanning.
14
13
12
7
2 3
4
5
6
10 11
1
8
9


