Video & Audio Settings
Before you begin using the Videogram Creator, it’s important that you learn how to control video and audio.
You may want to experiment with these settings later to optimize video capture for your system. More information regar-
ding “Optimizing System for Video Capture” can be found in Chapter 10 located towards the end of this manual.
Settings Control Panel
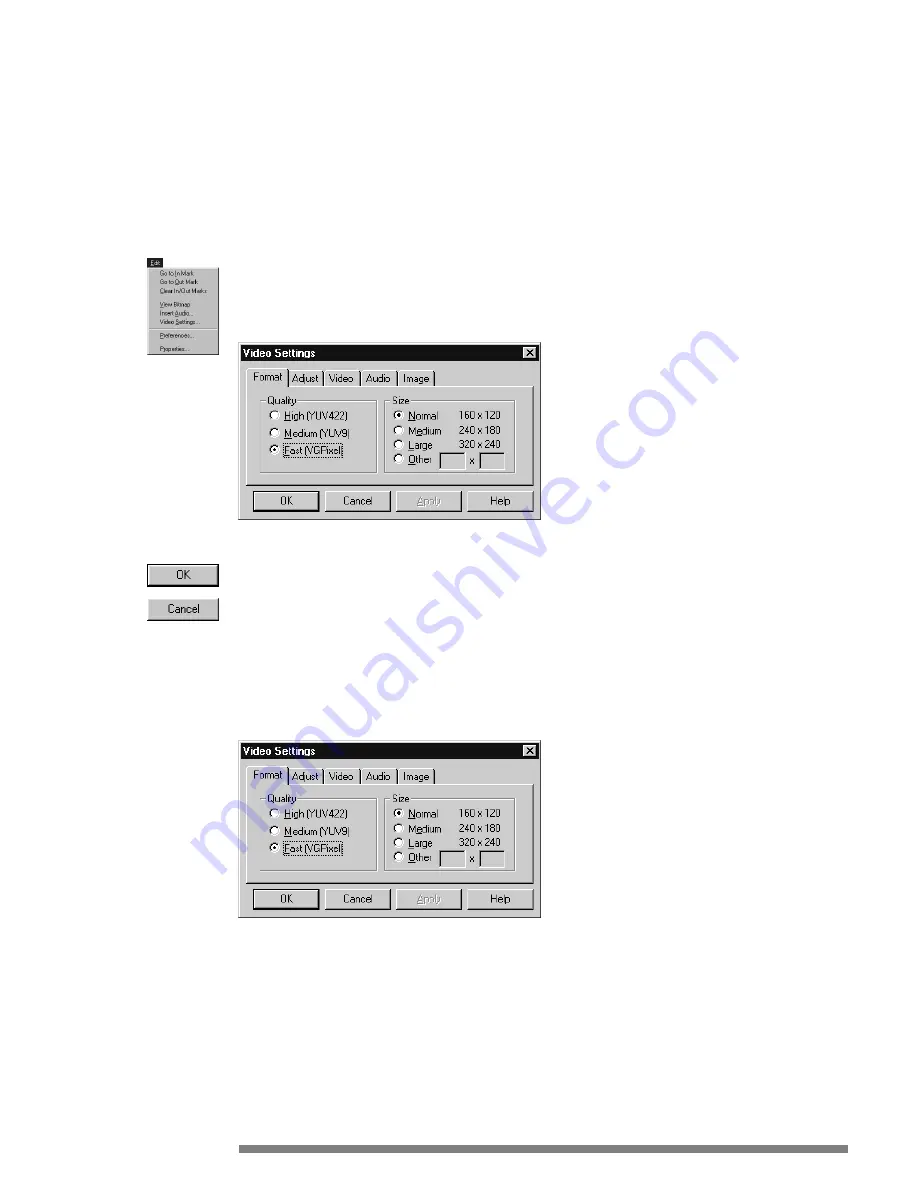
From the Videogram Creator application, click on the “Edit” option on the menu bar and select “Video Settings.” The fol-
lowing “Video Settings” control panel will appear. Use the Tabs located across the top to access the different settings for
video, audio and image capture. This section is broken down into separate tabs to make the information easier to use.
OK & CANCEL Buttons
These are found in a large number of Windows applications and they mean the same thing here. When you’re done
making changes, click OK to accept them and close the “Setting” dialog box or click CANCEL to abort all changes and
close the “Setting” dialog box.
Format
Quality
Select one of these settings to make captured video look better or play faster.
These settings tell the Videogram Creator software how much color and definition information you would like in the
video files you capture. Color and definition combine to enhance the quality of the video files. High quality will produce
the best visual results, however, it does create larger files and puts greater demands on slower systems.
•
High Quality (YUV 4:2:2) -
Select this option to maximize the quality of the video; video files will take up more
space on the hard drive by selecting this option (better quality = more room needed to store video), but will contain
more information to bring out colors and definition.
•
Medium Quality (YUV 9) -
This option produces good-quality video with good color and definition while consuming
less disk space.
15
Edit Menu
Standard
Windows
Buttons
Video & Sound Settings Control Panel
Format Tab - Settings Control Panel


