19
[TV Display]
The TV format determines the aspect ratio of
display according to the type of TV you have
connected.
•
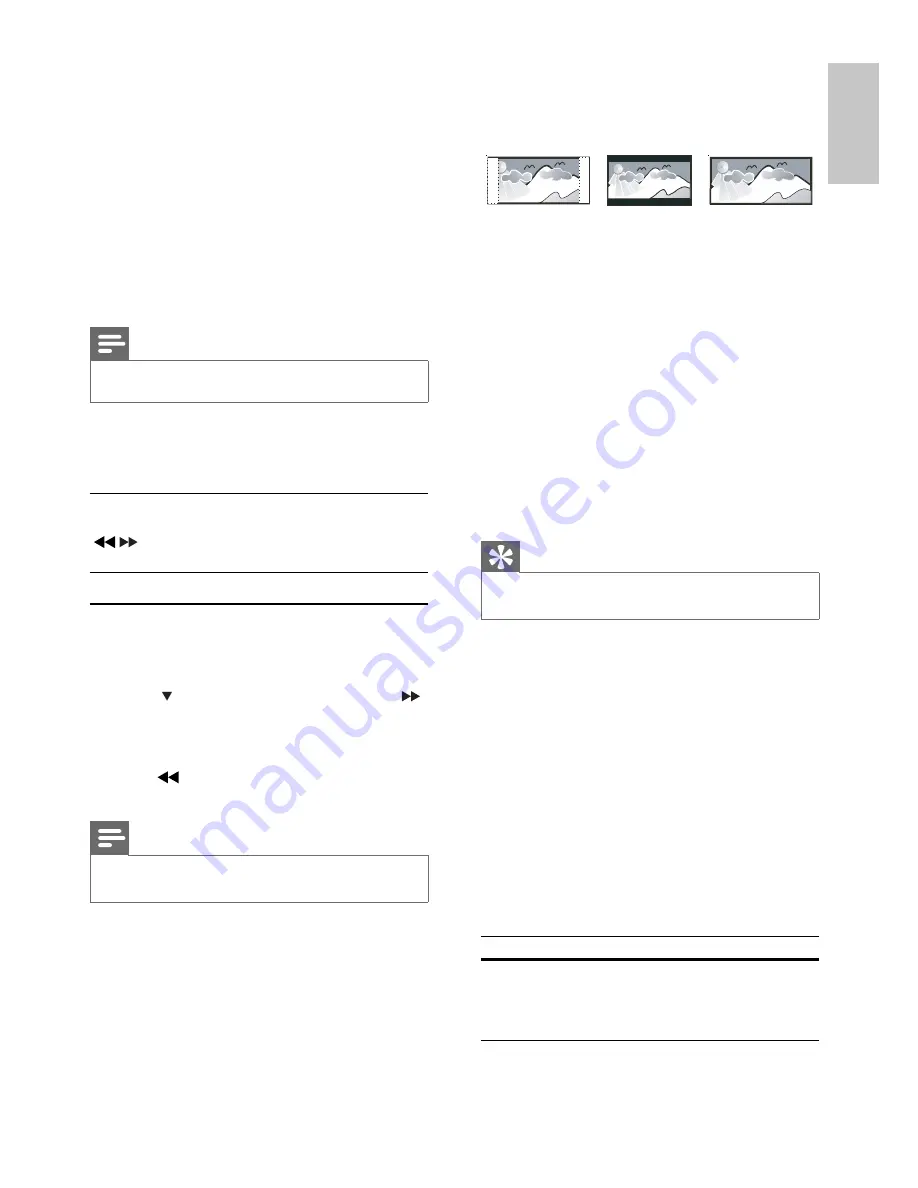
[4:3 Pan Scan]
– For 4:3 screen TV: full-height
display with the trimmed sides.
•
[4:3 Letter Box]
– For 4:3 screen TV: wide-
screen display with black bars on the top and
bottom of the screen.
•
[16:9 Wide Screen]
– For wide-screen TV:
display ratio 16:9.
[Progressive]
If the TV supports progressive scan output, you
can turn on the progressive scan mode to enhance
the picture quality. Video connection through
Component Video is required.
•
[Off]
– Disable progressive scan mode.
•
[On]
– Turn on progressive scan mode.
Tip
There is more detailed description available (see ‘Get
•
started’ > ‘Turn on Progressive Scan’).
[Picture Settings]
Select a predefi ned set of picture color settings or
customize your personal setting.
•
[Standard]
– original color setting.
•
[Bright]
– vibrant color setting.
•
[Soft]
– warm color setting.
•
[Personal]
– customize the color setting.
Adjust the level of brightness, contrast,
sharpness/tint and color saturation.
[HDMI Setup]
When you connect this apparatus and TV with
HDMI cable, select the best HDMI video setting
that your TV supports.
•
[Wide Screen Format]
– Defi ne the wide
screen format for disc play.
Option
Description
[Superwide]
Center position of the screen
is stretched less than the side.
Applicable only to 720p and
above video resolution setting.
4:3 Letter Box (LB)
4:3 Pan Scan (PS)
16:9 (Wide Screen)
•
[Off]
– disable audio output from the TV. The
sound is only output through this apparatus.
•
[All]
– the sound is output through both your
TV and this apparatus. If the audio format on
the disc is not supported, it is downmixed to
two-channel sound (Linear-PCM).
[CD Upsampling]
Convert the music CD to a higher sampling rate
using sophisticated digital signal processing for
better sound quality.
•
[Off]
– Turn off CD-upsampling.
•
[88.2kHz (X2)]
– Convert the sampling rate
of the CDs twice as high as the original rate.
Note
CD upsampling is only available in stereo mode.
•
[Audio Sync]
When you play a video disc, set the default delay
time for audio output.
1) To start, press
OK
.
2) Select a speaker delay in the menu, then press
/
to set the delay time.
3) Press
OK
to confi rm and exit.
Video setup
1
Press
SYSTEM MENU
.
»
[General Setup]
menu is displayed.
2
Press
to select
[Video Setup]
, then press .
3
Select an option, then press
OK
4
Select a setting, then press
OK
.
To return to the previous menu, press
•
.
To exit the menu, press
•
SYSTEM MENU
.
Note
See the explanations of the above options in the
•
following pages.
[TV Type]
Change this setting if the video does not appear
correctly. By default, this setting matches the most
common setting for TVs in your country.
•
[PAL]
– For TV with PAL color system.
•
[NTSC]
– For TV with NTSC color system.
•
[Multi]
– For TV that is compatible with both
PAL and NTSC.
English
EN