2-3
PCS 103 729
9
English
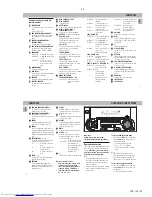
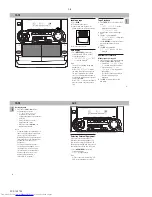
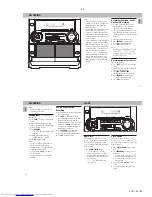
Controls on the system and
remote control
1
1
1
1
1
STANDBY ON
–
to switch the system on or to standby
mode.
–
to use for EASY SET.
2
2
2
2
2
DBB (DYNAMIC BASS BOOST)
–
to switch on bass boost, to enhance
bass response or to switch off bass
boost.
3
3
3
3
3
DIGITAL SOUND CONTROL
DISPLAY PANEL
–
to view the desired DSC display.
4
4
4
4
4
DSC (DIGITAL SOUND CONTROL)
–
to select the desired sound effect :
OPTIMAL, JAZZ, ROCK or TECHNO.
5
5
5
5
5
PROGRAM
for VCD/CD ... to program disc tracks.
for TUNER ..... to program preset radio
stations.
for CLOCK ..... to select 12- or 24-
hour in clock setting
mode
(on the system
only).
6
6
6
6
6
MICROPHONE
–
to connect microphones jack.
7
7
7
7
7
MIC LEVEL
–
to adjust the mixing level for karaoke
or microphone recording.
8
8
8
8
8
RECORD
–
to start recording on tape deck 2 only.
9
9
9
9
9
DISPLAY SCREEN
–
to view the current setting of the
system.
0
0
0
0
0
DISC CAROUSEL TRAY
!
!
!
!
!
DISC CHANGE
–
to change disc(s).
@
@
@
@
@
OPEN•CLOSE
–
to open or close the disc carousel tray.
#
#
#
#
#
DISC 1 / DISC 2 / DISC 3
(DISC DIRECT PLAY)
–
to select a disc tray for playback.
$
$
$
$
$
SOURCE
–
to select the following:
VCD / (CD 1•2•3)
–
to select VCD/CD mode. When VCD/
CD playback is stopped, press to
select the disc tray 1, 2 or 3.
PAL / NTSC
–
to select corresponding PAL or NTSC
system of your TV set (exception
Multi-system TV).
TUNER / (BAND)
–
to select Tuner mode. When in tuner
mode, press to select the waveband:
FM or MW.
TAPE / (TAPE 1• 2)
–
to select Tape mode. When tape
playback is stopped, press to select
either tape deck 1 or 2.
AUX / (VIDEO)
–
to select sound from an external
source (e.g. TV, VCR, Laser Disc player,
DVD player or CD Recorder).
%
%
%
%
%
MODE SELECTION
SEARCH•TUNING
à á
for VCD only .. to move the zoom
picture to the left or
right.
for VCD/CD ... to search backward/
forward.
for TUNER ..... to tune to a lower or
higher radio frequency.
for TAPE ........ to rewind or fast
forward on tape.
for CLOCK ..... to set the hour
(on the
system only) .
STOP•CLEAR
Ç
for VCD/CD ... to stop disc playback or
to clear a program.
for TUNER ..... to stop programming.
for TAPE ........ to stop playback or
recording on tape deck
2 only.
for DEMO ......
(on the system only) to
start or stop
demonstration mode.
PLAY•PAUSE
ÉÅ
for VCD/CD ... to start or interrupt
playback.
for VCD only…to watch a still picture.
for TAPE ........ to start playback.
PREV
í
/ NEXT
ë
(PRESET
43
)
for VCD only…to move the zoom
picture down or up.
for VCD with PBC on ..........................
...................... to select next or
previous MENU.
...................... to select next or
previous VCD entry
level track during
playback.
for VCD/CD ... to skip to the beginning
of the current, previous,
or next track.
for TUNER ..... to select a preset
station in memory.
for CLOCK ..... to set the minute
(on
the system only).
^
^
^
^
^
VOLUME
–
to increase or decrease the volume.
&
&
&
&
&
DIM
–
to select different brightness for the
display screen : DIM 1, DIM 2, DIM 3
or DIM OFF.
*
*
*
*
*
n
–
to connect headphones.
(
(
(
(
(
CLOCK•TIMER
–
to view the clock, set the clock or set
the timer.
)
)
)
)
)
RETURN
–
for VCD with PBC on to return to the
previous MENU level during playback
(for VCD version 2.0 only).
¡
¡
¡
¡
¡
PBC (PLAYBACK CONTROL)
–
to switch on or off PBC mode
(for VCD
version 2.0 only).
™
™
™
™
™
A. REPLAY (AUTO REPLAY)
–
to select playback mode either in
continuous AUTO REPLAY or ONCE
only.
£
£
£
£
£
DUBBING
–
to dub a tape in normal speed.
≤
≤
≤
≤
≤
TAPE DECK 2
∞
∞
∞
∞
∞
TAPE DECK 1
CONTROLS
10
English
§
§
§
§
§
OSD (ON SCREEN DISPLAY)
–
to switch on or off the on screen
display on the TV screen.
≥
≥
≥
≥
≥
INCREDIBLE SURROUND
(not
applicable for this model)
.
–
to switch on or off the surround sound
effect.
•
•
•
•
•
ZOOM
–
to enlarge a still picture on the TV
screen
(for VCD operation only).
ª
ª
ª
ª
ª
VOCAL
–
to fade out the vocal of the original
song during VCD playback or to switch
between mono or stereo mode during
audio disc playback
(for VCD operation
only).
º
º
º
º
º
KEY CONTROL (
I È i
)
–
to change the key to suit your vocal
range
(for VCD operation only).
I
................. to decrease vocal key
level.
È
.................... to restore vocal key to
original setting.
i
................... to increase vocal key
level.
⁄
⁄
⁄
⁄
⁄
ECHO
-
/
+
–
to adjust the echo level for karaoke
(for VCD operation only).
¤
¤
¤
¤
¤
RESUME
–
to continue playback again from
where you have stopped. Only when
PBC mode is switched off
(for VCD
operation only).
‹
‹
‹
‹
‹
SLOW
–
to watch a VCD at a slower speed.
There are 3 modes of selection
(for
VCD operation only).
›
›
›
›
›
A - B
–
to playback a certain scene or passage
of a disc repeatedly.
fi
fi
fi
fi
fi
DIGEST
–
to scan through a VCD or a particular
track. There are 4 modes of selection
(for VCD operation only).
fl
fl
fl
fl
fl
MUTE
–
to switch off the sound temporarily.
‡
‡
‡
‡
‡
DIGIT 0 – 9
(numbers consisting of two figures
must be keyed in within 2 seconds.)
for VCD with PBC on ..........................
to select an entry level.
for VCD/CD…to key in a disc track to
start playback or
...................... to select another track
during playback or
...................... to select a track for
programming.
°
°
°
°
°
B
–
to switch the system to standby mode.
Notes for remote control:
– First select the source you wish to
control by pressing one of the
source select keys on the remote
control (e.g. VCD, TUNER, etc.).
– Then select the desired function
(
É
,
í
,
ë
, etc.).
CONTROLS
OPERATING THE SYSTEM
Important:
Before you operate the system,
complete the preparation procedures.
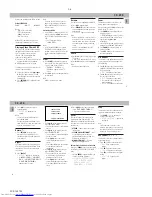
Demonstration mode
The system has a demonstration mode that
shows the various features offered by the
system.
When the system is switched
on for the first time, the demonstration
mode will start automatically.
Notes:
– During the demonstration, if you press
any source (or standby-on) button, the
system will switch to the respective
mode (or standby).
– When the system is switched to standby
mode, the demonstration will resume 5
seconds later.
To stop the demonstration mode
• Press and hold
Ç
(on the system only)
for
5 seconds
when the system is in
demonstration mode.
™
The demonstration will stop.
™
"
DEMO OFF
" is displayed.
™
The system will switch to standby
mode.
Note:
– Even though the AC power cord is
removed from and reconnected to the
wall socket, the demonstration will
remain off until it is switched on again.
To start the demonstration mode
• Press and hold
Ç
(on the system only)
for
5 seconds
when the system is in
standby mode.
™
The demonstration will begin.
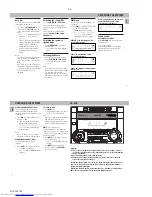
DIGITAL
SOUND
CONTROL
STANDBY-ON
PROGRAM
DIM
MINI HIFI SYSTEM
C D 1 • 2 • 3
BAND
TAPE 1 • 2
TAPE
VCD
TUNER
AUX
PRESET
▲
▲
TUNING
▲
▲
▲ ▲
STOP• CLEAR
SEARCH
PLAY• PAUSE
PREV
NEXT
D
B
B
VIDEO
O
P
TI
M
AL
JA
ZZ
R
O
CK
TE
C
H
N
O
DSC
RECORD DUBBING A.REPLAY
VOLUME
MICROPHONE - LEVEL
PAL/NTSC
CLOCK•TIMER
RETURN
PBC


