background image

2-1

PCS 103 727

5

English

General Information

• The type plate (which contains the

serial number) is located at the rear
of the system.

• Recording is permissible if

copyright or other rights of third
parties are not infringed.

Environmental Information

All unnecessary packaging has been
omitted. We have tried to make the
packaging easy to separate into three
materials: cardboard (box), polystyrene
foam (buffer) and polyethylene (bags,
protective foam sheet).

Your system consists of materials which
can be recycled and reused if disassembled
by a specialized company. Please observe
the local regulations regarding the disposal
of packaging materials, exhausted
batteries and old equipment.

CONTENTS                               GENERAL INFORMATION

      SAFETY INFORMATION

• Under no circumstances should you

repair the system yourself, as this will
invalidate the warranty!

• If the system is brought directly from a

cold to a warm location, or is placed in a
very damp room, moisture may
condense on the lens of the disc unit
inside the system. Should this occur, the
disc player will not operate normally.
Leave the power on for about one hour
with no disc in the system until normal
playback is possible.

• Electrostatic discharge may cause

unexpected problems. See whether
these problems disappear if you unplug
the AC power cord and plug it in again
after a few seconds.

• To disconnect the system from the

power supply completely, remove
the AC power plug from the wall
socket.

Accessories

(Supplied)

– Remote control
– Batteries (two AA size) for remote

control

– AM loop antenna
– FM wire antenna
– AC power cord
– One Video cinch cable

Safety Information

• Before operating the system, check that

the operating voltage indicated on the
typeplate (or the voltage indication
beside the voltage selector) of your
system is identical with the voltage of
your local power supply. If not, please
consult your dealer. The typeplate is
located at the rear of your system.

• When the system is switched on, do not

move it around.

• Place the system on a solid base (e.g. a

cabinet).

• Place the system in a location with

adequate ventilation to prevent internal
heat build-up in your system.
Allow at least 10 cm clearance from the
rear and the top of the unit and 5 cm
from each side.

• Do not expose the system to excessive

moisture, rain, sand or heat sources.

General Information ................. 5

Safety Information .................... 5

Preparation .......................... 6 - 7

Controls ............................... 8 - 10

Operating The System .... 10 - 12

CD - VCD ........................... 12 - 16

Tuner .................................. 17 - 18

Karaoke ..................................... 18

Tape ................................... 19 - 20

AUX ............................................ 20

Recording ......................... 21 - 22

Clock ......................................... 22

Timer .......................................... 23

Specifications ......................... 24

Maintenance ............................ 25

Troubleshooting .............. 25 - 26

IMPORTANT:

PLEASE NOTE THAT THE

VOLTAGE SELECTOR

LOCATED AT THE REAR OF

THIS SYSTEM IS PRESET AT

220V FROM THE FACTORY.

FOR COUNTRIES THAT

OPERATE AT 110V, PLEASE

ADJUST TO 110V BEFORE YOU

SWITCH ON THE SYSTEM.

6

English

PREPARATION

Rear Connections

AM ANTENNA

A

B

C

D

VOLTAGE

SELECTOR

110V-
127V

220V-
240V

AUX IN

R

+

L

+

E

AUDIO OUT

L

R

AC

MAINS

~

FM AERIAL

75

VOLTAGE

SELECTOR

110V-
127V

220V-
240V

VOLTAGE
SELECTOR

220V-
240V

110V-
127V

F

W

VIDEO

OUT

G

Summary of Contents for FW-V28

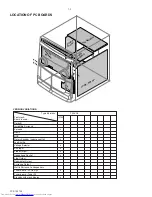
Page 1: ...oard ECO5 Sys 7B ETF7 Tape Module 9 3 Video CD Module 10 Combi Board 11 MPEG 99 Board 12 Set Mechanical Exploded view parts list 13 Copyright 2000 Philips Consumer Electronics B V Eindhoven The Netherlands All rights reserved No part of this publication may be reproduced stored in a retrieval system or transmitted in any form or by any means electronic mechanical photocopying or otherwise without ...

Page 2: ...olby B Incredible Surround Karaoke x News RDS Rotary Encoder volume control x Jog Shuttle Voltage Selector x Aux Input x Video Output x Headphone Socket x Line Output Subwoofer Output Surround Output Matrix Surround Loudspeakers Tuner board ECO5 Sys x Tuner board Tuner 95 Standby with clock display x VERSION VARIATIONS Type Versions FW V28 Features Board in used ...

Page 3: ...uency response within 3dB 50Hz 15kHz Dynamic Bass Boost DBB On DBB Off 2 Digital Sound Control Jazz Techno Optimal Rock 2 Input sensitivity Aux in 700mV 3dB at 600ohm Mic 3 5mV 3dB at 600ohm Output sensitivity Headphone 18mW at 32ohm CASSETTE RECORDER Number of track 2 x 2 stereo Tape speed 4 76 cm sec 2 Wow and flutter 0 4 DIN Fast wind rewind time C60 130 sec Bias system 75kHz 10kHz Rec Pb frequ...

Page 4: ...250Hz 15kHz e g 7122 707 48001 LF Voltmeter e g PM2534 DUT S N and distortion meter e g Sound Technology ST1700B Frame aerial e g 7122 707 89001 Tuner AM MW LW To avoid atmospheric interference all AM measurements have to be carried out in a Faraday s cage Use a bandpass filter or at least a high pass filter with 250Hz to eliminate hum 50Hz 100Hz RF Generator e g PM5326 Ri 50Ω Bandpass 250Hz 15kHz...

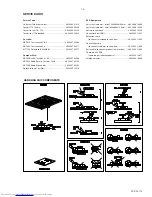
Page 5: ...97 30155 SBC429 Audio Signals disc 4822 397 30184 Dolby Pro logic Test Disc 4822 395 10216 ESD Equipment Anti static table mat large 1200x650x1 25mm 4822 466 10953 Anti static table mat small 600x650x1 25mm 4822 466 10958 Anti static wristband 4822 395 10223 Connector box 1MΩ 4822 320 11307 Extension cable to connect wristband to conn box 4822 320 11305 Connecting cable to connect table mat to con...

Page 6: ...zione della più grande cauzione alla loro manipolazione Durante le riparazioni occorre quindi essere collegato allo stesso potenziale che quello della massa dell apparecchio tramite un braccialetto a resistenza Assicurarsi che i componenti e anche gli utensili con quali si lavora siano anche a questo potenziale Pour votre sécurité ces documents doivent être utilisés par des spécia listes agréés se...

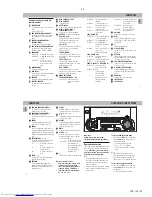
Page 7: ...etely remove the AC power plug from the wall socket Accessories Supplied Remote control Batteries two AA size for remote control AM loop antenna FM wire antenna AC power cord One Video cinch cable Safety Information Before operating the system check that the operating voltage indicated on the typeplate or the voltage indication beside the voltage selector of your system is identical with the volta...

Page 8: ...ear of the system E Video Out Connection Connect the VIDEO OUT terminal at the rear of the system to the TV or VCR VIDEO IN for viewing or recording F Adjusting the Operating Voltage for specific version only Before connecting the AC power cord to the wall outlet make sure that the voltage selector at the rear of the system is set to the local power line voltage If not reset the selector before co...

Page 9: ...rsion 2 0 only A REPLAY AUTO REPLAY to select playback mode either in continuous AUTO REPLAY or ONCE only DUBBING to dub a tape in normal speed TAPE DECK 2 TAPE DECK 1 CONTROLS 10 English OSD ON SCREEN DISPLAY to switch on or off the on screen display on the TV screen INCREDIBLE SURROUND not applicable for this model to switch on or off the surround sound effect ZOOM to enlarge a still picture on ...

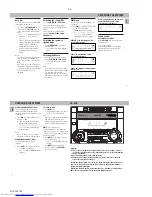
Page 10: ...system The speakers will be muted 12 English OPERATING THE SYSTEM CD VCD DIGITAL SOUND CONTROL DSC The DSC feature enables you to enjoy special sound effects that have preset equalizer settings providing the best music reproduction Press DSC to select OPTIMAL JAZZ ROCK or TECHNO The Digital Sound Control display panel will light up respectively OPTIMAL JAZZ ROCK or TECHNO and the respective flag w...

Page 11: ... of the fast rewinding or forwarding of the selected track Play returns to normal when PLAYÉ Å is pressed or when a new track is selected 14 English CD VCD Programming Tracks Programming tracks of a loaded disc is possible when playback is stopped The display will indicate the total tracks stored in the program Up to 99 tracks can be stored in the memory in any order When 99 tracks are stored and ...

Page 12: ... of the chosen scene or passage SET A appears on the display 2 Press A B again to mark the end of the chosen scene or passage SET B appears on the display The selected scene or passage is played repeatedly PLAY AB appears on the display 16 English 3 Press A B once more to return to normal playback CLEAR AB appears on the display Notes You can also cancel A B Repeat by pressing í or ë You can only ...

Page 13: ...nd The PROG flag starts flashing The next available preset number will be displayed for selection 4 Press à or á to tune to the desired frequency If you wish to store the radio station to another preset number press 4 or 3 to select the desired preset number 5 Press PROGRAM again The PROG flag disappears and the radio station will be stored Repeat steps 3 5 to store other preset radio stations 18 ...

Page 14: ...ctively If rewinding T1 1 or T2 1 with 1 scrolling left will be displayed If fast forwarding T1 2 or T2 2 with 2 scrolling right will be displayed The tape will stop automatically at the end of rewinding or fast forwarding 2 Press Ç to stop rewinding or fast forwarding 20 English Selecting External Equipment If you have connected the audio out terminals of the external equipment TV VCR Laser Disc ...

Page 15: ...not possible to listen to another source Dubbing tapes from tape deck 1 to tape deck 2 1 Press TAPE TAPE 1 2 to select tape deck 2 2 Load the prerecorded tape into tape deck 1 and a blank tape into tape deck 2 with full spool to the left 3 Press DUBBING DUB with 2 2 2 2 2 scrolling right will be displayed Dubbing will start immediately The REC flag starts flashing 4 Press Ç to stop dubbing Notes A...

Page 16: ...seconds 2 Press CLOCK TIMER again to store the start time The timer is now on The TIMER flag appears on the display 25 English MAINTENANCE TROUBLESHOOTING Warning Under no circumstances should you try to repair the set yourself as this will invalidate the guarantee Do not open the set as there is a risk of electric shock If a fault occurs check the points listed below before taking the system for ...

Page 17: ...d Use demagnetizing tape Tape deck door cannot open Power failure or AC power plug disconnect from the wall outlet during tape playback Reconnect the AC power plug and switch on the system again Lack of bass sound or apparently imprecise physical location of musical instruments Speakers are connected wrongly Check the speaker connection for proper phasing colored black wires to colored black termi...

Page 18: ...ely around the Volume knob and pulled it out as shown 2 Use a 0 5mm thick paper clip or stiff wire and bend into the shape as shownbelow Hook the 2 ends of the clip or wire into the slots 3 Hold the clip or wire in position and pulled out the Cover Ring DSC pos 143 4 Remove the 2 hidden screws A to take out the Cover Control pos 153 Note Only the Lightguide DSC pos 127 is sandwiched between the Fr...

Page 19: ... Rear Portion 1 Remove 2 screws F 2 screws G and uncatch C2 to loosen the Tuner board assembly 2a Remove 3 screw N to loosen the complete MPEG Board assembly to reach the Mains socket board Mains trans former and Combi board 2b Remove 3 screws M to loosen the MPEG board and shield case together 3 Remove 4 screws L to loosen the MPEG board from the shield case Note Do no bend beyond 45o otherwise t...

Page 20: ...sconnect the following assemblies or modules while repairing other areas Tuner Board CDC Module 2 The flex cables are very fragile care should be taken not to damage them during repair After repair be very sure that the flex cables are inserted properly into the flex sockets before encasing otherwise faults may occurs ...

Page 21: ...5MHz Table 1 East Eur Extended band EAS 65 81MHz 108MHz 74MHz 87 5MHz 531kHz 1602kHz 558kHz 1494kHz 98MHz 70 01MHz 65 81MHz Note Depending on the selected grid frequency 9 or 10kHz By holding the TUNER and R buttons depressed while switching on the Mains supply one of the undermentioned features will be activated the tuning grid frequency is toggled between 9kHz and 10kHz for the Oversea 21 versio...

Page 22: ...E AMPLIFIER POWER SUPPLY SIMPLE KARAOKE HEADPH0NE FRONT BASS ALC BD438 VCD VCD VCD HEADPHONE COMBI FRONT POWER TRAFO SUBWOOFER OUT AMPLIFIER 3139 119 33040 FW V39 21M dd wk013 For 12W set Only For 25W set Only L R SPEAKER 12W 6 ohm 25W 6 ohm FOR MATRIX SURROUND 0 9W 6 ohm N L ...

Page 23: ... DIAGRAM MAINS CVBS OUT M TOP B3P VH Module 3CDC MG VCD 98 CDC KEY FRONT COMBI MPEG 99 TRAFO ETF7 ECO5 ETF7 ETF HEAD AND WIRE SHIELD SCREW TO TAPE DECK CHASIS ECO5 HEADPHONE MIC VCD HEADPHONE KARA 3139 119 33040 FW V39 21M dd wk013 ...

Page 24: ...FRONT BOARD 6 1 PCS 103 245 TABLE OF CONTENTS FTD Display pin connection 6 2 Variation table 6 3 Circuit diagram 6 4 Component Chip layout 6 5 Electrical parts list 6 6 ...

Page 25: ...3G 4G 5G 6G 7G 8G 9G 10G Col Dp P1 P2 P3 P4 P5 P6 P7 P8 P9 P10 P11 P12 P13 P14 P15 P16 1G 5G a h j k b f m g c e r n d 6G a h j k b f m g c e r n d Col Dp 7G 8G a h j k b f m g c e r n d 9G F8 F9 10G F1 F2 F3 F4 F5 F6 F7 F8 11G F1 F2 F3 F4 F5 F6 F7 F8 12G F7 F8 FTD DISPLAY PIN CONNECTIONS PCS 103 246 ...

Page 26: ...pF 2462 220nF 220nF 220nF 220nF 220nF 220nF 220nF 220nF 220nF 220nF Variations table for Front Board ITEM NO A5272 A5273 A5274 A5275 A5276 A5277 A5307 A5308 A5344 A5350 A5413 3407 1k 1k 1k 1k 1k 3458 1k 1k 1k 1k 1k 3460 1k 1k 1k 1k 1k 3465 1k 1k 1k 1k 1k 1k 1k 1k 1k 1k 3471 4R7 4R7 1R 4R7 1R 4R7 4R7 1R 1R 4R7 1R 3479 1k 1k 1k 1k 1k 1k 1k 1k 1k 1k 3483 4R7 4R7 1R 4R7 1R 4R7 4R7 1R 1R 4R7 1R 3516 33...

Page 27: ... 40 P66 41 P67 42 P70 43 P42 70 P43 71 P44 72 P45 73 P46 74 P47 75 P50 76 P51 77 P52 78 P53 79 P54 P22 17 P30 18 P31 19 P32 20 P33 21 P34 22 P35 23 P36 24 P37 67 P40 68 P41 69 1 P10 2 P11 3 P12 4 P13 5 P14 6 P15 7 P16 8 P17 16 P20 10 P21 11 25 P00 26 P01 27 P02 28 P03 29 P04 30 P05 31 P06 32 P07 100K 3531 TMP87CN71 7401 470K 3536 180p 2u2 2421 MT1 5 MT2 9523 2458 EC16 1437 1 2 3 4 26 WH4D 1 1 2 3 ...

Page 28: ... versions For components used in a specific version see schematic diagram and respective parts list 3139 113 3412 pt 2 dd wk013 This assembly drawing shows a summary of all possible versions For components used in a specific version see schematic diagram and respective parts list 3139 113 3412 pt 2 dd wk013 ...

Page 29: ...19 4822 117 13577 330R 1 0 25W 3520 4822 050 21003 10k 1 0 6W 3521 4822 051 10102 1k 2 0 25W 3524 4822 050 11002 1k 1 0 4W 3525 4822 050 11002 1k 1 0 4W 3527 4822 050 11002 1k 1 0 4W 3528 4822 051 10102 1k 2 0 25W 3529 4822 051 10102 1k 2 0 25W 3530 4822 117 10833 10k 1 0 1W 3533 4822 117 10833 10k 1 0 1W 3534 4822 117 10833 10k 1 0 1W 3535 4822 117 10833 10k 1 0 1W 3536 4822 051 20474 470k 5 0 1W...

Page 30: ...008 0R Jumper 0805 4542 4822 051 20008 0R Jumper 0805 4543 4822 051 20008 0R Jumper 0805 4544 4822 051 20008 0R Jumper 0805 4545 4822 051 20008 0R Jumper 0805 4546 4822 051 20008 0R Jumper 0805 4547 4822 051 20008 0R Jumper 0805 COILS FILTERS 5400 4822 242 72066 Ceram Resonator 8MHz 5401 2422 543 01069 X tal Resonator 32 768kHz 5402 4822 157 62552 Coil 2 2µH 5 5404 4822 157 62552 Coil 2 2µH 5 5405...

Page 31: ...CONTROL AM FRAME AERIAL Reference Oscillator 1126 1 4 1 4 6 1 stereo 27 28 29 clock data enable clock data enable Version P1 P0 MW LW 31 30 programmable output ports AM RF AM Osc 3 5 1121 VLoop VLoop VLoop VLoop VLoop 2 6 5 43 1103 B C 450kHz 450kHz 450kHz 20 75kHz VStabA VStabB VStabB VStabA VStabB 10 7 MHz 10 7 MHz 35 9 Vcc Vdd Vcc1 7 23 VStabA VStabB 38 34 22 Vcc2 8 ECO5 sys 240698 A AM RF AM O...

Page 32: ...119 B5 5120 B4 5121 B4 5122 B3 5123 B2 5124 B2 5126 B3 5127 B4 5130 A3 5131 A3 6101 A2 6102 A1 6103 A1 6104 A2 6106 B3 6107 C5 6109 C2 6120 C4 7102 A3 7104 C2 7105 C3 7107 B3 7119 C4 9100 A2 9101 B3 9105 B2 9111 C2 9113 B2 9114 B2 9115 B3 9117 B2 9118 B4 9119 C4 9120 B4 9121 A2 9122 C3 9123 B1 9124 C4 9125 A3 9126 B5 9128 A2 9129 B3 9130 C3 9131 A5 9133 C3 9134 B3 9136 A5 9137 A5 2101 C4 2102 C4 2...

Page 33: ...1121 E20 1103 D 2 1102 B 2 1101 A 1 9128 A 4 9117 L10 9101 C 6 9100 B 4 7124 M13 7125 I16 7122 M 9 7119 B13 7111 F18 7109 M 7 7105 F 2 7104 E 3 7103 I 9 7102 D 8 7101 G11 4 5 1 6 7 8 9 10 11 12 13 14 15 2 16 17 18 19 20 21 3 K J N I H G F E D C B A M L K J N I H G F E D C B A M L 4 5 1 6 7 8 9 10 11 12 13 14 15 2 16 17 18 19 20 21 3 HN1V02H Chip jumper 8 7 6 5 4 3 2 1 6105 z_TEA5759 to from COMBI ...

Page 34: ...20223 22k 5 0 1W for LW version 3140 4822 051 20008 0R Jumper 0805 5120 CDA10 7MG40K 3140 4822 117 10353 150R 1 0 1W 5120 CDA10 7MG61KA 3141 4822 051 20563 56k 5 0 1W 3142 4822 100 11163 Trimmer 100k 30 0 1W 3143 4822 051 20223 22k 5 0 1W for RDS version 3144 4822 051 10102 1k 2 0 25W for RDS version 3145 4822 117 11449 2k2 1 0 1W 3146 4822 051 20229 22R 5 0 1W 3152 4822 116 83883 470R 5 0 5W 3153...

Page 35: ...echanism B Mechanism A OPTIONS VARIANTS TABLE MODULE ETF7 VARIANT 1 2 3 FEATURES DB DD FR ND DD FR ND DD FF Deck configuration double double double Deck type Tokyo Pigeon CWE CWE CWE Autoreverse yes B yes B no Auto Replay no no yes A B Motor configuration single single single Auto tape type selection yes yes yes Dolby type B Noise Reduction yes no no 19 kHz pilot suppression yes no no Normal High ...

Page 36: ...L HEF4952BT 1A0 1A1 1A2 Rec current ATTEN ALC PLAYBACK EQUALISATION PB EON SW HEF4952BT 2A0 2A1 2A2 MPX 1A0 1A1 PB A ADJ PB B ADJ Rec In PB In 2A2 DOLBY B NR CXA1101M REC Out PB Out REC ADJ SHIFT REGISTER HEF4094BT 3A0 3A1 3A2 HS REC CRB DOLBY NOM HI SPEED REC EON 3A0 NS 2A2 MUTE For Dolby version only PB Out ATTEN 4794 9792 CLK DATA STROBE For Non dolby version only Only 1 channel is presented NO...

Page 37: ...he Variable resistor 3773 for adjusting the optimal level of the bias current for Ferro or Chrome 11 Bias Symm For Dolby B NR version only Bias Symm making use of the Variable resistor 3785 to adjust the bias current for the left and the right channel to be equal 12 PB Switch Playback Switch which consists of the FETs 7785 For Dolby B NR version only 7786 J111 is for the purpose of providing a vir...

Page 38: ...otor 13 CrO2 A Chrome tape detection switch deck A open Cr close Fe 14 H H pin for motor CONNECTORS ASSIGNMENTS CONNECTOR 1701 INTERCONNECTION TO AF BOARD 1 REC L Record input left 2 REC R Record input right 3 GND A AF Ground 4 TAPE L Playback output left 5 12V D C supply 12V for AF electronics 6 TAPE R Playback output right 7 CMOS Negative d c supply 9V for CMOS ICs CONNECTOR 1703 INTERCONNECTION...

Page 39: ...V 1 5dB 3773 check figure 1 f Hz level dB 8dB 6dB 12 5k 4k 250 80 8dB f Hz level dB 8dB 10dB HSD 6dB 10k 4k 250 100 8dB 10dB HSD figure 2 check SBC419A 4822 397 30069 SBC420 4822 397 30071 SBC420 3150Hz SBC420 10kHz SBC420 DECK A B SBC419A SBC420 SBC419A or SBC420 SBC419A or SBC420 1 B Rec Switch REV Rec R CrO2 CrO2 Rec F Solenoid B Mode A Mode Solenoid Motor R1 680R R2 680R A Photo Sensor B Photo...

Page 40: ...PCS 103 378 9 6 9 6 COMPONENT LAYOUT CHIP LAYOUT 3 4 2 1 6 5 3 4 2 1 6 5 ...

Page 41: ... REC EQUALISATION 1 1 REC R S4 PLAYBACK 0 1 S1 ANALOG CCTRY 1 1 0 S2 S1 S3 AN7323S 0 1 1 BIAS 4n7 2726 7784 BC857B 1M 3787 100n 2746 A0 7 A1 9 A2 10 VDD HEF4952B 7730 7782 220R 3701 C B4 A 3789 47K A A 2784 15n 1N4148 6778 7792 BC847B P 2706 220p 2A0 33n 2719 3736 22K 3760 120R A A 1N4148 6776 P 3K3 7786 J111 470p 2727 3K9 3722 2742 1K2 1M 3780 47u 2763 100p 2711 100n 2741 15K 3723 3703 220R 6K8 3...

Page 42: ...05 A7 10K mode_B Vcc CrO2_B 10K 47K 3676 7618 BC847B 100n 2626 M 5 1A0 1703 1 1N4003 6611 100n 2624 100K 3628 3679 47K 120K 3610 BC807 25 7613 CRB 100K 3685 P 7610 HEF4094BT M 100K 3686 2A1 3601 2K2 680R 3688 3608 MOTOR M L CLK L 1 VDD 16 8 VSS CP 3 D 2 E0 15 4 O0 5 O1 O2 6 7 O3 14 O4 13 O5 12 O6 11 O7 Os 9 Os 10 STR MOTOR 56K 3612 7619 BC847B 5 6K8 3618 1702 3604 56K 5 3623 100K CRA 3613 27K 3622...

Page 43: ...Only the parts mentioned in this list are normal service spare parts TAPE MODULE EXPLODED VIEW 1 313911877130 Autoreverse Mech CWE44FR01 1 313911877140 Non Autoreverse Mech CWE44FF02 3 Screw D3 x 10 6 Screw M2 x 16 7 313911034080 Flex Cable 14 pin 7 5 cm Note Only the parts mentioned in this list are normal service spare parts ...

Page 44: ...ck 12 482240210972 Pinch Arm Assembly R 23 996500002314 Coil Assembly 32 482252811209 Flywheel Assembly RV 42 996500002315 Belt AF Autoreverse deck 42 996500002718 Belt AF Non autoreverse deck 69 482249211761 Spring 102 482253212931 Washer 103 482253212932 Washer 104 482253212933 Washer Note Only the parts mentioned in the list are normal service spare parts ...

Page 45: ...314 Coil Assembly 32 482252811209 Flywheel Assembly RV 44 2 996500002317 Flex Socket 14 Pin 44 3 996500002320 Photo Interrupter 44 4 482205016801 680R 1 0 4W 44 6 996500002318 Leaf Switch 44 7 996500002319 Mode Switch 59 996500002719 Belt BF Large 69 482249211761 Spring 102 482253212931 Washer 103 482253212932 Washer 104 482253212933 Washer Note Only the parts mentioned in the list are normal serv...

Page 46: ...002320 Photo Interrupter 44 4 482205016801 680R 1 0 4W 44 6 996500002318 Leaf Switch 44 7 996500002319 Mode Switch 45 996500002323 Rec Pb Head Assembly 50 482240210973 Pinch Arm Assembly L 54 996500002324 Flywheel Assembly L 69 482249211761 Spring 73 482249211762 Spring 101 996500002325 Washer 102 482253212931 Washer 103 482253212932 Washer 104 482253212933 Washer 107 996500002326 Washer 109 99650...

Page 47: ...toreverse 3678 482211710834 47k 1 0 1W 3679 482211710834 47k 1 0 1W 3680 482211710834 47k 1 0 1W 3685 482211652234 100k 5 0 5W 3686 482211710837 100k 1 0 1W 3688 482211710361 680R 1 0 1W Autoreverse 3701 482211711503 220R 1 0 1W 3702 482211711503 220R 1 0 1W 3703 482211711503 220R 1 0 1W 3704 482211711503 220R 1 0 1W 3705 482211711503 220R 1 0 1W 3706 482211711503 220R 1 0 1W 3707 482205120101 100...

Page 48: ...0805 4745 482205120008 0R Jumper 0805 4746 482205120008 0R Jumper 0805 4748 482205120008 0R Jumper 0805 4785 482205120008 0R Jumper 0805 4790 482205120008 0R Jumper 0805 4794 482205120008 0R Jumper 0805 4795 482205120008 0R Jumper 0805 COILS FILTERS 5701 482215711477 Coil 2 2µH 5 5703 482215620946 Osc Coil 100kHz DIODES 6611 482213031878 1N4003G 6612 482213031878 1N4003G 6614 482213030621 1N4148 A...

Page 49: ...ger TABLE OF CONTENTS Demounting Hints 10 2 Service Hints 10 3 Lubrication Instructions 10 4 ESD Warnings 10 6 Block Wiring Diagram 10 7 Circuit Diagram 10 8 Component Layout Diagram 10 9 Exploded View Mechanical Parts List 10 10 Electrical Parts List 10 12 ...

Page 50: ...g of Drawer A Pull drawer outwards B Unlock drawer with screwdriver C Lift drawer to demount from chassis Demounting of Flex Plate D Lift plate to unlock pin from bottom plate E Move plate inwards to demount from bottom plate 10 2 CS 53 001 ...

Page 51: ...D drive lockings pos 105 106 5 Turn gearwheel pos 42 of disc change mechanism by finger to move CD drive support in upper position as shown in picture below A 6 Demount CD drive support pos 95 B 7 Replace CD drive pos 100 The wire tree of JST connector has to be desoldered and resoldered on the new CD drive again Servicing Hints A B Mounting of Carrousel 1 Turn gearwheel pos 42 of disc change mech...

Page 52: ...ions Grease Grease inside grove Grease on top of rib Grease Grease on top of highest ring Grease on four rectangular surfaces Grease inside groves Grease on slide Grease on four profile groves CHASSIS DRAWER 10 4 CS 53 003 ...

Page 53: ...Grease DRAWER MECHANISM DISC CHANGE MECHANISM Grease Grease Grease on first and last tooth Grease on first and last tooth Use only grease Polylub GLY 801 service codenumber 4822 390 10136 10 5 CS 53 004 ...

Page 54: ...e old CD drive mechanism 5 Position new CD mechanism in its studs 6 Remove short circuit from printed board connector 7 Remove short circuit from flexfoil of new CD drive 8 Connect new flexfoil to print connector fig 3 fig 1 fig 2 fig 3 CHARGED CAPACITORS ON THE SERVO BOARD MAY DAMAGE THE CD DRIVE ELECTRONICS WHEN CONNECTING A NEW CDM MECHANISM THAT S WHY BESIDES THE SAFETY MEASURES LIKE SWITCH OF...

Page 55: ...13 15 DGND SDA SCL RAB SILD RESET P1 1 P1 2 P1 3 P1 4 P1 5 14 6 7 8 9 DSA_STB RST P3 5 P3 6 P3 7 4 11 12 13 DGND 30 47 59 5V VDD1P VDD2P VDD3C 2 19 5V VDDA1 VDDA2 48 46 45 Provision only CDM_UP TRAY DISC_1 6 1 CD SERVO BOARD CD Drive 1805 1801 1800 4 YELLOW 3 GREEN 6 WHITE 5 BLUE 2 ORANGE 1 BLACK DISC MOTO R INNER SWITCH MOTOR SLEDGE FLEX 1 5V 2 5V 3 GND 4 GND 5 9V 6 DRST 7 DSA_ACK 8 DSA_DATA 9 DS...

Page 56: ...GND DGND DGND DGND DGND AGND DGND AGND 100n 2862 100n 2810 22p 2875 10n 2886 2808 5n6 2827 22n 2826 100n 2806 100n 2805 100n 100n 2873 2820 100n 2850 100n 2844 22n 2842 22n 2841 100n 2822 1n 1n 2823 1n 2824 2825 100n 220p 2868 220p 2865 220p 2867 220p 2864 220p 2863 2812 10n 2817 5n6 2802 1n 100n 2800 22p 2874 2n7 2870 22n 2872 22n 2869 47p 2871 100n 2877 100p 2883 100p 2881 1n 2882 100p 2884 1n 2...

Page 57: ... 5 1853 C 5 2800 B 2 2801 A 1 2802 A 3 2803 A 2 2804 A 4 2805 A 3 2806 A 3 2808 C 2 2810 C 2 2811 B 2 2812 C 2 2813 C 2 2814 A 2 2816 A 4 2817 C 2 2818 A 4 2820 B 3 2821 B 3 2822 B 2 2823 C 3 2824 C 3 2825 C 3 2826 C 4 2827 C 4 2828 D 5 2829 D 4 2840 C 1 2841 C 1 2842 B 1 2843 B 1 2844 C 1 2850 C 4 2851 B 5 2852 C 4 2853 B 5 2860 B 4 2861 B 4 2862 B 4 2863 C 3 2864 C 3 2865 C 3 2866 C 4 2867 B 4 2...

Page 58: ...1 4822 532 12364 Washer 52 4822 532 12364 Washer 53 4822 532 12364 Washer 70 4822 361 10753 Carrousel Motor 73 4822 502 12548 Screw M2 6 X 3 5 74 4822 502 12548 Screw M2 6 X 3 5 80 4822 528 10937 Pulley 81 4822 522 10494 Gear Drawer 82 4822 358 10115 Belt 83 4822 532 12364 Washer 84 4822 532 12364 Washer 95 4822 404 10894 Support 96 4822 325 50215 Suspension 97 4822 325 50215 Suspension 98 4822 32...

Page 59: ...PCS 100 750 10 11 EXPLODED VIEW 10 11 95 120 121 21 22 25 105 106 107 108 123 96 97 88 99 100 54 55 56 57 58 59 61 82 80 73 74 70 81 83 84 48 39 35 38 45 43 50 51 42 52 44 53 40 41 47 46 26 ...

Page 60: ...83 47µF 20 6 3V 2891 4822 124 41643 100µF 20 16V RESISTORS 3800 4822 052 10228 2R2 5 0 33W 3801 4822 116 52249 1k8 5 0 5W 3802 4822 116 83884 47k 5 0 5W 3803 4822 116 83884 47k 5 0 5W 3804 4822 116 52231 820R 5 0 5W 3805 4822 116 52257 22k 5 0 5W 3809 4822 116 52238 12k 5 0 5W 3810 4822 052 10228 2R2 5 0 33W 3811 4822 116 52231 820R 5 0 5W 3812 4822 116 52238 12k 5 0 5W 3813 4822 050 11002 1k 1 0 ...

Page 61: ...aired for gain characteristics d SOUND FEATURES Sound Features include the DBB IS and 4 DSC modes The sound features are realised with a hex inverter IC 7530 HEF4069UBT as analog buffer amplifier and transistors as electronic switches controlled by the shift registers AF control e POWER AMPLIFIER IC 7391 AN7125 is used as power amplifier f CD_STBY CONTROL This Transistor 7401 BC337 25 switches on ...

Page 62: ...or components used in a specific version see schematic diagram and respective parts list 3139 113 3411 pt 2 dd wk014 This assembly drawing shows a summary of all possible versions For components used in a specific version see schematic diagram and respective parts list 3139 113 3411 pt 2 dd wk014 MAIN PART CHIP LAYOUT ...

Page 63: ...IN2 8 MUTE 9 OUT1 2 4 OUT1 OUT2 12 OUT2 10 STB 5 VCC 1 2R2 4u7 2337 7391 AN7125 3558 2520 1n 4228 330p 22K 3581 3409 5K6 4233 3639 a 3527 27K 7401 BC337 25 470p 2513 D 2341 680p 51 1 2 3 4 a pa 82K a 2K2 3400 AR 3387 AL 10n 2359 68p 6550 1N4148 1N5392 F2 2568 10K 3570 6328 3 2 1 8 4 47R 3338 7549 BC847B 7554 A NJM4556AM 2532 180p a 2594 47p 150K 7545 BC847B 680K 3493 3390 1322 A 2 1 a a ON4986 750...

Page 64: ...64 1 3243 4R7 6243 1N4003 25V 1K2 4221 6235 1N4148 6222 1N4003 2229 100n 6252 1N4003 1N4003 6251 2K2 3273 e 1570 1 e D 6240 1N4003 1 6253 1N4003 e B 3397 10K BC327 25 7249 5V6 6249 1N4003 1 2 3 4 5 6 6254 1N4003 1 1N4003 6225 1222 EH B D 1566 Q 2228 47u 1N4003 6221 4R7 3242 1K2 3222 2248 47u D BC369 7234 1203 1 2 6229 BZX79 C33 e 4218 B 2227 100u 1N4148 6269 2236 100n 1u 2223 CD 3248 330R B 3246 3...

Page 65: ...74 D1 9298 D2 9299 E2 10V 120V C PAD T2A 9271 9299 9273 3208 10M 1205 1577 1 1202 2 5 1 4 3 6 23 1 2 3 4 5 6 9274 9298 5202 e C PAD 2 9272 1201 1 3139 118 52620 86420 for 3411 pt 2 X X X X X TRANSFORMER MAIN X X X X X X X X X X X X X X X X X X X X X X X This assembly drawing shows a summary of all possible versions For components used in a specific version see schematic diagram and respective part...

Page 66: ...48 6633 2 3 4 5 6 1N4148 6632 1642 TC38 9 8 7 1 MPEG_gnd 680p 2667 agnd agnd 470n 2651 agnd 10n 2668 mic_gnd 10K 3634 10K 3660 1M 3661 3645 2K7 agnd agnd agnd 2669 100n 470R 3630 u 22 5640 100K 3651 2645 470n 7645 BC847B DIPMATE 48 1 2 1u 2660 1n 2661 4605 agnd agnd 4606 50 10u 2663 1u 2648 2647 1u 1u 2665 BC847B 7647 3674 12K 10K 3641 1M 3633 2649 680p 3675 220R agnd 3650 100K agnd 1 2 3 4 3644 4...

Page 67: ... diagram and respective parts list This assembly drawing shows a summary of all possible versions For components used in a specific version see schematic diagram and respective parts list 3139 113 3411 pt 2 dd wk014 1 2 3 1 2 3 A B A B 1406 A1 1431 A2 1432 B2 1433 B2 1434 B2 1435 B2 3450 A2 3451 A2 3452 A2 3453 B2 3454 B2 3455 B2 3456 B2 6442 A3 6443 A3 6444 A3 3K9 3455 1435 3454 2K2 1432 1K2 3453...

Page 68: ...0 20 16V 2510 5322 122 34099 470pF 10 63V 2511 5322 122 34099 470pF 10 63V 2512 5322 122 34099 470pF 10 63V 2513 5322 122 34099 470pF 10 63V 2514 4822 126 14585 100nF 10 50V 2515 4822 126 14585 100nF 10 50V 2517 5322 122 32658 22pF 5 50V 2524 5322 122 32659 33pF 5 50V 2525 5322 122 32659 33pF 5 50V 2526 4822 121 41856 22nF 5 250V 2527 4822 121 41856 22nF 5 250V 2528 4822 126 13751 47nF 10 63V 2529...

Page 69: ... 1W 3453 4822 051 20122 1k2 5 0 1W 3454 4822 117 11449 2k2 1 0 1W 3455 4822 051 20392 3k9 5 0 1W 3456 4822 051 20822 8k2 5 0 1W 3496 4822 117 11139 1k5 1 0 1W 3497 4822 051 20124 120k 5 0 1W 3498 4822 117 11148 56k 1 0 1W 3499 4822 117 13579 220k 1 0 1W 3501 4822 051 20683 68k 5 0 1W 3502 4822 051 20683 68k 5 0 1W 3509 4822 117 11149 82k 1 0 1W 3510 4822 117 11149 82k 1 0 1W 3517 4822 117 10833 10...

Page 70: ...63 4822 051 20008 0R Jumper 0805 4564 4822 051 20008 0R Jumper 0805 4565 4822 051 20008 0R Jumper 0805 4566 4822 051 20008 0R Jumper 0805 4567 4822 051 20008 0R Jumper 0805 4568 4822 051 20008 0R Jumper 0805 4569 4822 051 20008 0R Jumper 0805 4570 4822 051 20008 0R Jumper 0805 4571 4822 051 20008 0R Jumper 0805 4573 4822 051 20008 0R Jumper 0805 4574 4822 051 20008 0R Jumper 0805 4575 4822 051 200...

Page 71: ...7 25 7391 4822 209 16224 AN7125 7400 4822 130 60373 BC857B 7402 5322 209 11306 HEF4094BT 7405 4822 130 60373 BC857B 7501 5322 209 11102 HEF4052BT 7503 4822 130 41096 BC550C 7504 4822 130 41096 BC550C 7505 4822 130 44568 ON4986 7506 4822 130 44568 ON4986 7507 4822 130 44568 ON4986 7508 4822 130 44568 ON4986 7509 5322 130 60159 BC847B 7510 4822 130 60373 BC857B 7530 5322 209 14482 HEF4069UBT 7537 53...

Page 72: ... 21K FW V55 21M 21K FW M55 22 37 A53520 FW V28 21M MPEG 99 BLOCK DIAGRAM ESS3883 Video CD Companion ESS3880 Video CD Processor OP Amp NJM4560M 2M ROM AT27C020 GND_D 5V 5V 5V 12V Left Right A A D D D D A Mic In from Karaoke Board CVBS Out to Servo Board breakaway A RS OUT To Front Board Microprocessor DRAM MSM514265C 3 3V DSA RESET DATA STROBE ACK I 2 S SCLK WCLK DATA DSA ACK DATA STB MPEG 99 Conn ...

Page 73: ...ync I Pins SEL_PLL 1 0 select phase lock loop PLL clock frequency CPUCLK for the Visba See the SEL_PLL0 pin above for the settings DA9 DOE 92 O Dual purpose pin DRAM output enable active low DRAM multiplexed row and column address bus AIN 93 I Audio interface serial data input ARCLK 94 I Audio receive bit clock ARFS 95 I Audio interface receive frame sync TDMCLK 96 I TDM interface serial clock TDM...

Page 74: ...Analog Ground VCM 42 I ADC Common Mode Reference CMR buffer output CMR is approximately 2 25 V Bypass to analog ground with 47 m F electrolytic in parallel with 0 1 m F VREFP 43 I DAC and ADC maximum reference Bypass to VCMR with 10 m F in parallel with 0 1 m F VCCAA 44 I Analog VCC 5 V AOR AOR 45 46 O Right channel output AOL AOL 47 48 O Left channel output MIC1 49 I Microphone input 1 MIC2 50 I ...

Page 75: ...ions For components used in a specific version see schematic diagram and respective parts list 3139 113 3407 pt 3 dd wk013 This assembly drawing shows a summary of all possible versions For components used in a specific version see schematic diagram and respective parts list 3139 113 3407 pt 3 dd wk013 ...

Page 76: ...0 4 DA1 5 DA2 6 DA3 7 DA4 8 DA5 9 DA6 10 DA7 ES3880 7201 ACLK 88 AIN 93 AOUT SEL PLL0 89 ARCLK 94 ARFS 95 ATCLK 90 ATFS SEL PLL1 91 AUX0 45 AUX1 5V 3228 4K7 VPP 47R 3274 26 A9 22 CE_ GND 16 13 O0 14 O1 15 O2 17 O3 18 O4 19 O5 20 O6 21 O7 24 OE_ 31 PGM_ VCC 32 1 11 A1 23 A10 25 A11 4 A12 28 A13 29 A14 3 A15 2 A16 30 A17 10 A2 9 A3 8 A4 7 A5 6 A6 5 A7 27 A8 12V 7202 AT27C020 12 A0 2205 100p VCC7 5V ...

Page 77: ...98 99 100n 2263 52 53 54 55 56 57 58 59 6 60 61 62 63 64 65 66 67 68 69 7 70 71 72 73 74 75 76 77 78 79 8 80 23 24 25 26 27 28 29 3 30 31 32 33 34 35 36 37 38 39 4 40 41 42 43 44 45 46 47 48 49 5 50 51 ES3883 7204 1 10 100 11 12 13 14 15 16 17 18 19 2 20 21 22 2229 390p 2u7 5204 4K7 3239 100p 2261 3249 27p 2233 220R VCC3 100n 2218 2214 100n 3246 75R VCC1 1n 2232 5208 3250 22R 2262 100p 10n 2259 22...

Page 78: ...202 E6 4203 E7 4204 E7 5209 E2 5211 D4 5216 C6 6202 E2 6203 E1 6208 D5 7207 A A3 7207 B C3 5 4V 10 8V 5 4V 4 3V 5 6V 7208 C5 7209 D4 7210 E2 7211 E5 100n 2293 4203 100u 2221 2212 100u 5V 3272 2K7 CGND3 100n 2292 10u 2242 100K 3284 2266 1n 100K 3260 2291 100n 1n 2257 AGND 4202 6 7 8 4 AGND AGND 3 2 1 8 4 7207 B 5 5216 7207 A 2204 100n 3281 10K 100n 2270 4u7 2260 4K7 3269 3255 4R7 220R 3271 AGND 721...

Page 79: ...2 4k7 5 0 062W 3208 4822 051 30472 4k7 5 0 062W 3209 4822 051 30221 220R 5 0 062W 3210 4822 051 30221 220R 5 0 062W 3211 4822 051 30221 220R 5 0 062W 3212 4822 051 30101 100R 5 0 062W 3213 4822 051 30223 22k 5 0 062W 3214 4822 051 30103 10k 5 0 062W 3215 4822 051 30103 10k 5 0 062W 3216 4822 051 30103 10k 5 0 062W 3217 4822 051 30103 10k 5 0 062W 3218 4822 051 30472 4k7 5 0 062W 3220 4822 051 3047...

Page 80: ...PCS 103 748 13 1 13 1 EXPLODED VIEW MAIN UNIT ...

Page 81: ...9920 Knob Karaoke 0153 3139 118 12570 Cover Control 0158 3139 118 10660 Cover Cassette Left 0159 3139 118 10670 Cover Cassette Right 0160 3139 114 68520 Lens Cassette Left 0161 3139 114 68530 Lens Cassette Right 0197 4822 443 10488 Door Cassette Right 0198 4822 443 10487 Door Cassette Left 0199 4822 402 10621 Push Catch 0200 4822 529 10322 Damper Assembly 0203 4822 492 11344 Spring Compression 020...

Reviews: