2-6
SPR 00 0110
16
E n g l i s h
Basic Functions
IMPOR
T
ANT!
Befor
e you oper
ate the system,
complete
the prepar
ation pr
ocedur
es
.
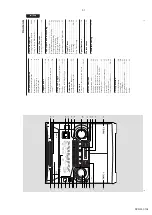
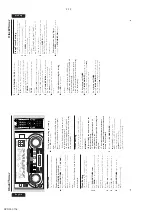
Demonstration mode
The system has a demonstr
ation mode that
sho
ws the var
ious f
eatures off
ered b
y the system.
To
activate the demonstration
●
In Standb
y mode
, press and hold
DEMO
ST
OP
Ç
on the system until "
DEMO ON
" is
displa
yed.
➜
The demonstr
ation will begin.
To
deactivate the demonstration
●
Press and hold
DEMO ST
OP
Ç
on the system
until "
DEMO OFF
" is displa
yed.
➜
The system will switch to Standb
y mode
.
Notes:
–
Even though the
A
C
po
wer cor
d is r
emo
ved fr
om
and r
econnected to the w
all soc
ket,
the
demonstr
ation will r
emain off until it is activated
again.
–
When the po
wer is turned on,
the disc tr
ay may
open and c
lose to initializ
e the system.
Easy Set
EASY SET allo
ws y
ou to store all a
vailab
le r
adio
stations automatically
.
●
In Standb
y or Demonstration mode
, press and
hold
ST
ANDBY ON
until "
EASY SET
" is
displa
yed.
➜
The system will search for all r
adio stations
on the FM band and then the
AM band.
➜
All a
vailab
le r
adio stations with suff
icient signal
strength will be stored automatically
.
➜
The system will stop searching when all the
availab
le r
adio stations are stored or when the
memor
y f
or 40 preset r
adio stations is used.
➜
The last preset r
adio station will remain on
the displa
y.
Note:
–
When EASY SET is used,
all pre
viously stor
ed
radio stations will be replaced.
MINI HIFI SYSTEM
BAND
C1
• 2 • 3
CDR
DUB
(HSD)
RECORD
DIM
CLOCK/
TIMER
PROG
V
O
L
U
M
E
STOP•CLEAR
SEARCH•TUNING
PLAY PAUSE
PREV
NEXT
SIDE
PRESET
▲
▲
DYNAMIC BASS BOOST
Å
É
1
3
2
4
6
5
7
9
8
VOLUME
á
à
ë
í
Ç
0
2
AUX/CDR
TV/AV
CD 123
TUNER
TAPE 1/2
AUTO REV.
CLOCK
BALANCE
CENTER
REAR
DPL
TEST TONE
BTC
TIMER ON/OFF
SLEEP
MUTE
DBB
TV VOL
TV VOL
SHUFFLE
DIM
REPEAT
LR
+
-
+
-
DSC
VEC
PER
BTC
B
A
S
S
/T
R
E
B
LE
PE
RS
ON
AL
DS
C
V
E
C
T
APE 1•2
CD 1•2•3
FM•AM
CDR/DVD
T
APE
CD
TUNER
AUX
LEFT
CENTER
RIGHT
SURR
SURR
IR SENSOR
AUTO
REVERSE
ECO POWER
PRO LOGIC
BASS
TREBLE
DEMO STOP
JOG CONTROL
STANDBY-ON
17
En
gli
sh
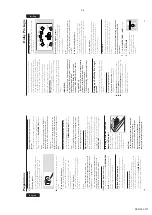
Switching the system on
In Standb
y mode
●
Press
ST
ANDBY ON
or
CD
/
TUNER
/
T
APE
/
A
UX
on the system.
➜
The system will switch to the last selected
source or the selected source
.
●
Press an
y one of the DISC DIRECT PLA
Y
b
uttons or
OPEN•CLOSE
.
➜
The system will switch to CD mode
.
In Eco P
o
w
er Standb
y mode
●
Press
CD 123
,
TUNER
,
T
APE 1/2
or
A
UX/
CDR
on the remote control.
➜
The system will switch to the selected source
.
Switching the system to Standb
y
mode
In Demonstration mode
●
Press and hold
DEMO ST
OP
Ç
on the
system.
In Eco P
o
w
er Standb
y mode
●
Press
ECO PO
WER
.
In an
y others sour
ce mode
●
Press
ST
ANDBY ON
(or
B
on the remote
control).
➜
When in Standb
y mode
, the clock will be
displa
yed.
Switching the system to Eco
Po
w
er Standb
y mode
●
Press
ECO PO
WER
(or press and hold
B
on
the remote control).
➜
"
LOW POWER STANDBY ON
" will be
displa
yed,
after which the displa
y screen will go
b
lank.
➜
The lo
w po
w
er ST
ANDBY ON
LED will be
lighted.
Note:
–
If the demonstr
ation has not been deactivated,
it
will r
esume f
ive seconds later
.
Po
w
er Sa
ving
Automatic Standb
y
As a po
w
e
r-sa
ving f
eature
, the system will
automatically switch to Standb
y mode 30
min
utes after a disc or tape has stopped pla
ying
and no control is oper
ated.
Dim mode
You can select the desired br
ightness f
or the
displa
y.
●
Press
DIM
repeatedl
y to select DIM 1,
DIM 2,
DIM 3 or DIM OFF displa
y mode
.
➜
DIM
appear
s on the displa
y, except f
or DIM
OFF mode
.
DIM OFF - normal brightness with
Spectrum Analyz
er
On
DIM 1 - normal brightness with Spectrum
Analyz
er Off
DIM 2 - half brightness with Spectrum
Analyz
er On
DIM 3 - half brightness with Spectrum
Analyz
er Off and all LEDs on the system
will be s
witched off.
Basic Functions
Summary of Contents for FW-P900
Page 20: ...D O N O T P R I N T B L A N K P A G E ...
Page 25: ...4 1 4 1 SET BLOCK DIAGRAM PCS 103 615 Blue Strip wOOx BassTreble ...
Page 44: ...PCS 103 378 9 6 9 6 COMPONENT LAYOUT CHIP LAYOUT 3 4 2 1 6 5 3 4 2 1 6 5 ...
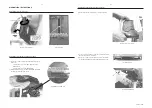
Page 55: ...10 3 CS 53 302 Service Position ...
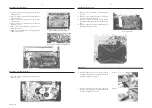
Page 56: ...10 4 CS 53 303 Wiring ...
Page 74: ...D O N O T P R I N T B L A N K P A G E ...
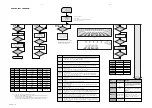
Page 101: ...14 1 14 1 SPR 00 0142 ...


