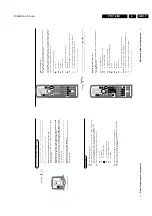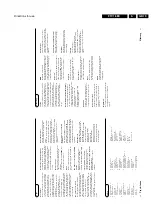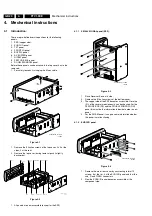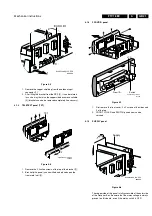
Directions for use
GB 15
FTV1.9EE
3.
21
Connect P
eripheral equipment
&
Connect the audio cable to the Dolb
y Pr
o Logic Sur
round r
eceiv
er and to
A
UDIO OUT L
and
R
at the back of y
our r
eceiv
er bo
x
1
.
é
If y
ou want the loudspeak
ers of y
our monitor to act as centr
e speak
er
,also
connect an audiocable to the Dolb
y Pr
o Logic Sur
round r
eceiv
er and to the
SURR
OUND SOUND CENTRE IN
at the back of y
our r
eceiv
er
bo
x
2
.
“
Select
Centr
e Mode On
in the Sound men
u.
See p
.13.
In the Sound men
u onl
y the v
olume men
u item can be contr
olled.
The loudspeak
ers of the monitor will no
w onl
y pr
oduce centr
e sound,
the
loudspeak
ers connect to the audio r
eceiv
er will pr
oduce Sur
round Sound.
Dolb
y
Pr
o Lo
gic Sur
round r
eceiv
e
r
AUDIO OUT
L
R
1
2
SURROUND
SOUND CENTRE IN
20
Connect P
eripheral equipment
&
Connect y
our camera or camcor
der at the fr
ont side of y
our r
eceiv
er
.
é
Connect the equipment to
VIDEO
2
and
A
UDIO L
1
for mono
equipment.
“
For ster
eo equipment also connect
A
UDIO R
1
.
S-VHS quality with an S-VHS camcor
der is obtained b
y connecting the S-VHS
cables with the
S-VIDEO
input
3
and
A
UDIO
inputs
1
.
Camera & camcor
der
Connect the eur
ocable
1
to
EXTERNAL 1
as sho
wn opposite
.
Onl
y f
or Photo CD
&
Pr
ess
S
and
s
at the same time
.
é
Select
Photo CD
in the Setup men
u.
“
Select
Photo CD Pr
esent
.
This off
ers y
ou optim
um pictur
e quality f
or still pictur
es.
‘
Pr
ess one of the colour men
u k
eys r
epeatedl
y to s
witch off all men
us.
Other equipment
&
Inser
t the plug into the headphone sock
et
L
at the fr
ont side of the
receiv
er
.
é
Pr
ess
¬
to s
witch off the internal loudspeak
ers of the
TV
.
The headphone impedance must be between 8 and 2000 Ohm.
The headphone sock
et has a 3.5 mm jack.
In the
SOUND
men
u select
Headphone
to adjust the headphone v
olume and
balance and to select the audio sour
ce f
or y
our headphone sound.
See p
.13.
If y
ou want to connect mor
e equipment to y
our r
eceiv
er
,consult y
our dealer
.
Headphone
S
•V
H
S
V
ID
E
O
A
U
D
IO
L
R
1
2
3
Photo CD
1
EXTERNAL
1
n
Menu Language
Country
Automatic Installation
Manual Installation
Give Name
Reshuffle
Favourite Programmes
Decoder/Descrambler
Setup
INSTALLATION
Ext2 Output
Photo CD
Information Line
Picture mute
Auto Format
SETUP
Summary of Contents for FTV1.9EE
Page 45: ...Electrical diagrams and print layouts 45 FTV1 9EE 7 Teletext component side ...
Page 46: ...Electrical diagrams and print layouts 46 FTV1 9EE 7 Teletext copper side ...
Page 49: ...Electrical diagrams and print layouts 49 FTV1 9EE 7 Euro I O panel ...
Page 50: ...Electrical diagrams and print layouts 50 FTV1 9EE 7 Euro I O panel ...
Page 51: ...Electrical diagrams and print layouts 51 FTV1 9EE 7 Euro I O component side ...
Page 52: ...Electrical diagrams and print layouts 52 FTV1 9EE 7 Euro I O copper side ...
Page 54: ...Electrical diagrams and print layouts 54 FTV1 9EE 7 Feature box component side ...
Page 55: ...Electrical diagrams and print layouts 55 FTV1 9EE 7 Feature box copper side ...
Page 56: ...Electrical diagrams and print layouts 56 FTV1 9EE 7 Incredible sound Incredible sound ...
Page 57: ...Electrical diagrams and print layouts 57 FTV1 9EE 7 ECO NICAM ...
Page 74: ...Electrical diagrams and print layouts 74 FTV1 9EE 7 Personal notes Personal notes ...


