17
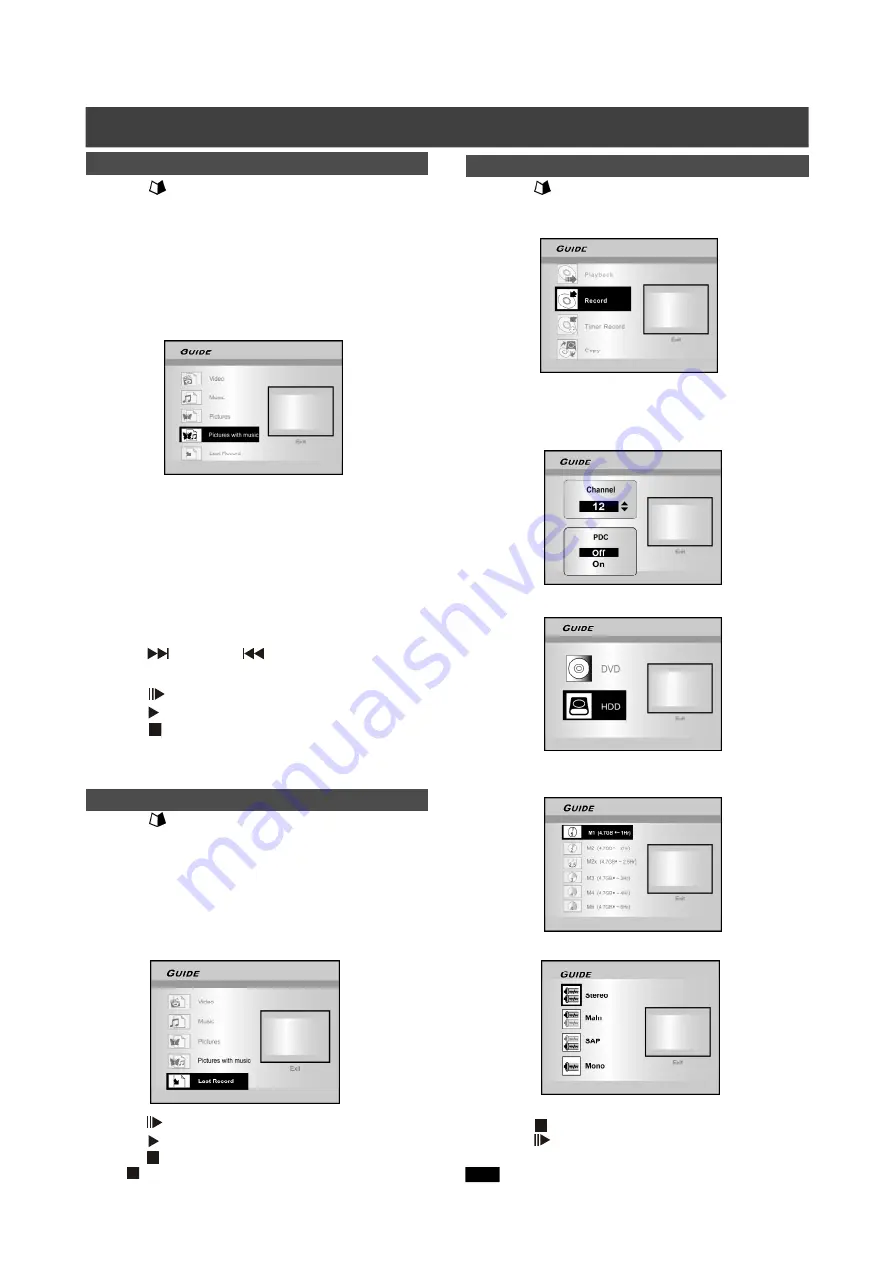
Playback pictures with music
1. Press [
GUIDE] to display the Guide menu.
2. Press [
p
] [
q
] to select “Playback” and then
press [OK].
3. Press [
p
] [
q
] to select DVD or HDD and then
press [OK].
4. Press [
p
] [
q
] to select “Pictures with music” and
press [OK].
The browser menu of picture files will be displayed.
5. Press [
p
] [
q
][
t
] [
u
]
to select the picture file to
start playback with and press [OK].
The browser menu of audio files will be displayed.
6. Press [
p
] [
q
][
t
] [
u
] to select the music file to
start playback with and press [OK].
Playback will start.
7. Press [
p
][
q
] to select “Rotate RIGHT” or “Rotate
LEFT” and “Rotate UP” “Rotate down.”
Press [
t
] or [
u
] to skip the picture.
Press [
NEXT ] or [
PREVIOUS ] to skip the
MP3 file.
8. Press [
PAUSE] to pause playback.
Press [ PLAY] to resume normal playback .
Press [ STOP] to stop playback.
G
UIDE
M
ENU
: P
LAYBACK
, R
ECORD
Playback the last recorded title (on HDD only)
1. Press [
GUIDE] to display the Guide menu.
2. Press [
p
] [
q
] to select “Playback” and then
press [ENTER].
3. Press [
p
] [
q
] to select HDD and press [OK].
4. Press [
p
] [
q
] to select “Last Record” and press
[OK].
Playback of the title last recorded on your HDD will begin.
5. Press [
PAUSE] to pause playback.
Press [ PLAY] to resume normal playback .
Press [ STOP] to stop playback at a marked stop.
Press [
STOP] twice to bring the playback to a full stop.
Record on the HDD
1. Press [
GUIDE] to display the Guide menu.
2. Press [
p
] [
q
] to select “Record” and then
press [OK].
3. Press [
p
] [
q
] to select the Signal- Input ( TV,
AV1, AV2, S-Video, DV) and press [OK].
If you select “TV,” press [
p
] [
q
] to select the channel you want to
record and press [OK].
4. Press [
p
] [
q
] to select “HDD” and press [OK].
5. Press [
p
] [
q
] to select “Recording mode” and
then press [OK].
If you select “TV” in step 3, press [
p
] [
q
] to select TV audio and
press [OK].
6. Press [OK] to start recording.
Press [
STOP] to stop recording.
Press [
PAUSE] to pause recording.
Note:
You can press the [GUIDE] button to exit the Guide menu.
Summary of Contents for DVDR520H/69
Page 46: ......


