background image

23

24

L

EARN

M

ORE

L

EARN

M

ORE

DesXcape 150DM as Desktop Monitor 

Analog and Digital video input

When you have different video signal coming from the VGA port and the DVI-D port, the signal
from DVI-D port is automatically chosen as the preferred signal for video display. You may choose
to display the video signal from VGA port by using 

INPUT SELECTION

from the OSD menu.

For more information about the OSD menu, please refer to OSD functions in the 

Optimize and

Customize

chapter.

Working with an optional wireless keyboard

Setting up Wireless Keyboard

The optional Philips DesXcape 150DM wireless keyboard gives
you the benefits of an additional input tool that complements
DesXcape 150DM’s built in on screen keyboard. The Wireless
Keyboard uses a built-in radio frequency module to communi-
cate directly to your DesXcape 150DM. In order to comple-
ment – not interfere with – your DesXcape experience, key-
board frequency is different than the frequency employed by
DesXcape 150DM to communicate the host computer.

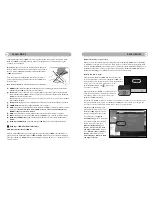
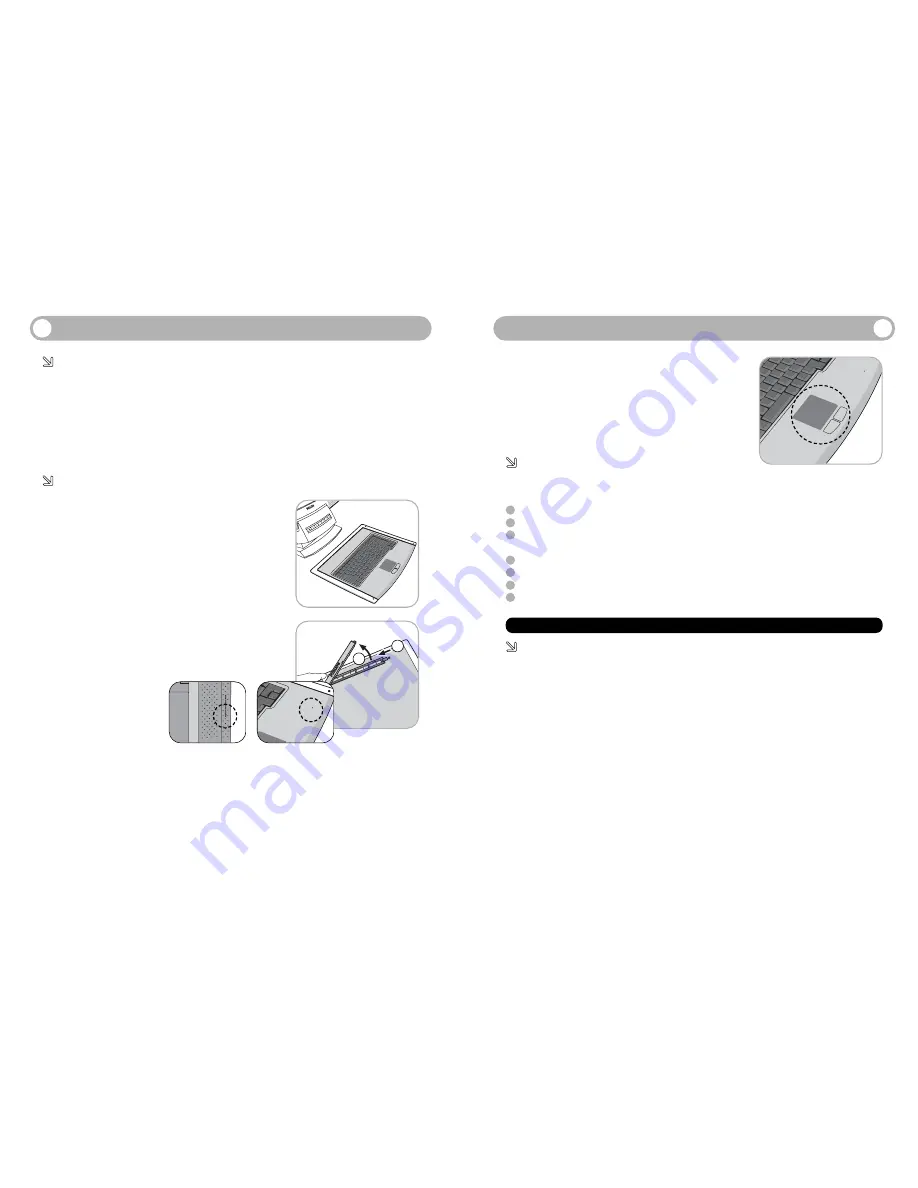
Installing the optional wireless keyboard

With your DesXcape 150DM nearby, slide and lift to remove
the battery cover of your wireless keyboard. Load four AAA
size batteries into the keyboard.
Replace the cover over the
batteries and slide the cover
back into place. With batter-
ies loaded, the keyboard auto-
matically searches for your
DesXcape 150DM and, in a
few seconds, configures itself to
work with DesXcape 150DM.

On rare occasions when the automatic configuration process doesn’t connect, restart the search process by pressing
the Connection Reset button on the front panel of the keyboard and then Keyboard Connection Reset button on the
left-hand rear of your DesXcape 150DM. Both your DesXcape 150DM and the keyboard will try to find each other
and automatically configure themselves.

Connection Reset

2

1

Using Wireless  Keyboard

The Wireless Keyboard functions exactly like a normal key-
board.A touch pad below the keypad allows you to draw lines
or point to items on the Windows desktop. The left touch pad
button functions like left clicking a mouse and the right touch
pad button functions like right clicking a mouse.

Other DesXcape 150DM functions

Here is a functional list of components and interfaces on the DesXcape 150DM:

(PLEASE REFER TO PAGE 5 FOR DETAILS)

1 Brightness adjusting wheel:

Scrolls up or down to adjust LCD screen brightness.

2 Volume adjusting wheel:

Scrolls up or down to adjust DesXcape 150DM speaker volume.

3 DC-in:

Connects to the plug from AC power adaptor for directly charging your DesXcape

150DM when it is not housed in its base station.

4 Speaker:

Outputs DesXcape 150DM sound.

5 Headphone jack:

Outputs DesXcape 150DM sound to your headphones.

6 USB:

Supports additional USB keyboard or mouse devices.

7 Kensington lock slot:

Supports Kensington type lock

Optimize and Customize

DesXcape 150DM as Wireless Monitor

Optimize wireless signal strength

Here is a quick summary of ways you can optimize your wireless signal strength:

-

Keep as few things as possible between your DesXcape 150DM and the wireless network adap-
tor. Large metal objects are especially prone to creating signal degradation.

-

Avoid working in the vicinity of interference creating devices such as 2.4GHz cordless phones,
microwave ovens and Bluetooth devices.

Using your DesXcape 150M antenna

-

Pull up the DesXcape 150DM antenna from its housing and adjust the antenna direction for
best signal quality.

Optimize wireless display performance

When it is on the base station, DesXcape 150DM supports all PC applications. When it is detached
from the base station, most applications run flawlessly. However, at times there are few exceptions.

Sometimes Internet streaming audio and video may not run smoothly on DesXcape 150DM in its
wireless mode. This is most likely due to poor wireless signal quality, large video screen size, or too

Connection Reset

on DesXcape
150DM

on Wireless
Keyboard

Touch Pad

Summary of Contents for DesXcape 150DM10P

Page 1: ...150DM Access Access To To Freedom Freedom User s Manual Philips DesXcape 150DM Detachable Monitor ...

Page 2: ...150DM and logon to your com puter Refer to the corresponding sections in this User s Manual when in doubt 2 Then go through the interactive Philips DesXcape 150DM Tutorial that your computer will automatically launch for you 3 Finally come back to this User s Manual to learn more about your DesXcape 150DM If you have questions after DesXcape 150DM is set up on your computer come back to this User ...

Page 3: ...be designat ed a computer administrator To determine your user account status click Start menu Control Panel User Accounts for the information If you have further question please contact your computer vendor USB B S e r v ic e P a c k User s Manual Quick Start Guide English Setup CD 3 4 GETTING STARTED A Complete Start Guide GETTING STARTED A Complete Start Guide This chapter provides detailed ste...

Page 4: ...dicator 5 Battery indicator 6 Brightness adjusting wheel 7 Volume adjusting wheel 8 DC power in 9 Speaker 10 Headphone jack 11 USB 12 Mini VGA out 13 Antenna and housing 14 Stylus housing 15 Kensington lock slot 16 Software Hardware reset button 17 Reset button for optional wireless keyboard 18 Monitor support 19 Battery cover 20 Base station connector 1 OSD button 2 Audio out 3 Audio in 4 VGA DVI...

Page 5: ...re environment for your DesXcape 150DM 1 Connect the power cord to the AC power adaptor plug it into the base station and then into a power outlet 2 If you plan to use DesXcape 150DM as your desktop monitor make sure your computer is run ning a resolution of 1024 x 768 or lower Plug theVGA cable into the base station and then into your computer To check and adjust the resolution of your computer r...

Page 6: ... end and software for DesXcape 150DM will not be installed on your computer 1 2 yellow end blue end yellow end blue end Step 3 Enable Remote Desktop If your computer has already been set to enable Remote Desktop this screen will not be displayed Click Next to continue Step 4 Select Power Mode Click Next to continue It is highly recommended that you select I want to disable standby and hibernate mo...

Page 7: ...uage you selected for your DesXcape 150DM you will see either Situation A 1 Smart Display Services Installed screen 2 Connect USB Cable screen Connect the red end of the included USB cable to the base station s red socket Next connect the yellow end of the USB cable to your computer s USB port Note DO NOT connect the yellow end back to the BASE STATION Wait for a few moments before the computer re...

Page 8: ...cape 150DM user logs on to the computer by selecting his or her user name from the DesXcape 150DM Dashboard Click Next to continue with the wizard Scenario 3 Using DesXcape 150DM to access two or more computers running the Windows XP Professional operating system on your home network with an Access Point between the computers you want to access through DesXcape 150DM Start with the first computer ...

Page 9: ...e wireless signals from your computer More information about how to use and configure the settings from Dashboard can be found from Microsoft Help and Support on your comput er Open the Start menu Help and Support Hardware and then Windows Powered Smart Display Look for information under Smart Display settings dashboard button input panel button Step 12 Add Smart Display Users The wizard lists the...

Page 10: ...rk indicator light is green 2 Click on the user name with which you want to connect A Logon dialog box appears with the user name listed This dialog box does not appear if you have chosen to have your DesXcape 150DM remember the password for your user connection in the Dashboard set tings To have your DesXcape 150DM remember the password tap the edit box Edit next to the selected user name in the ...

Page 11: ...lips websites Base station function The base station works only when DesXcape 150DM is housed in it The base station turns off automatically when DesXcape 150DM is powered off or detached A light indicator at the front shows whether or not the base station is active It is highly recommended that you connect to the base station only devices that you do not plan to use while DesXcape 150DM is away f...

Page 12: ...rom DesXcape 150DM There is a mini VGA output port at the right side of your DesXcape 150DM See illustration on page 5 With the included DesXcape 150DM mini VGA cable this port can output the display sig nals of your DesXcape 150DM directly to any display device you wish to use another monitor or even a projector Automatic wireless reconnection When you move out of the wireless operating range of ...

Page 13: ...Wireless Keyboard functions exactly like a normal key board A touch pad below the keypad allows you to draw lines or point to items on the Windows desktop The left touch pad button functions like left clicking a mouse and the right touch pad button functions like right clicking a mouse Other DesXcape 150DM functions Here is a functional list of components and interfaces on the DesXcape 150DM PLEAS...

Page 14: ...ces and then Add UserWizard To remove an existing DesXcape 150DM user tap Edit but ton of the user account on Dashboard and tap delete Reconfigure the DesXcape 150DM wireless network You can reconfigure your DesXcape 150DM wireless net work settings to make it work again with a changed home wireless network environment Here s how 1 At the Product Maintenance page select Add Users The setup program...

Page 15: ...n including serial number resolution and video input status 8 INPUT SELECTION Selects Analog VGA port or Digital DVI D port video input signal M A I N C O N T R O L S A D J U S T P O S I T I O N V I D E O N O I S E E X I T M A I N C O N T R O L S M OV E S E L E C T I O N T H E N R E S E T TO FA C TO RY S E T T I N G S O S D S E T T I N G S P R O D U C T I N F O R M AT I O N C O N T R A S T L A N G...

Page 16: ...with a mouse 802 11b An industry standard that describes a popular wireless network configuration DesXcape 150DM is designed to be used on 802 11b networks Access point See wireless access point Ad hoc network A computer to computer connection between two devices that have wireless network adapters installed Your DesXcape 150DM can establish an ad hoc connection with any computer that has a wirele...

Page 17: ...network connecting geographi cally separated computers printers and other devices A WAN allows any connected device to interact with any other on the network The Internet is an example of a WAN Windows Powered Smart Display A digital device powered by Microsoft Windows CE for Smart Displays that acts as a wireless com puter terminal It allows a computer user to wire lessly connect to a computer ru...

Page 18: ...s net work adaptor However this requires that you have the specialized knowledge to set up the wire less network for DesXcape 150DM manually during setup process During Hardware Setup Q3 Where is the packing list A quick packing list is available on Quick Start Guide A more complete packing list is available at the Getting Started A Complete Start Guide chapter of this User s Manual Q4 Where is th...

Page 19: ... by choosing Start menu All Programs Microsoft Smart Display Services and then Add UserWizard Usually DesXcape 150DM reverts to factory setting because of a lack of battery power Even in power off status DesXcape 150DM still consumes a little power to maintain the settings and to keep the system ready to power on instantly Therefore it is important that you recharge your DesXcape 150DM at least ev...

Page 20: ...ish and hassle free home PC experience anywhere in your house Smart Display vs DesXcape 150DM DesXcape 150DM is a Smart Display device and much more Like other Smart Displays DesXcape 150DM runs Windows CE for Smart Displays and meets Smart Display hardware requirements But DesXcape 150DM doesn t stop with the basics Its screen size overall dimensions outstanding display thoughtful features and ov...

Page 21: ... When your DesXcape 150DM is placed in its base station in the stationary mode the USB cable connecting the base station and your computer transmits data for the optional wireless keyboard DesXcape 150DM touch sensitive screen and base station USB ports to your computer 39 40 APPENDIX APPENDIX LCD panel Type TFT LCD Screen size 15 inch 38 1 cm Pixel pitch 0 297 x 0 297mm LCD panel type 1024 x 768 ...

Page 22: ...ct expires the warranty on all replaced and repaired prod ucts and parts also expires What is excluded Your warranty does not cover Labor charges for installation or setup of the product and adjustment of customer controls on the product Product repair and or part replacement because of misuse accident unauthorized repair or other cause not within the control of Philips Consumer Electronics We rec...

Page 23: ...icker Reception problems caused by signal conditions outside the unit A product that requires modification or adaptation to enable it to operate in any other country other than the country for which it was designed manufactured approved and or authorized or repair of products damaged by these modifications Incidental or consequential damages resulting from the product Here are the care notes you s...

Page 24: ...mpliance could void the user s authority to operate the equipment Use only RF shielded cable that was supplied with the monitor when connecting this monitor to a computer device To prevent damage which may result in fire or shock hazard do not expose this appliance to rain or excessive moisture THIS CLASS B DIGITAL APPARATUS MEETS ALL REQUIREMENTS OF THE CANADIAN INTER FERENCE CAUSING EQUIPMENT RE...

Page 25: ...nies can recycle your product to increase the amount of reusable materials and to minimize the amount to be disposed of Please find out about the local regulations on how to dispose of your old monitor from your local Philips dealer Information for UK only WARNING THIS APPLIANCE MUST BE EARTHED Important This apparatus is supplied with an approved moulded 13A plug To change a fuse in this type of ...

Page 26: ... warranty the number of pixel defects on a TFT LCD panel must exceed these acceptable levels Bright Dot Dots sub pixels which appeared brightly in the screen when the LCM displayed with dark pattern R G or B 1 dot 2 Max Adjacent 2 dots 1 Max Total amount of Bright dots 2 Max Bright dot density Min 10mm Dark Dot Dots sub pixels which appeared darkly in the screen when the LCM displayed with bright ...

Page 27: ...as confirmation of ownership in the event of product loss or theft MODEL REGISTRATION Returning the attached card right away guarantees you ll receive all information and special offers for which your purchase makes you eligible So please act today www philipsusa com DETACH AND MAIL PORTION BELOW 3135 015 07803 rev 7 02 Mail This Card Today To Get The Most From Your Purchase No I do not want to re...

Page 28: ...ion Owner Confirmation Model Registration See Inside For Valuable Benefits Warranty Registration Card PO BOX 1533 DEPOSIT NY 13754 1533 PLEASE APPLY FIRST CLASS STAMP TIME DATED MATERIAL Please Open Promptly a 1375415338 IMPORTANT PHILIPS Warranty Card 8 16 02 12 38 PM Page 2 ...

Reviews: