background image

08

Receiver Connections

3

To achieve optimum signal quality, please read this chapter carefully before 

setting up your receiver and select the most appropriate option depending on 

the equipment you have.

Before connecting equipment to your satellite receiver please check  the 

instruction manual for each device. 

Note: If you encounter any problems setting up your product, please contact 

the Helpline (details below).

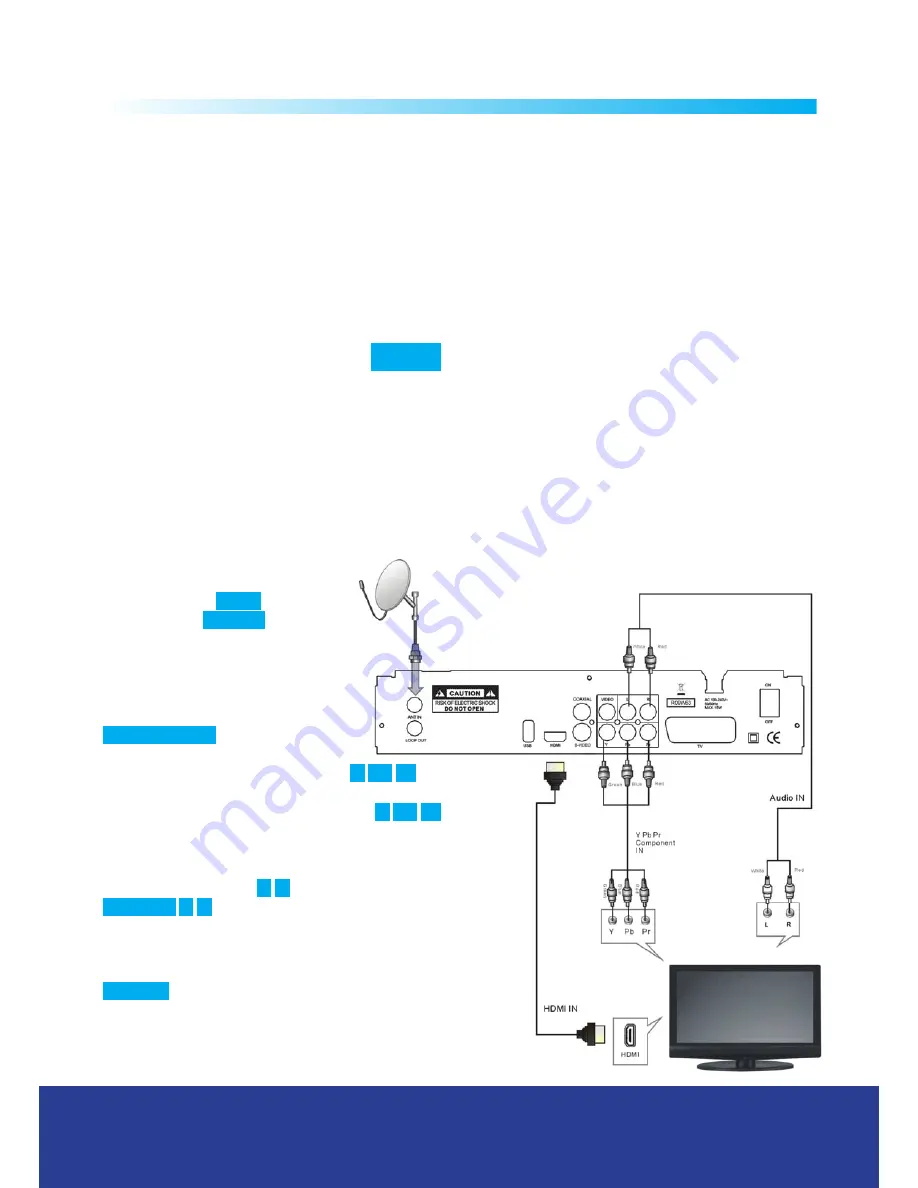
The downlead from your satellite dish is connected via the F connector on the 

back of your receiver marked 

 LNB IN .

.

There are three options for connecting your satellite receiver to your TV. 

3.1 Connection to Dish and TV 1 via HDMI or YPbPr output and Audio output

(for high definition viewing). For best results always use HDMI connection if 

available for HD and upscaled SD broadcasts, also for ordinary SD broadcasts 

as these will be upscaled by your receiver.

Connect the HDMI lead supplied to 

the HDMI socket on the back of your 

receiver marked  

 HDMI 

 and to any 

socket marked 

 HDMI IN 

 on the back 

of your TV. 

If you don’t have an HDMI socket on  

your TV check for  a group of 5 phono

sockets on the back of your TV marked 

 COMPONENT IN 

 this is an alternative 

high definition connection. 

The video phono sockets are marked 

 Y 


 Pb 


 Pr 

 and require 

a 3 phono to 3 phono component video lead (not supplied)  

to connect to the phono sockets marked 

 Y 


 Pb 


 Pr 

  on the 

back of your TV.  

This type of connection will also need a 2 phono to 2 phono  

lead (not supplied) to carry a stereo audio signal from the  

phono sockets marked 

 L 


 R 

 on your receiver to those marked 

 AUDIO IN  


 L 


 R 

  on your TV.

Note:


HDMI connections carry both Audio and Video signals,

if you want to play Audio through your HI-FI system, connect 

the Digital Audio Out phono socket on your receiver marked 

 COAXIAL 

 to your Hi-Fi using a digital coaxial lead. You will 

need to remember to mute the volume on your TV.

3). To ensure the best image quality, set the video output  

mode to HDTV, press the “FORMAT” button to select video  

resolution 1080i or 720p.

Customer Careline:

 08457 573479

Local Rate - UK only

Technical Support: www.philex.com/support

Summary of Contents for HDSR 400

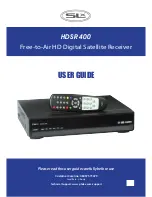
Page 1: ...HDSR 400 Free to Air HD Digital Satellite Receiver USER GUIDE Please read this user guide carefully before use Customer Careline 08457 573479 Local Rate UK only Technical Support www philex com support ...

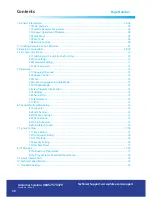
Page 2: ...nd Audio Mode 13 5 5 TV Radio Mode 13 5 6 View Program Information 13 5 7 Subtitles 13 5 8 Channel List 13 5 9 View teletext 13 5 10 EPG 13 6 Channel Editing Managing 14 6 1 Favourites 14 6 2 Edit Channel 14 6 3 To Move Channel 15 6 4 Channel Lock 15 6 5 To Skip channel 15 6 6 To Delete channels 15 7 System Setting 15 16 7 1 Time Setting 15 7 2 A V output Setting 16 7 3 OSD Setting 16 7 4 Security...

Page 3: ...enna Cleaning disconnect the mains supply and use only a lightly dampened soft cloth Do not use chemical solvents or strong detergents as these may damage the cosmetic finish To prevent electric shock do not remove any cover If anything goes wrong don t try and fix it yourself get a qualified engineer to look at it Do not expose this equipment to dripping or splashing Never put a naked flame sourc...

Page 4: ...tal lock function Capacity for storing up to 5 000 channels Automatic software upgrade via satellite Ethernet for future use Full remote control function 1 2 Satellite Receiver Accessories Your satellite receiver is supplied with remote control unit RCU and HDMI lead 1 3 General Operation of Receiver This manual contains full instructions for everyday operation of your receiver There are a series ...

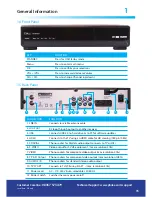
Page 5: ...le for HD viewing 760p 1080i 5 COAXIAL Phono socket for Digital audio output connects to TV or HiFi 6 S VIDEO Video output for S VHS equipment max resolution 576i 7 VIDEO Phono sockets for composite video output max resolution 576i 8 Y Pb Pr Output Phono sockets for component video output max resolution 1080i 9 AUDIO L R Phono sockets for standard stereo audio output 10 TV SCART Connects to TV VCR...

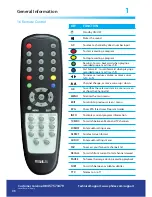
Page 6: ...lected item in a menu screen or show the Channel list MENU To enter the main menu EXIT To return to previous screen menu EPG Show EPG Electronic Program Guide INFO To display current program information TV RADIO To switch between Radio and TV channels FORMAT Enter audio setting menu ASPECT To select screen format AUDIO Enter audio settings menu FAV To access your favourite channels list RECALL To ...

Page 7: ...ntroller for an extended period remove the batteries to prevent possible leakage and corrosion 5 Do not drop apply shock or step on the remote control 6 Do not spill water on the remote control Note If the receiver does not respond to the remote control at close range you replace the batteries Using the Remote Control 1 To use the remote control point it towards the front of the digital set top bo...

Page 8: ...receiver marked HDMI and to any socket marked HDMI IN on the back of your TV If you don t have an HDMI socket on your TV check for a group of 5 phono sockets on the back of your TV marked COMPONENT IN this is an alternative high definition connection The video phono sockets are marked Y Pb Pr and require a 3 phono to 3 phono component video lead not supplied to connect to the phono sockets marked ...

Page 9: ...eceiver to the S VIDEO IN socket on your TV and use a 2 phono to 2 phono lead not supplied to carry a stereo audio signal from the phono sockets marked L R on your receiver to those marked AUDIO IN L R on your TV 3 4 Power Connection Your satellite receiver is mains powered insert the 3 pin plug into a standard UK 240V socket and switch on the socket and switch on the receiver using the switch sho...

Page 10: ...want to add with the buttons and press button to select an option 3 Press the OK button to view the satellite list and then select the satellite you want to add for English language channels this will normally be Astra 2 at 28 2 Degrees East Astra2abdEuro1 4 Press the OK button to confirm your selection 5 You should not need to edit or change any of the items in the Dish Setting menu as they shoul...

Page 11: ... button Select the frequency using the Arrow buttons and press the OK buttons Motorized Setting menu indicates the selected frequency 4 Select the DiSEqC Motor and the set the motor to DiSEqC 1 2 or USALS by using the buttons then the Motor setting will be displayed as the figure shown on the right consult the manual which came with your DiSEqC USALS Motor for additional information In the USALS m...

Page 12: ...downloaded or TV Free to View and Pay to View channels are downloaded to be searched for the selected satellite s Network Search Allows searching of additional related feeds from the network information table To reduce the number of dead channels Temporary Feeds and Data this is normally set to OFF 3 Move the cursor to the Scan section at the bottom of the menu select Press OK and then press the O...

Page 13: ...m providers 5 8 Channel List To display the channel list press the OK button 5 9 View teletext 1 Press the TTX button to open a teletext page the teletext transmitted depends on the program providers press again to exit 2 Press the 4 colour buttons and numeric buttons 0 9 to assist the operation 3 Press the buttons button to page up and down 4 To enter a page number use the numeric buttons 5 10 EP...

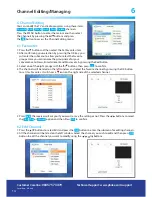
Page 14: ...d button 3 Select one of the eight groups with the buttons then press OK to confirm 4 The channels will be listed on the left window and select the favorite channel by pressing the OK button to set it as Favorites It will show a icon on the right side of the selected channel 5 Press Exit the receiver will ask you if you want to save the setting or not Press the buttons to select the Yes No or Canc...

Page 15: ...g the buttons an Arrow symbol will appear at the righthand side of the channel name then press the Exit button the receiver will ask you if you want to save the setting or not Press the buttons to select the Yes No or Cancel option and then Press OK to confirm 6 6 To Delete channels You can delete channels from the channel list by selecting the channels using the buttons an X symbol will appear at...

Page 16: ... RGB Red Green And Blue mode 7 3 OSD Setting Transparency Set a level of transparency for the OSD On Screen Display menu Menu Language Set the menu language you want The default language is English 7 4 Security Setting This menu allows you to set Receiver Lock Install Lock Channel Lock Age limit New Password and Verify Password Receiver Lock ON sets a lock on your receiver requiring a password whe...

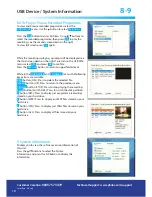
Page 17: ...itably formatted FAT 32 USB 2 0 memory device such as an external hard drive To be detected your memory device should be plugged into the USB socket on the back of the receiver and switched on before you switch on your satellite receiver 8 1 To Record a Programme Make sure that your memory device has been plugged into the USB socket on the back of the receiver and switched on before you switch on ...

Page 18: ... C menus the following key actions are available RED button DEL Press to delete the selected file GREEN button UP Press to return to the previous menu YELLOW button STOP Press to stop playing the recording BLUE button Switch Disk Press to switch the disk partition 7 button REC Press to display just programme recordings stored on your hard drive 8 button MP3 Press to display just MP3 files stored o...

Page 19: ...CONNECTORS F connectors x 2 LNB input x1 LNB loop out x1 SCART socket x1 SCART standard AV out to TV VCR HDMI socket x1 HD AV out to HDTV DVD recorder Phono sockets x 3 Y Pb Pr Component HD video out to LCD Plasma S Video socket x1 S Video out TV VCR Phono socket x 1 Composite standard AV out to TV VCR Phono sockets x 2 Stereo Audio out Left and Right to Hi Fi TV VCR Coaxial socket x 1 S PDIF Digi...

Page 20: ...h Check the Signal Level in the Antenna Setup menu Check the cable connections LNB and oth er equipment connected between the LNB and receiver Check brightness volume level on TV Check if channel is currently on air BBC3 and BBC4 transmitted after 7pm CBBC and CBeebies before 7pm Adjust the dish Connect a signal attenuator to the LNB Change to a larger dish Change to an LNB with lower noise factor...

Reviews: