9
Batteries
NOTE!
Wear safety goggles when working with
batteries.
Removal
1.
Detach the seat lift cover and chassis cover,
see page 8.
NOTE!
Be careful when removing the chassis
cover. A chassis equipped with lights has the
wiring for its rear lights fastened to the electronics.
Separate the wiring for the rear lights at the
contact located on the wiring.
2.
Switch off the power using the control panel.
3.
Set the main fuse to the “OFF” position,
see fig. 10.
4.
Block the front edge of the seat up, loosen the
seat lift’s base by loosening the lock nut,
see fig. 11. Take note of the design of the
base with an eye towards the future
remounting. Carefully lower the seat forward.
5.
Loosen the battery connections. The positive
terminals first, and thereafter the negative
terminals.
6.
In order to gain access to the battery more
easily, the electrical connections for the drive
motor, magnetic brake, lights and brake
release sensor can be loosened. Note the
placement of the cables with an eye towards
future remounting.
7.
Lift the batteries out.
Install
1.
Seat your two new batteries. The battery
terminals must be located towards the rear.
2.
Mount the battery connections, first the
negative terminals and thereafter the positive
terminals.
3.
Mount the electrical connections for the drive
motor, magnetic brake, lights and brake
release sensor if they have been
disconnected earlier.
4.
Carefully elevate the seat upwards again,
mount the base and retighten the lock nut.
5.
Mount the covers again.
6.
Switch the main fuse to the “ON” position,
see fig. 10.
Batteries
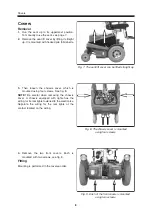
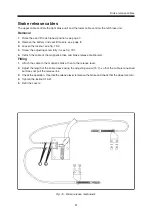
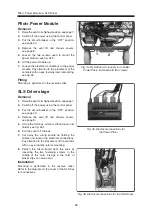
Fig. 12. Battery connections.
Fig. 10. Main fuse/Battery isolator.
On
Off
Fig. 11. Seat lift lock nut.
Summary of Contents for Chairman Playman
Page 1: ...SERVICE MANUAL US Chairman Playman Robo ...
Page 2: ......
Page 24: ...Distribution Chart 24 A B C D E F 1 2 3 4 ...
Page 25: ...Distribution Chart 25 Distribution Chart A B C D E F 5 6 7 8 ...
Page 26: ...Notes 26 ...
Page 27: ......
Page 28: ...Order no 201162 US 0 ...


