Page 13
OPERATION
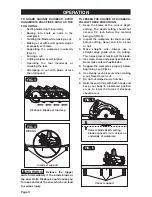
4. Tighten the bevel-adjustment knob by
rotating the knob clockwise.
NOTICE: The saw is equipped with a 45°
quick adjustment for 45° bevel cutting. Tilt
the base as far it will go: the indicator will
be at the 45° setting.
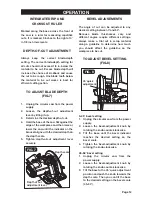
0° BEVEL STOP
The saw has a 0° bevel stop that has been
adjusted before shipment to assure that
the blade is vertical to the base at the 0°
bevel setting.
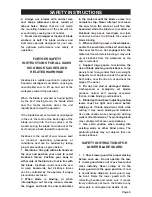
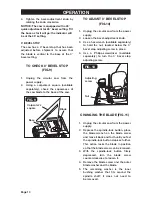
TO CHECK 0° BEVEL STOP
(FIG.9)
1. Unplug the circular saw from the
power supply.
2. Using a carpenter’s square (available
separately), check the squareness of
the saw blade to the base of the saw.
FIG. 9
Carpenter’s
square
Base
Blade
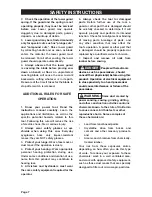
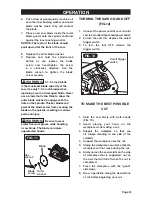
TO ADJUST 0° BEVEL STOP
(FIG.10)
1. Unplug the circular saw from the power
supply.
2. Loosen the bevel-adjustment knob.
3. Use a hex wrench (available separately)
to hold the nut, located below the 0°
bevel stop adjusting screw in place.
4. Use a Philips-screwdriver (available
separately) to turn the 0° bevel stop
adjusting screw.
FIG. 10
Adjusting
screw
Nut
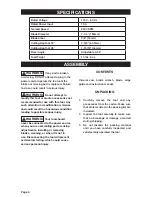
CHANGING THE BLADE (FIG.11)
1. Unplug the circular saw from the power
supply.
2. Depress the spindle-lock button, place
the blade wrench on the blade screw
and move it back and forth until you feel
the spindle-lock button depress further.
This action locks the blade in position
so that the blade screw can be removed.
3. With the spindle-lock button firmly
depressed, turn the blade screw
counterclockwise to loosen it.
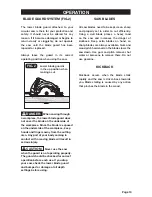
4. Remove the blade screw and the outer
blade washer and the blade.
5. The remaining washer is the inner
bushing washer that fits around the
spindle shaft; it does not need to
be removed.


