


Setting the AUTO-ON & AUTO-OFF TIMER
AUTO-ON & AUTO-OFF Timer,
time of day clock
MODE
turn
off the unit.
TIMER-ON
AUTO-ON
TIMER-ON
ON
AUTO-ON
AUTO-TIMED
AUTO-TIMED
CLOCK
AUTO TIMER-
ON
ON
(TIMER ON)
The unit must remain " OFF" while programming
the AUTO-OFF program.
AUTO-OFF
AUTO-OFF
TIMER-OFF
OFF
AUTO-
OFF
AUTO-TIMED
AUTO-TIMED
CLOCK
AUTO TIMER-
OFF
OFF
(TIMER OFF)
AUTO-ON & AUTO-OFF
ON
OFF
Before setting the
the
must be set/operational. You
must also select the appropriate operating
.
After the appropriate settings have been made,
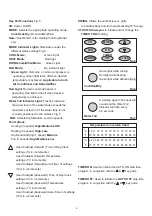
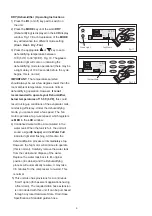
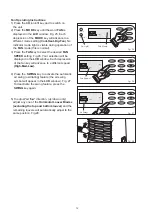
1) Press the
key pad to initiate the
time sequence.(Fig.32). The display
window will indicate
and the word
will flash for 5 seconds. Press the
or
key pad to select the desired
start time.(Fig. 32a).
Key pad will decrease the
setting in 10 minute increments.
Keypad will increase the
setting in 10minute increments.
When the desired time is established,(the time
will flash in the display window) press the
key pad to register the
program. The word
will stop flashing and
remain"on"
indicating the program
is set. The time of day clock setting will
immediately revert back in the display window
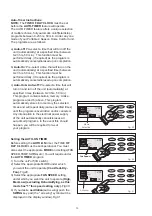
2) Press the
key pad to initiate the
time sequence. (Fig.33). The
display window will indicate
and the
word
will flash for 5 seconds. Press the
or
key pad to select the desired
time.(Fig. 32a).
Key pad will decrease the
setting in 10 minute increments.
Key pad will decrease the
setting in 10 minute increments.
When the desired time is established,(the time
will flash in the display window) press the
key pad to register the
program. The word
will stop flashing
and remain "on"
indicating the
program is set. The time of day clock setting will
immediately revert back in the display window.
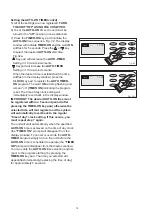
When the
times are set.
Within the same program sequence, the display
window shows TIMER ON/OFF identifying that both
and
times are now programmed
(Repeatable daily until such time the program is
canceled and/or changed).
IMPORTANT: The desired AUTO-ON & AUTO-
OFF time must be registered within a 5 second
period (after pressing the TIMER-ON/OFF key
pads) otherwise the selected time will not
register and the system will automatically revert
back to the regular "time of day" clock setting
AUTO-ON
AUTO-OFF
AUTO-TIMED
AUTO-ON/OFF
AUTO-ON/OFF
TIMER-ON/TIMER-OFF
The unit will start automatically when the specified
time is achieved on the time of day clock
and will stop automatically when the specified
time is achieved on the time of day
clock. To cancel or override the
program, simply turn the unit on or off prior to the
scheduled
time. You can verify the
time selection anytime by pressing
each respective
key pad
and the selected time will temporarily appear
replacing the time of day clock for approximately
5 seconds.
16


