


5
INSTALLATION
2. Installation
2.1 Disassembling the Camera
Before you mount and adjust the camera, follow these steps to disassemble the
camera.
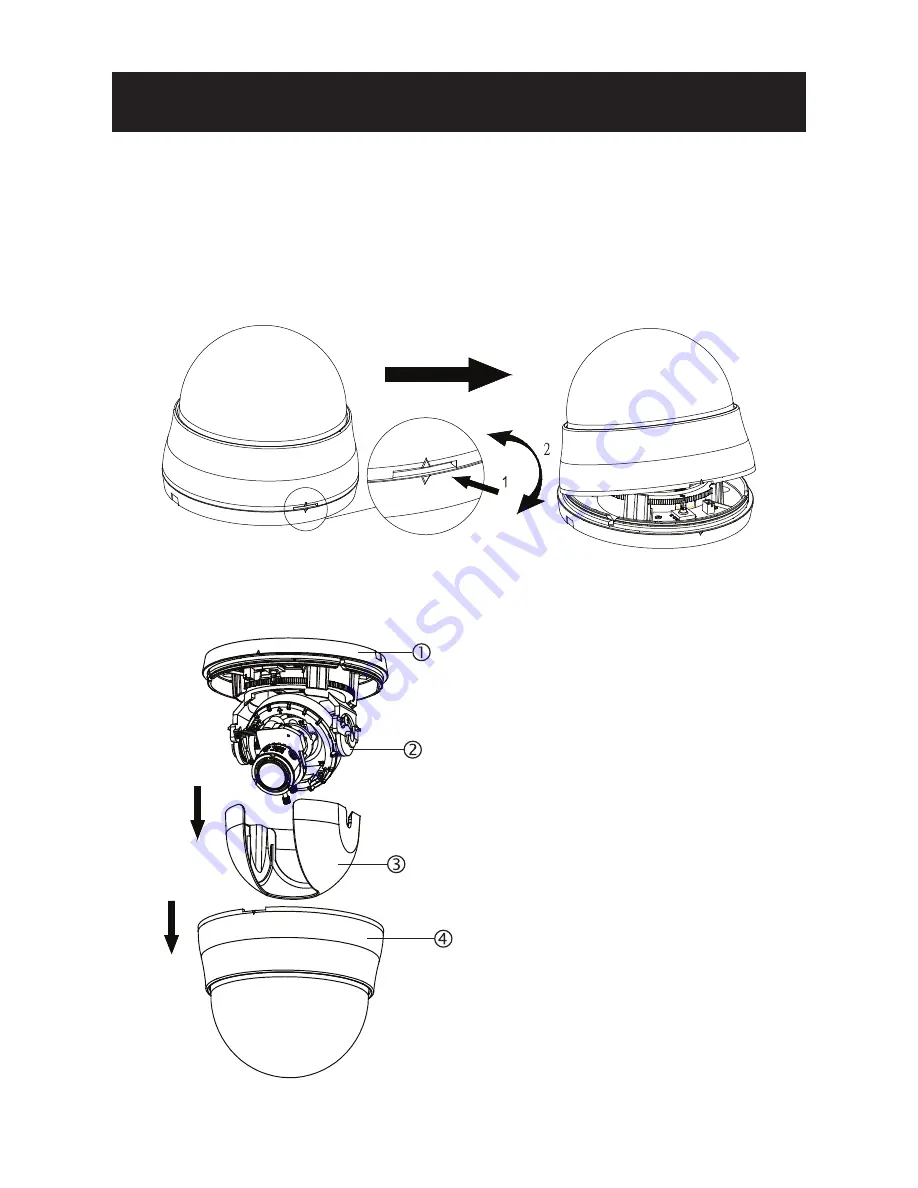
1.
Insert a coin or flat tool to the side hole and twist to remove the dome cover.
2.
Remove the inner liner (#3) by gently pulling it free from the tilt adjustment
bracket (#2).
3.
Set the dome cover (#4) and liner (#3) aside.
1. Bottom case
2. Tilt adjustment bracket
3. Inner liner
4. Dome cover
Figure 2-1 Disassemble the camera
Summary of Contents for PDCHRDN-700AI
Page 2: ......


