background image

Manual 


Operation 

6.1 

Preparations before the measurement 

6.1.1 

Sample 

Type of hydraulic impactor 

Classification of samples in weight classes 


Heavy  

Medium-weight 

Light 

>5 kg 

2 … 5 kg 

0,05 … 2 kg 

 
Please note that the hydraulic impactor is shortly subjected to a relatively high impact force, considering 
his low mass and his impact energy, when it impinges on the surface. The maximum impact force for a 
type D device is 900 Newton.  
 

The surface temperature of the test object should be below 120 °C. 

The test object should obtain a smoothly grinded surface in order to avoid faulty measurements. 
These faulty measurements may be an effect of rough grinding or grooves by a lath machine.  

The throatiness of the test object shall not exceed 2 µm.  

For test object above 5 kg, which have a compact form, there are no preparations needed,  

Test objects between 2 and 5 kg or heavier objects with protruding parts or thin sides shall be 
placed on a stable subsurface so they do not break or deform when the hydraulic impactor hits 
them. If they deform or break the Leeb value may be wrong. 

Note that also bigger test objects may deform if they have thin sides or protruding parts. 

Test objects below 2 kg should be coupled to a stable (above 5 kg heavy) subsurface.  

The hardened layer of the testing object no not be any thinner than 0,8 mm.  

The surface of the test object should not be magnetic. 

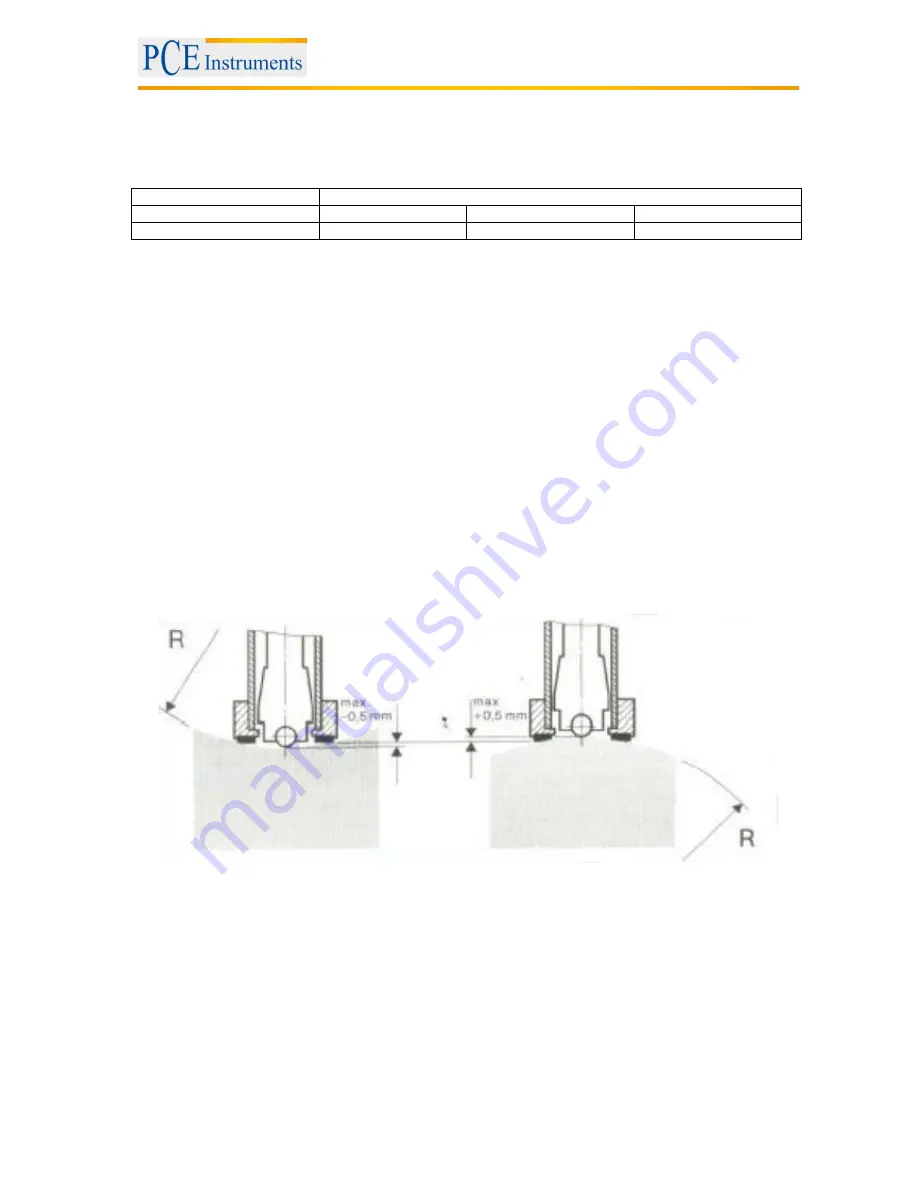
Curved surfaces of test objects should at least have a radius 30 mm. Otherwise a supporting ring 
is needed. 

Measuring instruments that work by using the impact force only work properly when the impactor 
is at a certain point of the guide tube, when hitting the test object. If spherical or cylindrical 
objects that are arched to the inside of the test object are measured, the measurement may not 
be correct. 


Summary of Contents for PCE-1000

Page 1: ...struments UK Ltd Units 12 13 Southpoint Business Park Ensign way Hampshire Southampton United Kingdom SO31 4RF From outside UK 44 Tel 0 2380 98703 0 Fax 0 2380 98703 9 info pce instruments com www pce instruments com english www pce instruments com Manual Durometer PCE 1000 Version 1 0 Date of creation 07 09 2015 Date of last change 12 04 2016 ...

Page 2: ...tion diagram 8 6 3 Switch on 9 6 4 Menu 9 6 4 1 Direction of impact 9 6 4 2 Material settings 9 6 4 3 Hardness scale 9 6 4 4 Mean time 10 6 4 5 Storage 10 6 4 6 Read out delete stored data 10 6 4 7 Check out the serial number 10 6 4 8 Restore factory settings 11 6 4 9 Return to measurement mode 11 6 5 Measurement 11 6 6 Show statistical values 12 6 7 Calibration 12 6 8 How to charge the battery 12...

Page 3: ...n applied in 1978 It is defined by the ratio the rebound speed of an impacting object and its impact speed multiplied by 1000 The harder the surface of the material is the higher the rebound speed The Leeb hardness value is able to make a direct connection between a group of materials e g aluminium steel and its attributes For the most common metallic parts there are conversion tables which help t...

Page 4: ...sed by qualified personnel and repaired by PCE Instruments personnel There is no warranty of damages or injuries caused by non observance of the manual The device may only be used in approved temperature range The opening of the case should only be done by qualified personnel of the PCE Instruments You should not make technical changes on the device The appliance should only be cleaned with a damp...

Page 5: ...ulic impactor D Power Automatically Power supply DC 9 V Ni MH Akku Surounding temperature 0 50 C Max temperature of the samples 120 C Minimum hardness layer 0 8 mm Minimal thickness of the sample 3 mm Dimensions 100 x 60 x 33 mm Weight 150 g 4 System description 4 1 Device M Button Menu Calculation of average and MIN MAX adjustment upwards C Button change settings delete outliners adjustment downw...

Page 6: ...value HSD Shore hardness value HV Vickers hardness value σb Tensile strength Hydraulic impactor D HLD 170 960 HRC HRB HB HV HSD Steel 20 0 67 9 59 6 99 5 80 647 80 940 32 5 99 5 Tool steel 20 5 67 1 80 898 Stainless steel 19 6 62 4 46 5 101 7 85 655 85 802 Grey cast iron 93 334 Spheroidal graphite iron 131 387 Aluminium cast 30 159 Brass 13 5 95 3 40 173 Bronze 60 290 Copper 45 315 ...

Page 7: ...rm there are no preparations needed Test objects between 2 and 5 kg or heavier objects with protruding parts or thin sides shall be placed on a stable subsurface so they do not break or deform when the hydraulic impactor hits them If they deform or break the Leeb value may be wrong Note that also bigger test objects may deform if they have thin sides or protruding parts Test objects below 2 kg sho...

Page 8: ...urface by turning it The direction of impact should be vertical to the coupled surface The minimum thickness of the coupling sample is 5 mm In order to perform reliable measurements the test objects need to be coupled correctly If that is not the case there discrepancies between the measurements In addition to that the Leeb values may be too little and differ and there may be rattling noises when ...

Page 9: ...eturn to the normal measurement mode 6 4 1 Direction of impact When M button has been pressed and you got the point DIRE you will have to press C in order to adjust the direction of impact 6 4 2 Material settings After reaching the MATE section C needs to be pressed until your preferred material is chosen M1 M9 M1 Steel cast steel M2 Cold work steel M3 Stainless steel M4 Grey cast iron M5 Spheroid...

Page 10: ...m left corner of the LCD 00 is displayed All measured data is stored automatically 6 4 6 Read out delete stored data After you got to the point MEMR press C to enter the read out mode Press M and C simultaneously to view the measured values If there are no measurement values the LCD will show NOD M and C serve to scroll through the stored data HOLD M and C simultaneously for about 5 seconds to exi...

Page 11: ...ain to return to the measurement mode The durometer will display 000 6 5 Measurement 1 Press the release button on top of the durometer to switch it on 2 Push the roll pin in the slot of the hydraulic impactor until the hydraulic impactor until it locks 3 Press the durometer tightly onto the surface that is to be measured 4 Press the release button on top of the durometer to perform a measurement ...

Page 12: ...ime needs to be set three times To calibrate you need to perform three measurements on the test block Hold the C button until the calibration mode is opened On the left side of the display ADJ is displayed Press C or M to reduce or increase the standard value Hold M to finish calibration Hold C to abort without saving the settings Please note If the deviation is not higher than the one written dow...

Page 13: ...e use them or give them to a recycling company which disposes of the devices in line with law If you have any questions please contact PCE Instruments 8 Contact If you have any questions about our range of products or measuring instruments please contact PCE Instruments 8 1 PCE Instruments UK By post PCE Instruments UK Ltd Units 12 13 Southpoint Business Park Ensign Way Southampton Hampshire Unite...

Reviews: