background image

S300_V1.00.00                                                                User Manual 

NOTE: This document is CONFIDENTIAL and must be used exclusively for the operation of PAX programs.    It may not be 
duplicated, published, or disclosed without PAX prior written permission.                                                                                     

132 

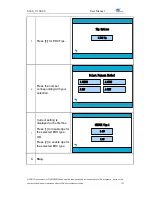
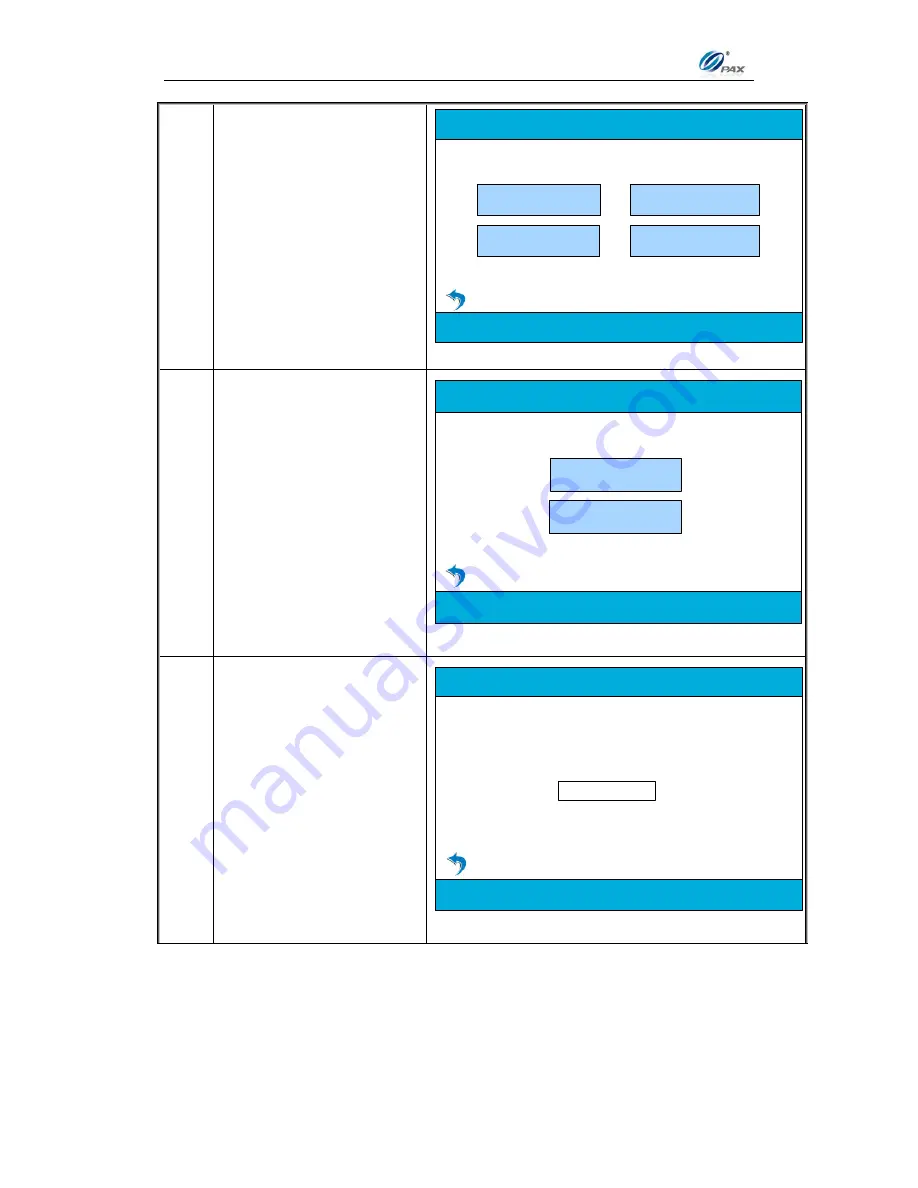
2. 


From the System Settings 
menu, press

 [2] 

for 

Working Mode. 

 2.Working Mode

 3.Keys Injection

System Options

 1.Date/Time Setup

 4.App Management


3. 


From the WORKING 
MODE Settings menu, 
press

 [1] 

for Tip Options


 2.Fraud Control

Working Mode

 1.Tip Options


4. 


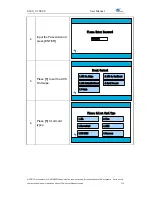
Input the Password and 
press

 [ENTER] 

********

Please Enter Password


Summary of Contents for S300

Page 1: ...S300_V1 00 00 User Manual duplicated published or disclosed without PAX prior written permission 1 PAX Technology Inc All Rights Reserved S300_V1 00 00 User Manual V20140912 ...

Page 2: ...his document is subject to change without notice If you find any problems in the documentation please report them to us in writing This document is not warranted to be error free Except as may be expressly permitted in your license agreement for these Programs no part of these Programs may be reproduced or transmitted in any form or by any means electronic or mechanical for any purpose Security No...

Page 3: ...3 EBT Balance Inquiry 57 4 4 GIFT TRANSACTION 59 4 4 1 Gift Sale 59 4 4 2 Gift Return 62 4 4 3 Gift Issue 64 4 4 4 Gift Add Value 66 4 4 5 Gift Balance Inquiry 68 4 4 6 Gift Void 70 4 5 COMMERCIAL CARDS 73 4 6 TIP ADJUST 76 5 MENU OPTION 78 5 1 ACCESSING THE MAIN MENU 78 5 2 MAIN MENU OPTIONS 79 5 3 MERCHANT SETTINGS 80 5 3 1 Authorizations 81 5 3 1 1 Trans Types 81 5 3 1 2 Card Types 84 5 3 2 Sec...

Page 4: ... 4 5 App Info 162 5 7 COMMUNICATIONS 164 5 7 1 Main Communication 164 5 7 2 Maximum Tries 166 5 7 3 Connect Timeout 168 5 7 4 Receive Timeout 170 5 7 5 LAN Parameters 172 5 7 5 1 LAN Type 172 5 7 5 2 Local IP Address 174 5 7 5 3 NetMask 176 5 7 5 4 Gateway IP Address 178 5 7 5 5 DNS IP 180 5 7 6 ECR Communication Type 182 6 FUNCTION MENU OPTION 184 6 1 REVIEW 184 6 2 FIND 186 APPENDIX A TROUBLESHO...

Page 5: ...st be used exclusively for the operation of PAX programs It may not be duplicated published or disclosed without PAX prior written permission 5 Revision history Date Version By Description of Change Contact 2014 10 21 V2014912 W Kammerer Initial Release support pax us ...

Page 6: ...his document 1 1 The Purpose of This Document This document provides the detailed description for all user functions which can be performed on the POS terminal The document is intended for use by the Software Engineers developing and maintaining the Payment Application design for the US Payment Card Industry also for use by customer and Independent Sells Organization ISO The document should be mai...

Page 7: ...on about the use of the POS terminal device CHART FOR STEP Due to keyboard differences actions will differ with from one POS terminal model to another Make sure to match the action with the correct model of the POS terminal being used Denotes a definition or explanation about the User Function in the step action table that follows Denotes an example of when why and what condition the User Function...

Page 8: ...uces operation of Application Management then it lists FAQ glossary and index This manual contains the following sections Chapter 1 General Information Chapter 2 PAX S300 POS Terminal Overview Chapter 3 How to Load Application Chapter 4 How to Do Transaction Chapter 5 Menu Option Chapter 6 Function Option Appendix A Troubleshooting Appendix B Quick Reference Guide Appendix C BroadPOS Server Commun...

Page 9: ...o text images logos and slogans is the property of PAX and is protected by U S and international copyright laws Any other use including the reproduction modification display or distribution of the content on this system is strictly prohibited No portion of this system may be reproduced duplicated copied sold resold or otherwise exploited for any purpose ...

Page 10: ...S300_V1 00 00 User Manual 1 5 Document Reference NO Title Date Version 1 2 3 ...

Page 11: ...ion 11 2 PAX S300 POS Terminal Overview 2 1 POS Terminal Screens The Screen representations shown in this manual are general screens The following is an example of the idle and Main Menu screens for each of the different LCD Display types A standard screen and font format should accommodate 21 characters per line and up to 5 lines of text Screen Display Function menu screen 2 Find 1 Review Functio...

Page 12: ... must be used exclusively for the operation of PAX programs It may not be duplicated published or disclosed without PAX prior written permission 12 Main Menu Screen 2 Operation Settings 5 Communication 3 Hosts Settings Main Menu 1 Merchant Settings 4 System Settings ...

Page 13: ...tion of PAX programs It may not be duplicated published or disclosed without PAX prior written permission 13 2 2 POS Terminal Communication Options The following chart summarizes the information regarding the different POS terminal model communication options MODEL LAND LINE GPRS CDMA ETHERNET WI FI S300 ...

Page 14: ...of S300 POS terminal KEY FUNCTION 0 9 Number Keys Enter any numeric value Or press for more than one time to enter characters of alphabet CANCEL Used to cancel an operation Access to the function menu for S300 CLEAR Erases character under the cursor when editing data ENTER Accepts entered information Executes the current function Access to the main application menu for S300 2 4 Keypad Layout Note ...

Page 15: ...prior written permission 15 3 How to Load Application Note This section explains the instructions for loading the applications as well as its parameters to the terminal Rebuild file system is recommended before loading new applications For Details of how to load application please refer to BroadPOS Terminal S300 Application Installation Guide or contact our support at support pax us ...

Page 16: ...entering transactions Example X goes to Y s shop to buy a cellphone After X finishes his shopping he goes to Y to pay for the cellphone X delivers his credit card to Y and Y processes a Credit Sale transaction on the S300 POS terminal and ECR When the transaction is complete Y returns the credit card to X X takes the card and cellphone and then goes home X Credit card holder Y Merchant of shop STE...

Page 17: ...l prompt for the manager password When prompted enter the password and then press ENTER CREDIT SALE Please Enter Password 4 Manually keying the full account number then press ENTER The account number must be between 13 16 digits It can also be input on ECR CREDIT SALE 5555 Please Enter The Card Number 5 If manually keyed the account number enter the four digit expiration date in MMYY format then p...
Page 18: ...eature of the Secure Card When prompted enter the corresponding digits then press ENTER CREDIT SALE Please Enter Last 4 Digits 7 Input the dollar amount of the transaction then press ENTER It can also be input on ECR CREDIT SALE 0 00 Please Enter Amount 8 This is a feature of the Table Mode only for Restaurant When prompted enter the table number then press ENTER It can be input on ECR CREDIT SALE...

Page 19: ...ests then press ENTER It can be input on ECR CREDIT SALE Please Enter Number of Guests 10 If the account number was manually entered the terminal will ask if the card is present Depending on the user s response the terminal will prompt for V code and other AVS settings Dependent upon Fraud Control settings 11 Press 1 if the card is present OR Press 2 if the card is not present IS CARD PRESENT 2 NO...

Page 20: ...3 Enter the street address then press ENTER i e If billing address is 123 Main St enter 123 CREDIT SALE Please Enter Your Address 14 Enter the ZIP Code then press ENTER i e If billing address ZIP code is 12345 0123 enter 12345 CREDIT SALE Please Enter Your Zip Code 15 This is a feature of the Commercial Cards Enter the additional information for commercial card then press ENTER CREDIT SALE Please ...

Page 21: ... CREDIT SALE Please Enter TAX Amount 17 The terminal contacts the Host Processor for an approval and delivers the message to ECR If the POS terminal failed to deliver the message to ECR POS terminal will generate a reversal automatically before next transaction 18 Cardholder signs his her name Transaction Approved Please Sign Your Name Cancel Accept 19 Terminal will display the message of reminder...

Page 22: ... close so he cannot void that transaction he should do a Credit Return to return money to X s Credit card account X delivers his credit card to Y Y process a Credit Return transaction Then X gives the cellphone back to Y and Y give the credit card to X X Credit card holder Y Merchant of shop STEP ACTION DISPLAY 1 Be sure the terminal is at the Idle Prompt 2 ECR sends message about the EDC Type and...

Page 23: ...the original transaction included a tip amount then the total amount should be entered as the return amount CREDIT RETURN 0 00 Please Enter Amount 4 This is a feature of the Table Mode only for Restaurant When prompted enter the table number then press ENTER It can be input on ECR CREDIT RETURN Please Enter Table Number 5 This is a feature of the Guest No Mode only for Restaurant When prompted ent...

Page 24: ...d then press ENTER CREDIT RETURN Please Enter Cust Code 7 This is a feature of the Commercial Cards Enter the TAX amount for commercial card then press ENTER CREDIT RETURN Please Enter TAX Amount 8 The terminal contacts the Host Processor for an approval and delivers the message to ECR If the POS terminal failed to deliver the message to ECR POS terminal will generate a reversal automatically befo...

Page 25: ...ly for the operation of PAX programs It may not be duplicated published or disclosed without PAX prior written permission 25 10 Terminal will display the message of reminder after the successful transaction ECR will print the receipt 11 POS terminal will go back to the idle screen 12 Stop ...

Page 26: ...l in advance X gave credit card information to the hotel clerk The clerk does Credit Pre Auth with the S300 POS terminal and ECR X has booked a room in the hotel and prepared to go on his travel X Credit card holder STEP ACTION DISPLAY 1 Be sure the terminal is at the Idle Prompt 2 ECR sends message about the EDC Type and Transaction Type to POS The EDC Type is CREDIT and the Transaction Type is A...

Page 27: ...the number of guests then press ENTER It can be input on ECR CREDIT AUTH Please Enter Number of Guests 7 If the account number was manually entered the terminal will ask if the card is present Depending on the user s response the terminal will prompt for V code and other AVS settings Dependent upon Fraud Control settings 8 The terminal contacts the Host Processor for an approval and delivers the m...

Page 28: ... and gives his Credit card to clerk The clerk does a Credit Post Auth on the S300 POS terminal and ECR After the transaction the clerk gives the key to X and leads X to his room X Credit card holder STEP ACTION DISPLAY 1 Be sure the terminal is at the Idle Prompt 2 ECR sends message about the EDC Type and Transaction Type to POS The EDC Type is CREDIT and the Transaction Type is POSTAUTH If ECR Si...

Page 29: ...e transaction and press Accept If the terminal does not find the transaction it displays NOT FOUND and backs to idle screen 5 Input the dollar amount of the transaction then press ENTER CREDIT POSTAUTH 0 00 Please Enter Amount 6 This is a feature of the Commercial Cards Enter the additional information for commercial card then press ENTER CREDIT POSTAUTH Please Enter Cust Code 7 This is a feature ...

Page 30: ... Processor for an approval and delivers the message to ECR If the POS terminal failed to deliver the message to ECR POS terminal will generate a reversal automatically before next transaction 9 Cardholder signs his her name Transaction Approved Please Sign Your Name Cancel Accept 10 Terminal will display the message of reminder after the successful transaction ECR will print the receipt 11 POS ter...

Page 31: ...V1 00 00 User Manual NOTE This document is CONFIDENTIAL and must be used exclusively for the operation of PAX programs It may not be duplicated published or disclosed without PAX prior written permission 31 ...

Page 32: ... code to clerk The clerk does a Credit Forced transaction After the transaction the clerk gives the key to X and leads X to his room X Credit card holder STEP ACTION DISPLAY 1 Be sure the terminal is at the Idle Prompt 2 ECR sends message about the EDC Type and Transaction Type to POS The EDC Type is CREDIT and the Transaction Type is FORCED If ECR Simulator sends Transaction Type 00 it means the ...

Page 33: ...sion 33 5 Input the authorization number previously obtained then press ENTER CREDIT FORCED Please Enter Auth Code 6 This is a feature of the Card Present Mode Press 1 if the card is present OR Press 2 if the card is not present IS CARD PRESENT 2 NO 1 Yes 7 This is a feature of the Commercial Cards Enter the additional information for commercial card then press ENTER CREDIT FORCED Please Enter Cus...

Page 34: ...rminal contacts the Host Processor for an approval and delivers the message to ECR If it is an offline transaction the terminal will store the information of the transaction and deliver the message to ECR If the POS terminal failed to deliver the message to ECR POS terminal will generate a reversal automatically before next transaction 10 Cardholder signs his her name Transaction Approved Please S...

Page 35: ...V1 00 00 User Manual NOTE This document is CONFIDENTIAL and must be used exclusively for the operation of PAX programs It may not be duplicated published or disclosed without PAX prior written permission 35 ...

Page 36: ...e should do a Credit Void Sale to void the previous transaction Y process a Credit Void Sale transaction Then X gives the cellphone back to Y and Y give the credit card to X X Credit card holder Y Merchant of shop STEP ACTION DISPLAY 1 Be sure the terminal is at the Idle Prompt 2 ECR sends message about the EDC Type and Transaction Type to POS The EDC Type is CREDIT and the Transaction Type is V S...

Page 37: ... for a SALE transaction that matches the criteria Once found confirm the transaction and press Accept If the terminal does not find the transaction it displays NOT FOUND and backs to idle screen 5 View the transaction on the display to verify it is the correct transaction then Press ENTER Transaction 0001 SALE Amount 0 00 Acount 1111 Cancel Accept 6 The terminal contacts the Host Processor for an ...

Page 38: ... X changes his mind that he wants the cellphone So X gives his card to Y and Y does a Credit Void Return on S300 POS terminal and ECR Y returns the credit card to X X takes the card and cellphone and then goes home X Credit card holder Y Merchant of shop STEP ACTION DISPLAY 1 Be sure the terminal is at the Idle Prompt 2 ECR sends message about the EDC Type and Transaction Type to POS The EDC Type ...

Page 39: ...ess Accept If the terminal does not find the transaction it displays NOT FOUND and backs to idle screen 5 View the transaction on the display to verify it is the correct transaction then Press ENTER Transaction 0001 RETURN Amount 0 00 Acount 1111 Cancel Accept 6 If it is an online transaction the terminal contacts the Host Processor for an approval and deliver the message to ECR ECR will print the...

Page 40: ... cancel the room He requires the clerk to return the money Then the clerk does a Credit Void Post Auth transaction to return the money to X s credit account Then X goes back to US X Credit card holder STEP ACTION DISPLAY 1 Be sure the terminal is at the Idle Prompt 2 ECR sends message about the EDC Type and Transaction Type to POS The EDC Type is CREDIT and the Transaction Type is V POST If ECR Si...

Page 41: ...a Post Auth transaction that matches the criteria Once found confirm the transaction and press Accept If the terminal does not find the transaction it displays NOT FOUND and backs to idle screen 5 View the transaction on the display to verify it is the correct transaction then Press ENTER Transaction 0001 POSTAUTH Amount 0 00 Acount 1111 Cancel Accept 6 The terminal contacts the Host Processor for...

Page 42: ...room He requires the clerk to return the money Then the clerk does a Credit Void Forced transaction to return the money to X s credit account Then X goes back to US X Credit card holder STEP ACTION DISPLAY 1 Be sure the terminal is at the Idle Prompt 2 ECR sends message about the EDC Type and Transaction Type to POS The EDC Type is CREDIT and the Transaction Type is V FRCD If ECR Simulator sends T...

Page 43: ...ss Accept If the terminal does not find the transaction it displays NOT FOUND and backs to idle screen 5 View the transaction on the display to verify it is the correct transaction then Press ENTER Transaction 0001 FORCED Amount 0 00 Acount 1111 Cancel Accept 6 If it is an online transaction the terminal contacts the Host Processor for an approval and deliver the message to ECR ECR will print the ...

Page 44: ...Sale transaction on the S300 POS terminal and ECR When the transaction is complete Y returns the debit card to X X takes the card and cellphone and then goes home X Debit card holder Y Merchant of shop STEP ACTION DISPLAY 1 Be sure the terminal is at the Idle Prompt 2 ECR sends message about the EDC Type and Transaction Type to POS The EDC Type is DEBIT and the Transaction Type is SALE If ECR Simu...

Page 45: ...a feature of the Table Mode When prompted enter the table number then press ENTER DEBIT SALE Please Enter Table Number 6 This is a feature of the Guest No Mode When prompted enter the number of guests then press ENTER DEBIT SALE Please Enter Number of Guests 7 This is a feature of the CashBack Prompt Choose an item of cash back DEBIT SALE 3 20 00 6 Other Amount 4 30 00 Please Select Cash Back 2 10...

Page 46: ...0 Please Enter Cash Back Amount 9 Input the PIN on the Keypad then press ENTER DEBIT SALE AMT 0 00 Please Enter Your PIN Please protect your PIN code during entry Do not let anyone see it 10 The terminal contacts the Host Processor for an approval and delivers the message to ECR ECR will print the receipt If the POS terminal failed to deliver the message to ECR POS terminal will generate a reversa...

Page 47: ...s debit card to Y Y process a Debit Return transaction Then X gives the cellphone back to Y and Y gives the debit card to X X Debit card holder Y Merchant of shop STEP ACTION DISPLAY 1 Be sure the terminal is at the Idle Prompt 2 ECR sends message about the EDC Type and Transaction Type to POS The EDC Type is DEBIT and the Transaction Type is RETURN If ECR Simulator sends Transaction Type 00 it me...

Page 48: ...his is a feature of the Guest No Mode When prompted enter the number of guests then press ENTER DEBIT RETURN Please Enter Number of Guests 8 Input the PIN on the Keypad then press ENTER DEBIT RETURN AMT 0 00 Please Enter Your PIN Please protect your PIN code during entry Do not let anyone see it 9 The terminal contacts the Host Processor for an approval and delivers the message to ECR ECR will pri...

Page 49: ...is document is CONFIDENTIAL and must be used exclusively for the operation of PAX programs It may not be duplicated published or disclosed without PAX prior written permission 49 10 POS terminal will go back to the idle screen 11 Stop ...

Page 50: ...hone X delivers his EBT card to Y and Y processes an EBT Sale transaction on the S300 POS terminal and ECR When the transaction is complete Y returns the EBT card to X X takes the card and cellphone and then goes home X EBT card holder Y Merchant of shop STEP ACTION DISPLAY 1 Be sure the terminal is at the Idle Prompt 2 ECR sends message about the EDC Type and Transaction Type to POS The EDC Type ...

Page 51: ...the terminal will prompt for the manager password When prompted enter the password and then press ENTER EBT SALE Please Enter Password 2 3 2 1 Manually keying the full account number then press ENTER The account number must be between 8 19 digits EBT SALE 5555 Please Enter The Card Number 2 4 If manually keyed the account number enter the four digit expiration date in MMYY format then press ENTER ...
Page 52: ... Voucher Manual Entry only EBT SALE Please Select Account Type 1 FoodStamp 2 CashBenefit 3 Voucher 4 Input the dollar amount of the transaction then press ENTER EBT SALE 0 00 Please Enter Amount 5 If Selected Then Food Stamp Proceed to Step 7 Cash Benefit Proceed to Step 6 7 Voucher Skip to Step 9 6 The terminal will now Prompt you to enter a Cash Back amount or press ENTER to bypass DEBIT SALE 3 ...

Page 53: ...Keypad then press ENTER EBT SALE AMT 0 00 Please Enter Your PIN Please protect your PIN code during entry Do not let anyone see it 8 If using an external PIN pad the PIN Entry prompt will be displayed on the PIN pad instead of the terminal EBT SALE AMT 0 00 Please Enter PIN On the PIN Pad Please protect your PIN code during entry Do not let anyone see it 9 Enter the Voucher number then press ENTER...

Page 54: ...rmission 54 10 Enter the Authorization number then press ENTER EBT SALE Please Enter Auth Code 11 The terminal contacts the Host Processor for an approval and delivers the message to ECR ECR will print the receipt If the POS terminal failed to deliver the message to ECR POS terminal will generate a reversal automatically before next transaction 12 POS terminal will go back to the idle screen 13 St...

Page 55: ...transaction Then X gives the apples back to Y and Y gives the EBT card to X X EBT card holder Y Merchant of shop STEP ACTION DISPLAY 1 Be sure the terminal is at the Idle Prompt 2 ECR sends message about the EDC Type and Transaction Type to POS The EDC Type is EBT and the Transaction Type is RETURN If ECR Simulator sends Transaction Type 00 it means the order of Transaction Type is not available p...

Page 56: ...Keypad then press ENTER EBT RETURN AMT 0 00 Please Enter Your PIN Please protect your PIN code during entry Do not let anyone see it 5 The terminal contacts the Host Processor for an approval and delivers the message to ECR ECR will print the receipt If the POS terminal failed to deliver the message to ECR POS terminal will generate a reversal automatically before next transaction 6 POS terminal w...

Page 57: ... knows the balance amount of his EBT card X EBT card holder Y Merchant of shop STEP ACTION DISPLAY 1 Be sure the terminal is at the Idle Prompt 2 ECR sends message about the EDC Type and Transaction Type to POS The EDC Type is EBT and the Transaction Type is BALANCE If ECR Simulator sends Transaction Type 00 it means the order of Transaction Type is not available press on the screen to select BALA...

Page 58: ...ed without PAX prior written permission 58 5 Input the PIN on the Keypad then press ENTER EBT BALANCE AMT 0 00 Please Enter Your PIN Please protect your PIN code during entry Do not let anyone see it 6 The terminal contacts the Host Processor for an approval and deliver the message to ECR ECR will print the receipt 7 POS terminal will go back to the idle screen 8 Stop ...

Page 59: ...ction on the S300 POS terminal and ECR When the transaction is complete Y returns the gift card to X X takes the card and apples and then goes home X Gift card holder Y Merchant of shop STEP ACTION DISPLAY 1 Be sure the terminal is at the Idle Prompt 2 ECR sends message about the EDC Type and Transaction Type to POS The EDC Type is GIFT and the Transaction Type is SALE If ECR Simulator sends Trans...

Page 60: ...the Account Number 3 If the security for Card Manually Entry is on the terminal will prompt for the manager password When prompted enter the password and then press ENTER GIFT SALE Please Enter Password 4 Manually keying the full account number then press ENTER The account number must be between 13 16 digits GIFT SALE 5555 Please Enter The Card Number 5 Input the dollar amount of the transaction t...
Page 61: ...d or disclosed without PAX prior written permission 61 6 The terminal contacts the Host Processor for an approval and delivers the message to ECR ECR will print the receipt If the POS terminal failed to deliver the message to ECR POS terminal will generate a reversal automatically before next transaction 7 POS terminal will go back to the idle screen 8 Stop ...

Page 62: ...ess a Gift Return transaction Then X gives the apples back to Y and Y gives the gift card to X X Gift card holder Y Merchant of shop STEP ACTION DISPLAY 1 Be sure the terminal is at the Idle Prompt 2 ECR sends message about the EDC Type and Transaction Type to POS The EDC Type is GIFT and the Transaction Type is RETURN If ECR Simulator sends Transaction Type 00 it means the order of Transaction Ty...

Page 63: ...number must be between 13 16 digits GIFT RETURN 5555 Please Enter The Card Number 5 Input the dollar amount of the transaction then press ENTER GIFT RETURN 0 00 Please Enter Amount 6 The terminal contacts the Host Processor for an approval and delivers the message to ECR ECR will print the receipt If the POS terminal failed to deliver the message to ECR POS terminal will generate a reversal automa...

Page 64: ...PLAY 1 Be sure the terminal is at the Idle Prompt 2 ECR sends message about the EDC Type and Transaction Type to POS The EDC Type is GIFT and the Transaction Type is ISSUE If ECR Simulator sends Transaction Type 00 it means the order of Transaction Type is not available press on the screen to select ISSUE on S300 Notice If needed message including Transaction Type Amount Tip Account Clerk Server I...

Page 65: ... number must be between 13 16 digits GIFT ISSUE 5555 Please Enter The Card Number 5 Input the dollar amount of the transaction then press ENTER GIFT ISSUE 0 00 Please Enter Amount 6 The terminal contacts the Host Processor for an approval and delivers the message to ECR ECR will print the receipt If the POS terminal failed to deliver the message to ECR POS terminal will generate a reversal automat...

Page 66: ... Add Value on S300 POS terminal and ECR X Gift card holder Y Merchant of shop STEP ACTION DISPLAY 1 Be sure the terminal is at the Idle Prompt 2 ECR sends message about the EDC Type and Transaction Type to POS The EDC Type is GIFT and the Transaction Type is ADD If ECR Simulator sends Transaction Type 00 it means the order of Transaction Type is not available press on the screen to select ADD on S...

Page 67: ...nt number must be between 13 16 digits GIFT ADD 5555 Please Enter The Card Number 5 Input the dollar amount of the transaction then press ENTER GIFT ADD 0 00 Please Enter Amount 6 The terminal contacts the Host Processor for an approval and delivers the message to ECR ECR will print the receipt If the POS terminal failed to deliver the message to ECR POS terminal will generate a reversal automatic...

Page 68: ...e balance on his card X Gift card holder Y Merchant of shop STEP ACTION DISPLAY 1 Be sure the terminal is at the Idle Prompt 2 ECR sends message about the EDC Type and Transaction Type to POS The EDC Type is GIFT and the Transaction Type is BALANCE If ECR Simulator sends Transaction Type 00 it means the order of Transaction Type is not available press on the screen to select BALANCE on S300 Notice...

Page 69: ...AX prior written permission 69 4 Manually keying the full account number then press ENTER The account number must be between 13 16 digits It can also be input on ECR GIFT BALANCE 5555 Please Enter The Card Number 5 The terminal contacts the Host Processor for an approval and deliver the message to ECR ECR will print the receipt 6 POS terminal will go back to the idle screen 7 Stop ...

Page 70: ...on the S300 POS terminal X Gift card holder Y Merchant of shop STEP ACTION DISPLAY 1 Be sure the terminal is at the Idle Prompt 2 ECR sends message about the EDC Type and Transaction Type to POS The EDC Type is GIFT and the Transaction Type is VOID If ECR Simulator sends Transaction Type 00 it means the order of Transaction Type is not available press on the screen to select VOID on S300 Notice If...

Page 71: ...e Card Number 5 Input the transaction to be voided CREDIT VOID Please Enter Trans 6 The terminal searches the database for a transaction that matches the criteria Once found confirm the transaction and press Accept If the terminal does not find the transaction it displays NOT FOUND and backs to idle screen 7 View the transaction on the display to verify it is the correct transaction then Press ENT...

Page 72: ...his document is CONFIDENTIAL and must be used exclusively for the operation of PAX programs It may not be duplicated published or disclosed without PAX prior written permission 72 9 POS terminal will go back to the idle screen 10 Stop ...

Page 73: ...e is CREDIT and the Transaction Type is SALE If ECR Simulator sends Transaction Type 00 it means the order of Transaction Type is not available press on the screen to select SALE on S300 Notice If needed message including Transaction Type Amount Tip Cust Tax Account Exp date CVV AVS Invoice Table Guest Clerk ID can be input through ECR 3 Swipe the Card or manually enter the Account Number and Exp ...

Page 74: ...nter the Customer Code then press ENTER OR Press ENTER to bypass CREDIT SALE Please Enter Cust Code 7 Enter the Tax Amount then press ENTER OR Press ENTER to bypass Continue to next step if tax amount was entered or skip to Step 9 if tax amount was bypassed CREDIT SALE Please Enter TAX Amount 8 If the entered tax amount exceeds the user input amount the terminal will display the warning CREDIT SAL...

Page 75: ...ed published or disclosed without PAX prior written permission 75 9 Enter the correct tax amount then press ENTER OR Press ENTER to bypass CREDIT SALE Please Enter TAX Amount 10 The terminal contacts the Host Processor for an approval and deliver the message to ECR ECR will print the receipt 11 POS terminal will go back to the idle screen 12 Stop ...

Page 76: ...ON DISPLAY 1 Be sure the terminal is at the Idle Prompt 2 ECR sends message about Tip Adjust to POS terminal including Transaction Type 06 and tip amount 3 Select the Tip Type accordingly CREDIT ADJUST 2 By Trans 3 By Card Type Please Select Tip Type 1 Scroll Untipped 4 By Card Num 4 Press 1 for untipped transactions Skip to Step 8 OR Press 2 to find transactions by Transactions Number Skip to Ste...

Page 77: ... a Card Type and proceed to Step 8 CREDIT ADJUST Please Select Card Type 1 Visa 2 MasterCard 6 enRoute 5 Discover 4 DCI DISC 3 AMEX 7 Input the last 4 digits of the card and proceed to Step 8 CREDIT ADJUST Please Enter Last 4 Digits 8 The terminal searches the database for transactions that matches the criteria Once found scroll to find the specific one which you want to adjust and press Accept If...

Page 78: ...ence of reprogramming You can manage the terminal to work best for your business The menus are divided into main menu options which have submenu options You can access your terminal s menu by pressing the ENTER button 5 1 Accessing the Main Menu STEP ACTION DISPLAY 1 Press ENTER to access the Main Menu Press the number on the keypad that corresponds with your selection 2 Operation Settings 5 Commu...

Page 79: ...ms available in the terminal s main menu are NO NAME DESCRIPTION 1 Merchant Settings Set security authorization Set batch time and Set additional prompts 2 Operation Settings Buzzer Setup Set operation mode Halo Setup 3 Hosts Settings View or modify host parameters host URL parameters and AutoDial Setup 4 System Settings Time Date Set working Mode key injection App management etc 5 Communications ...

Page 80: ...on of PAX programs It may not be duplicated published or disclosed without PAX prior written permission 80 5 3 Merchant Settings This menu contains four different functions that can be changed manually if necessary They are MENU DESCRIPTION Authorizations Security Settings Set Batch Time Additional Prompts ...

Page 81: ...es are disabled by the Host and cannot be enabled Example As the Manager of the store I don t want anyone to process a Void or Return but me Set the Void and Return functions to Manager Only The password will then be required to process those transactions Remember the password is either the default current date MMDDYYYY or the user specified 1 to 16 digit password STEP ACTION DISPLAY 1 From the Ma...

Page 82: ... or disclosed without PAX prior written permission 82 Transaction Type Continued STEP ACTION DISPLAY 3 Input the Password and press ENTER Please Enter Password 4 Press 1 to edit authorization for Transaction Types 1 Trans Types Authorization 2 Card Types 5 Press the number corresponding with your selection 2 DEBIT 3 EBT Select Payment Method 1 CREDIT 4 GIFT ...
Page 83: ...sion 83 6 Scroll to select the Transaction Type Press the number corresponding with your selection 2 FORCED EN 5 V SALE EN 3 AUTH EN CREDIT 1 RETURN EN 4 POSTAUTH EN 6 V RTRN EN Information in the parenthesis is the current setting EN Always Enabled DIS Disabled MGR Password Protected 7 Press the number corresponding with your selection CREDIT RETURN 2 1 Disabled 2 Always Enabled 3 Pswd Protected ...

Page 84: ... and etc Example We are not set up to accept American Express cards but sometimes my cashier takes them by mistake which is a problem Disable the AMEX card type and the terminal will post an error as soon as the card is swiped STEP ACTION DISPLAY 1 From the Main menu press 1 for Merchant Settings 2 Operation Settings 5 Communication 3 Host Settings Main Menu 1 Merchant Settings 4 System Settings 2...

Page 85: ...shed or disclosed without PAX prior written permission 85 3 Input the Password and press ENTER Please Enter Password 4 Press 2 to edit authorization for Card Types 1 Trans Types Authorization 2 Card Types 5 Press accordingly to edit choose for Card Types Please Choose Card Type 1 Visa EN 2 MasterCard EN 6 enRoute EN 5 Discover EN 4 DCI DISC EN 3 AMEX EN ...

Page 86: ...ly for the operation of PAX programs It may not be duplicated published or disclosed without PAX prior written permission 86 6 Press the number corresponding with your selection Visa 2 2 Always Enabled 1 Disabled An EN indicates the card type is enabled and a DIS indicates disabled 7 Stop ...

Page 87: ...nd to be compared with the last four digits swiped Default setting All Digits Manually enter the complete account number and to be compared with the account number swiped Display Account Account number swiped is displayed on screen and to be compared against the embossed account number by the user Last 4 Digits Display Account Manually enter last four digits of account number to be compared with t...

Page 88: ...ceipt of the terminal The new password should be a series of one to sixteen non sequential numbers that can be easily remembered Using birthdays or anniversaries is not advised as unauthorized persons can easily discover these passwords If the new User Password is forgotten download the Parameters to re establish the default password STEP ACTION DISPLAY 1 From the Main menu press 1 for Merchant Se...

Page 89: ...hout PAX prior written permission 89 3 From the Security Switch menu press 1 for User Password 2 Batch 5 Card Manual Entry 3 Account Truncation Security Switch 1 User Password 4 Secure Card 4 Press ENTER to change the password Change Password NO Yes 5 The password is anything other than the default password MMDDYYYY enter the OLD password then press ENTER Enter Old Password ...

Page 90: ...ration of PAX programs It may not be duplicated published or disclosed without PAX prior written permission 90 6 Enter the NEW password then press ENTER Note The password must be one to sixteen digits in length Enter New Password 7 Re enter the NEW password then press ENTER Re enter New Password 8 Stop ...

Page 91: ...he Batch function Example I want to make sure that no one closes the batch but me Set the Batch function to be password protected STEP ACTION DISPLAY 1 From the Main menu press 1 for Merchant Settings 2 Operation Settings 5 Communication 3 Host Settings Main Menu 1 Merchant Settings 4 System Settings 2 From the Merchant Settings menu press 2 to access Security Settings 2 Security Settings 4 Additi...

Page 92: ...sclosed without PAX prior written permission 92 3 Press 2 to secure the Batch function 2 Batch 5 Card Manual Entry 3 Account Truncation Security Switch 1 User Password 4 Secure Card 4 Input the Password and press ENTER Please Enter Password 5 Press 2 to Password Protect the function OR Press 1 to enable the function Batch 1 1 Always Enabled 2 Pswd Protected 6 Stop ...

Page 93: ...ceipt Changing the Full on Merchant Receipt setting to disable will print the last four digits on the Merchant s receipt STEP ACTION DISPLAY 1 From the Main menu press 1 for Merchant Settings 2 Operation Settings 5 Communication 3 Host Settings Main Menu 1 Merchant Settings 4 System Settings 2 From the Merchant Settings menu press 2 to access Security Settings 2 Security Settings 4 Additional Prom...

Page 94: ... duplicated published or disclosed without PAX prior written permission 94 4 Scroll to select the EDC type or press 1 for all EDC types 3 DEBIT 4 EBT Select Payment Method 2 CREDIT 5 GIFT 1 ALL 5 Enter the password then press ENTER Please Enter Password 6 Scroll to select accordingly then press ENTER Account Truncation 1 OFF 2 ON 7 Stop ...

Page 95: ...the number on the front of the card STEP ACTION DISPLAY 1 From the Merchant Settings menu press 2 to access Security Settings 2 Operation Settings 5 Communication 3 Host Settings Main Menu 1 Merchant Settings 4 System Settings 2 From the Merchant Settings menu press 2 to access Security Settings 2 Security Settings 4 Additional Prompts Merchant Params 1 Authorizations 3 Set Batch Time 3 Press 4 fo...

Page 96: ...rograms It may not be duplicated published or disclosed without PAX prior written permission 96 4 The current setting is displayed in the first line Scroll to select the option then press ENTER 2 Last 4 Digits 5 Last4dgtsAndDisplay 3 All Digits Secure Card 1 1 No Security 4 Display Account 6 AllDgtsAndDisplay 5 Stop ...

Page 97: ... entry of a credit transaction STEP ACTION DISPLAY 1 From the Merchant Settings menu press 2 to access Security Settings 2 Operation Settings 5 Communication 3 Host Settings Main Menu 1 Merchant Settings 4 System Settings 2 From the Merchant Settings menu press 2 to access Security Settings 2 Security Settings 4 Additional Prompts Merchant Params 1 Authorizations 3 Set Batch Time 3 Press 5 for Car...

Page 98: ... published or disclosed without PAX prior written permission 98 4 Press 1 for all EDC types OR Select the specific EDC type 3 EBT Select Payment Method 2 CREDIT 4 GIFT 1 ALL 5 Enter the password then press ENTER Please Enter Password 6 Scroll to select the option then press ENTER Card Manual Entry 1 Disabled 2 Always Enabled 3 Pswd Protected 7 Stop ...

Page 99: ...d during this process Please note the batched transactions are cleared from memory with the first transaction of the new batch Example The AutoBatch report is printing in the middle of the day I accessed the Set Batch Time function and changed the time Now the report prints after we have closed for the day STEP ACTION DISPLAY 1 From the Main menu press 1 for Merchant Settings 2 Operation Settings ...

Page 100: ...ams It may not be duplicated published or disclosed without PAX prior written permission 100 3 Input the Password and press ENTER Please Enter Password 4 Scroll to select the host then press ENTER 5 Press the number corresponding with your selection If you select 2 go to 6 Or you select 1 go to 7 Auto Batch 2 1 OFF 2 ON ...

Page 101: ...d must be used exclusively for the operation of PAX programs It may not be duplicated published or disclosed without PAX prior written permission 101 6 Input the desired time in military 24 hour time and press ENTER Transaction Payment Batch Time HH MM HH MM 7 Stop ...

Page 102: ...ey are MENU DESCRIPTION CashBack Prompt Gift Sale Mode Table Mode Guest No Mode 5 3 4 1 CashBack Prompt Note CashBack Prompt can be disabled enabled terminal prompts for cashback amount STEP ACTION DISPLAY 1 From the Main menu press 1 for Merchant Settings 2 Operation Settings 5 Communication 3 Host Settings Main Menu 1 Merchant Settings 4 System Settings 2 From the Merchant Settings menu press 4 ...

Page 103: ...shed or disclosed without PAX prior written permission 103 3 Input the Password and press ENTER Please Enter Password 4 Press 1 for CashBack Prompt Additionnal Prompts 1 CashBack Prompt 2 Gift Sale Mode 3 Table Mode 5 The defaulting setting is OFF Press 1 to disable CashBack Prompt OR Press 2 to enable CashBack Prompt CashBack Prompt 1 1 OFF 2 ON 6 Stop ...

Page 104: ...odes which can be set as a default setting Or select Prompt to ask user which mode it is when doing the transaction STEP ACTION DISPLAY 1 From the Main menu press 1 for Merchant Settings 2 Operation Settings 5 Communication 3 Host Settings Main Menu 1 Merchant Settings 4 System Settings 2 From the Merchant Settings menu press 4 for Additional Prompts 2 Security Settings 4 Additional Prompts Mercha...

Page 105: ...may not be duplicated published or disclosed without PAX prior written permission 105 4 Press 2 for Gift Sale Mode Additionnal Prompts 1 CashBack Prompt 2 Gift Sale Mode 3 Table Mode 5 The defaulting setting is 2 Press 1 for Sale OR Press 2 for NoNSFSale OR Press 3 for Prompt Gift Sale Mode 1 1 Sale 2 NoNSFSale 3 Prompt 6 Stop ...

Page 106: ...ant Mode Table Mode is effective in Credit Sale Credit Return Credit Auth Debit Sale and Debit Return STEP ACTION DISPLAY 1 From the Main menu press 1 for Merchant Settings 2 Operation Settings 5 Communication 3 Host Settings Main Menu 1 Merchant Settings 4 System Settings 2 From the Merchant Settings menu press 4 for Additional Prompts 2 Security Settings 4 Additional Prompts Merchant Params 1 Au...

Page 107: ...X programs It may not be duplicated published or disclosed without PAX prior written permission 107 4 Press 3 for Table Mode Additionnal Prompts 1 CashBack Prompt 2 Gift Sale Mode 3 Table Mode 5 The defaulting setting is 2 Press 1 to enable Table Mode OR Press 2 to disable Table Mode Table Mode 2 1 ON 2 OFF 6 Stop ...

Page 108: ...st No Mode can be enabled and disabled in Restaurant Mode STEP ACTION DISPLAY 1 From the Main menu press 1 for Merchant Settings 2 Operation Settings 5 Communication 3 Host Settings Main Menu 1 Merchant Settings 4 System Settings 2 From the Merchant Settings menu press 4 for Additional Prompts 2 Security Settings 4 Additional Prompts Merchant Params 1 Authorizations 3 Set Batch Time 3 Input the Pa...

Page 109: ...ated published or disclosed without PAX prior written permission 109 4 Turn to the next page by pressing the arrow button on the right of the screen and press 1 for Guest No Mode Additionnal Prompts 1 Guest No Mode 5 The defaulting setting is 2 Press 1 to enable Guest No Mode OR Press 2 to disable Guest No Mode Guest No Mode 2 1 ON 2 OFF 6 Stop ...

Page 110: ...DESCRIPTION Buzzer Setup Operation Mode Halo Setup 5 4 1 Buzzer Setup Note This feature enables and disables the terminal s built in buzzer which sounds a tone when specific functions are performed or buttons pressed Example I would like to know when the Menu button is pressed so I enabled the Buzzer function The terminal now beeps whenever the Menu button is pressed STEP ACTION DISPLAY 1 From the...

Page 111: ... written permission 111 2 From the Operation Settings menu press 1 for Buzzer Setup 2 Operation Mode 3 Halo Setup Operation Settings 1 Buzzer Setup 3 Press the number corresponding with your selection If you select 1 go to 4 Or you select 2 go to 5 Buzzer Setup 1 Key Tone 2 Swipe Tone 4 Default setting is ON Press 1 to disable the buzzer OR Press 2 to enable the buzzer Key Tone 1 OFF 2 ON ...

Page 112: ...d must be used exclusively for the operation of PAX programs It may not be duplicated published or disclosed without PAX prior written permission 112 5 Default setting is ON Press 1 to disable the buzzer OR Press 2 to enable the buzzer Swipe Tone 1 OFF 2 ON 6 Stop ...

Page 113: ...fter working in Demo Mode make sure to return to Normal Mode in order to perform real transactions Example I have a new employee that needs to be trained on the POS Terminal I ll put the terminal in Demo Mode That way the new employee can be trained without interfering with business STEP ACTION DISPLAY 1 From the Main menu press 2 for Operation Settings 2 Operation Settings 5 Communication 3 Host ...

Page 114: ...icated published or disclosed without PAX prior written permission 114 3 Input the Password and press ENTER Please Enter Password 4 The defaulting setting is Normal Mode Press the number corresponding with your selection Operation Mode 1 1 Nomal Mode 2 Demo Mode 5 Press ENTER to accept the change OR Press CANCEL to cancel Are You Sure NO Yes ...

Page 115: ...ENTIAL and must be used exclusively for the operation of PAX programs It may not be duplicated published or disclosed without PAX prior written permission 115 6 If Multi Merchant is enabled demo mode cannot be enabled No Demo Mode For Multi Merchant 7 Stop ...

Page 116: ...nd cash back on debit and EBT Cash Benefit transactions Example Store policy is not to allow a Cash Back amount on a debit sale to exceed 20 If I set the cash back Halo of that amount my new counter people will not be able to give back an amount greater than 20 in error STEP ACTION DISPLAY 1 From the Main menu press 2 for Operation Settings 2 Operation Settings 5 Communication 3 Host Settings Main...

Page 117: ...AX prior written permission 117 3 Input the Password and press ENTER Please Enter Password 4 The default setting is OFF Press the number corresponding with your selection If the Halo was disabled continue with step 6 HALO For Sale 2 1 OFF 2 ON 5 The current HALO is displayed in the first line Input the new maximum amount for a sale then press ENTER HALO For Sale 0 00 0 00 New Rate ...

Page 118: ...118 6 The default setting is OFF Press the number corresponding with your selection If the Halo was disabled continue with step 8 HALO For Return 2 1 OFF 2 ON 7 The current HALO is displayed in the first line Input the new maximum amount for a return then press ENTER HALO For Return 0 00 0 00 New Rate 8 The default setting is OFF Press the number corresponding with your selection Cash Back HALO 2 ...

Page 119: ...lusively for the operation of PAX programs It may not be duplicated published or disclosed without PAX prior written permission 119 9 The current HALO is displayed in the first line Input the new maximum amount for cash back then press ENTER Cash Back HALO 0 00 0 00 New Rate 10 Stop ...

Page 120: ...view edit the Host Parameters Host URL parameters and set the Auto Dial parameters MENU DESCRIPTION Hosts Parameters Host URL Params AutoDial Setup 5 5 1 Host Parameters Note This function is used for editing host parameters STEP ACTION DISPLAY 1 From the main menu press 3 to enter Host Settings 2 Operation Settings 5 Communication 3 Host Settings Main Menu 1 Merchant Settings 4 System Settings 2 ...

Page 121: ...d published or disclosed without PAX prior written permission 121 3 From the Hosts Settings menu press 1 to enter Host Parameters 2 Hosts URL Params Host Settings 1 Hosts Parameters 3 AutoDial Setup 4 Scroll to select the host then press ENTER 5 Press the number corresponding with your selection 2 Bank ID HOST PARAMS 1 Merchant ID 3 Terminal Type ...

Page 122: ...exclusively for the operation of PAX programs It may not be duplicated published or disclosed without PAX prior written permission 122 6 Input the desired Merchant ID Bank ID Terminal Type then press ENTER This is a sample of inputting Terminal ID 000000000000 Merchant ID 7 Stop ...

Page 123: ...e This function is used for URL and Port editing manually in the terminal STEP ACTION DISPLAY 1 From the main menu press 3 to enter Host Settings 2 Operation Settings 5 Communication 3 Host Settings Main Menu 1 Merchant Settings 4 System Settings 2 Input the Password and press ENTER Please Enter Password 3 From the Hosts Settings menu press 2 to enter Hosts URL Params 2 Hosts URL Params Host Setti...

Page 124: ...e duplicated published or disclosed without PAX prior written permission 124 4 Scroll to select the host then press ENTER 5 Press the number corresponding with your selection 2 Batch URL s Transaction Payment URL Type 1 Auth URLs 6 Press the number corresponding with your selection 2 Host URL 2 Transaction Payment Edit URL 1 Host URL 1 ...

Page 125: ...disclosed without PAX prior written permission 125 7 Press the number corresponding with your selection If you select 1 continue to 8 If you select 2 continue to 9 2 Port Transaction Payment URL Settings 1 URL 8 Input the desired URL address then press ENTER Gatewaystage itstgate com Host URL 9 Input the desired port number then press ENTER 433 Host Port 10 Stop ...

Page 126: ...ature allows the merchant s terminal to automatically contact the Host and settle the transactions STEP ACTION DISPLAY 1 From the main menu press 3 to enter Host Settings 2 Operation Settings 5 Communication 3 Host Settings Main Menu 1 Merchant Settings 4 System Settings 2 Input the Password and press ENTER Please Enter Password 3 From the Hosts Settings menu press 1 to enter AutoDial Setup 2 Host...

Page 127: ...may not be duplicated published or disclosed without PAX prior written permission 127 4 Select the corresponding Host 5 The default setting is 2 Press 1 to disable AutoDial and skip to Step 9 OR Press 2 to enable AutoDial and go forward AUTODIAL SETUP 2 1 OFF 2 ON 6 Set the Start AutoDial time and press ENTER 03 00 START AD AT ...

Page 128: ... be used exclusively for the operation of PAX programs It may not be duplicated published or disclosed without PAX prior written permission 128 7 Set the Stop AutoDial time and press ENTER 05 00 STOP AD AT 8 Set the AutoDial Interval and press ENTER 5 AD INTERVAL 9 Stop ...

Page 129: ...ing Mode Keys Injection App Management 5 6 1 Date Time Setup Note All POS Terminals include an internal clock that keeps the time and date The clock keeps time in a 24 hour or military format This function sets the internal clock STEP ACTION DISPLAY 1 From the Main Menu press 4 to access System Settings 2 Operation Settings 5 Communication 3 Host Settings Main Menu 1 Merchant Settings 4 System Set...

Page 130: ...out PAX prior written permission 130 3 Verify the current Date is incorrect Input the correct date using MM DD YY format and press ENTER 01 01 2011 Please Enter Date MM DD YYYY 4 Verify the current Time is incorrect Input the correct hour and minutes using Military 24 hour Format 12 00 00 Please Enter Time HH MM SS 5 Verify the Date time is now correct and press CANCEL 6 Stop ...

Page 131: ...ons Fraud Control 5 6 2 1 Tip Options Note These features listed below provide the user with multiple Tip options The following sub menu options can be found in the Tip Options menu MENU DESCRIPTION EDC Tip 5 6 2 1 1 EDC Tip Note EDC Tip allows the user to enable disable the active tips for individual EDC types STEP ACTION DISPLAY 1 From the Main Menu press 4 to access System Settings 2 Operation ...

Page 132: ...d or disclosed without PAX prior written permission 132 2 From the System Settings menu press 2 for Working Mode 2 Working Mode 3 Keys Injection System Options 1 Date Time Setup 4 App Management 3 From the WORKING MODE Settings menu press 1 for Tip Options 2 Fraud Control Working Mode 1 Tip Options 4 Input the Password and press ENTER Please Enter Password ...

Page 133: ... without PAX prior written permission 133 5 Press 1 for EDC Tips Tip Options 1 EDC Tip 6 Press the number corresponding with your selection 2 DEBIT 3 EBT Select Payment Method 1 CREDIT 4 GIFT 7 Current setting is displayed in the first line Press 1 to disable tips for the selected EDC type OR Press 2 to enable tips for the selected EDC type CREDIT Tip 1 1 OFF 2 ON 8 Stop ...

Page 134: ...nu MENU DESCRIPTION AVS On Swipe AVS On Card Present AVS on Card Not Present Card Present V Code 5 6 2 2 1 AVS On Swipe Note 4 AVS On Swipe enables AVS prompts on all swiped transactions for individual Credit Card types or for all card types 5 Example The Merchant does not want any AVS prompts when the card is swiped The AVS On Swipe setting will be changed to None This will disable the AVS prompt...

Page 135: ...d without PAX prior written permission 135 1 From the Main Menu press 4 for System Settings 2 Operation Settings 5 Communication 3 Host Settings Main Menu 1 Merchant Settings 4 System Settings 2 Press 2 for Working Mode 2 Working Mode 3 Keys Injection System Options 1 Date Time Setup 4 App Management 3 Press 2 for Fraud Control 2 Fraud Control Working Mode 1 Tip Options ...

Page 136: ...lished or disclosed without PAX prior written permission 136 4 Input the Password and press ENTER Please Enter Password 5 Press 1 to set the AVS On Swipe 2 AVS On CardPrsnt 5 V Code 3 AVS OnCardNotPrsnt Fraud Control 1 AVS On Swipe 4 Card Present 6 Press 1 for all card types Please Select Card Type 2 Visa 3 MasterCard 1 ALL 6 Discover 5 DCI DISC 4 AMEX ...

Page 137: ...must be used exclusively for the operation of PAX programs It may not be duplicated published or disclosed without PAX prior written permission 137 7 Press the number that corresponds to the desired AVS Prompt 2 Address 3 Zip AVS On Swipe 1 None 4 Address Zip 8 Stop ...

Page 138: ...e card is present for individual Credit Card types or for all card types OPTION DEFINITION None There will be no AVS prompts Address AVS will prompt for address only Zip AVS will prompt for zip code only default Address Zip AVS will prompt for address and zip code STEP ACTION DISPLAY 1 From the Main Menu press 4 for System Settings 2 Operation Settings 5 Communication 3 Host Settings Main Menu 1 M...

Page 139: ...e duplicated published or disclosed without PAX prior written permission 139 3 Press 2 for Fraud Control 2 Fraud Control Working Mode 1 Tip Options 4 Input the Password and press ENTER Please Enter Password 5 Press 2 to set the AVS On CardPrsnt 2 AVS On CardPrsnt 5 V Code 3 AVS OnCardNotPrsnt Fraud Control 1 AVS On Swipe 4 Card Present ...

Page 140: ...rams It may not be duplicated published or disclosed without PAX prior written permission 140 6 Press 1 for all card types Please Select Card Type 2 Visa 3 MasterCard 1 ALL 6 Discover 5 DCI DISC 4 AMEX 7 Press the number that corresponds to the desired AVS Prompt 2 Address 3 Zip AVS On Swipe 1 None 4 Address Zip 8 Stop ...

Page 141: ...types Example For added security the AVS feature that prompts for Address and Zip on all manual entries where the card is not present should be enabled OPTION DEFINITION None There will be no AVS prompts Address AVS will prompt for address only Zip AVS will prompt for zip code only Address Zip AVS will prompt for address and zip code default STEP ACTION DISPLAY 1 From the Main Menu press 4 for Sys...

Page 142: ... duplicated published or disclosed without PAX prior written permission 142 3 Press 2 for Fraud Control 2 Fraud Control Working Mode 1 Tip Options 4 Input the Password and press ENTER Please Enter Password 5 Press 3 to set the AVS OnCardNotPrsnt 2 AVS On CardPrsnt 5 V Code 3 AVS OnCardNotPrsnt Fraud Control 1 AVS On Swipe 4 Card Present ...

Page 143: ...rams It may not be duplicated published or disclosed without PAX prior written permission 143 6 Press 1 for all card types Please Select Card Type 2 Visa 3 MasterCard 1 ALL 6 Discover 5 DCI DISC 4 AMEX 7 Press the number that corresponds to the desired AVS Prompt 2 Address 3 Zip AVS On Swipe 1 None 4 Address Zip 8 Stop ...

Page 144: ...e assured that the AVS prompts are always displayed I will set the Card Present option to No If manual OPTION DEFINITION No If manual It is assumed that the card is NOT present on all manual entry transactions Always Yes It is assumed that the card is always present default Ask If manual The terminal will ask if the card is present on all manual entry transactions STEP ACTION DISPLAY 1 From the Ma...

Page 145: ... be duplicated published or disclosed without PAX prior written permission 145 3 Press 2 for Fraud Control 2 Fraud Control Working Mode 1 Tip Options 4 Input the Password and press ENTER Please Enter Password 5 Press 4 to set the Card Present 2 AVS On CardPrsnt 5 V Code 3 AVS OnCardNotPrsnt Fraud Control 1 AVS On Swipe 4 Card Present ...

Page 146: ...rams It may not be duplicated published or disclosed without PAX prior written permission 146 6 Press 1 for all card types Please Select Card Type 2 Visa 3 MasterCard 1 ALL 6 Discover 5 DCI DISC 4 AMEX 7 Press the number that corresponds to the desired AVS Prompt 2 Address 3 Zip AVS On Swipe 1 None 4 Address Zip 8 Stop ...

Page 147: ...l card types or for all card types OPTION DEFINITION Off Will not prompt for Code default On if Manual Will prompt for Code on manual entry transactions On if Manual Card not Present Will prompt for Code if card is not present On Always Will always prompt for Code STEP ACTION DISPLAY 1 From the Main Menu press 4 for System Settings 2 Operation Settings 5 Communication 3 Host Settings Main Menu 1 M...

Page 148: ...not be duplicated published or disclosed without PAX prior written permission 148 3 Press 2 for Fraud Control 2 Fraud Control Working Mode 1 Tip Options 4 Input the Password and press ENTER Please Enter Password 5 Press 4 to set the V Code 2 AVS On CardPrsnt 5 V Code 3 AVS OnCardNotPrsnt Fraud Control 1 AVS On Swipe 4 Card Present ...

Page 149: ...rams It may not be duplicated published or disclosed without PAX prior written permission 149 6 Press 1 for all card types Please Select Card Type 2 Visa 3 MasterCard 1 ALL 6 Discover 5 DCI DISC 4 AMEX 7 Press the number that corresponds to the desired AVS Prompt 2 Address 3 Zip AVS On Swipe 1 None 4 Address Zip 8 Stop ...

Page 150: ...te Use this function to enter the Key Load sub application STEP ACTION DISPLAY 1 From the Main Menu press 4 for System Settings 2 Operation Settings 5 Communication 3 Host Settings Main Menu 1 Merchant Settings 4 System Settings 2 From the System Settings menu press 3 to Select the Key Injection 2 Working Mode 3 Keys Injection System Options 1 Date Time Setup 4 App Management 3 Input the Password ...

Page 151: ...nction 1 for starting Key Injection process proceed to Step 5 then skip to Step 8 2 for setting baud rate skip to Step 6 1 Start 2 Set BaudRate Key Inject 5 Session Started Key Inject Receiving 6 Inject success Key Inject Inject Success 7 Press the number corresponding with your selection 1 Set to 1200 2 Set to 2400 3 Set to 4800 BaudRate 1200 4 Set to 9600 5 Set to 19200 8 After setup the baud ra...

Page 152: ...V1 00 00 User Manual NOTE This document is CONFIDENTIAL and must be used exclusively for the operation of PAX programs It may not be duplicated published or disclosed without PAX prior written permission 152 ...

Page 153: ...this function to manage the APP Load sub menu STEP ACTION DISPLAY 1 From the System Settings menu press 1 to Select the App Management 1 App Management 2 Keys Injection 3 Date Time Setup System Options 2 Input the Password and press ENTER Please Enter Password 3 Press Button on touch screen to select OR Press the number on the keypad that corresponds with your selection 1 Activate 2 App Update 3 C...

Page 154: ...ion to activate the App Load STEP ACTION DISPLAY 1 From the System Settings menu press 1 to Select the App Management 1 App Management 2 Keys Injection 3 Date Time Setup System Options 2 Input the Password and press ENTER Please Enter Password 3 Press 1 to activate App Load 1 Activate 2 App Update 3 Configuration App Load 4 Terminal SN 5 App Info 4 Press 1 for activate online and POS terminal conn...

Page 155: ...AL and must be used exclusively for the operation of PAX programs It may not be duplicated published or disclosed without PAX prior written permission 155 5 Then POS terminal displays communication messages Activated or error messages Activated Activate 6 Stop ...

Page 156: ...ations parameters signatures certifications from ADS and download advertisements from ADD STEP ACTION DISPLAY 1 From the System Settings menu press 1 to Select the App Management 1 App Management 2 Keys Injection 3 Date Time Setup System Options 2 Input the Password and press ENTER Please Enter Password 3 Press 2 for App Update 1 Activate 2 App Update 3 Configuration App Load 4 Terminal SN 5 App I...

Page 157: ...Trans remained in database please check App Update 6 Terminal displays Checking while checking if there are available applications on the ADS Checking App Update 7 If there is no available download the Terminal displays No Available DownLD Press any key No Available DownLD Press any key App Update 8 If there are available the Terminal automatic starts the download process and displays Downloading ...

Page 158: ...g is the function that allows user to set phone number to link to the BroadPOS Terminal Server STEP ACTION DISPLAY 1 From the System Settings menu press 1 to Select the App Management 1 App Management 2 Keys Injection 3 Date Time Setup System Options 2 Input the Password and press ENTER Please Enter Password 3 Press 3 for Configuration 1 Activate 2 App Update 3 Configuration App Load 4 Terminal SN...

Page 159: ...st be used exclusively for the operation of PAX programs It may not be duplicated published or disclosed without PAX prior written permission 159 5 Set Server URL and press ENTER Please Enter Server URL 6 Set Server Port and press ENTER Please Enter Server Port 7 Stop ...

Page 160: ...he SN and other information of the terminal STEP ACTION DISPLAY 1 From the System Settings menu press 1 to Select the App Management 1 App Management 2 Keys Injection 3 Date Time Setup System Options 2 Input the Password and press ENTER Please Enter Password 3 Press 4 for Terminal SN 1 Activate 2 App Update 3 Configuration App Load 4 Terminal SN 5 App Info 4 Screen displays the SN and other inform...

Page 161: ...0 00 User Manual NOTE This document is CONFIDENTIAL and must be used exclusively for the operation of PAX programs It may not be duplicated published or disclosed without PAX prior written permission 161 5 Stop ...

Page 162: ...rmission 162 5 6 4 5 App Info Note This function displays the App Info of each application STEP ACTION DISPLAY 1 From the System Settings menu press 1 to Select the App Management 1 App Management 2 Keys Injection 3 Date Time Setup System Options 2 Input the Password and press ENTER Please Enter Password 3 Press 5 for App Info 1 Activate 2 App Update 3 Configuration App Load 4 Terminal SN 5 App In...

Page 163: ... must be used exclusively for the operation of PAX programs It may not be duplicated published or disclosed without PAX prior written permission 163 4 Screen displays the App Info of each application Use the keys or press ENTER to go forward rootcert Info Ver 5 Stop ...

Page 164: ...ons during authorization and batching only The following features are part of the Communication Menu MENU DESCRIPTION Main Communication Maximum Tries Connect Timeout Receive Timeout LAN Parameters ECR Comm Type 5 7 1 Main Communication Note Use this feature to set the main method of communication STEP ACTION DISPLAY 1 From the Main Menu press 5 to access the Comm Menu 2 Operation Settings 5 Commu...

Page 165: ...duplicated published or disclosed without PAX prior written permission 165 3 From the Communication Options menu press 1 for Main Communication 4 Receive Timeout 2 Maximum Tries Communication Options 1 Main Comm 3 Connect Timeout 5 LAN Parameters 6 ECR Comm Type 4 Press the number corresponding with your selection Main Comm 1 1 LAN 5 Stop ...

Page 166: ...maximum tries for communication STEP ACTION DISPLAY 1 From the Main Menu press 5 to access the Comm Menu 2 Operation Settings 5 Communication 3 Host Settings Main Menu 1 Merchant Settings 4 System Settings 2 Input the Password and press ENTER Please Enter Password 3 From the Communication Options menu press 2 to select the entry for Maximum Tries 4 Receive Timeout 2 Maximum Tries Communication Opt...

Page 167: ...AL and must be used exclusively for the operation of PAX programs It may not be duplicated published or disclosed without PAX prior written permission 167 4 Terminal displays the current tries setting Input the New tries and press ENTER 1 Maximum Tries 5 Stop ...

Page 168: ... the timeout for connection STEP ACTION DISPLAY 1 From the Main Menu press 5 to access the Comm Menu 2 Operation Settings 5 Communication 3 Host Settings Main Menu 1 Merchant Settings 4 System Settings 2 Input the Password and press ENTER Please Enter Password 3 From the Communication Options men press 3 to select the entry for Connect Timeout 4 Receive Timeout 2 Maximum Tries Communication Option...

Page 169: ...nd must be used exclusively for the operation of PAX programs It may not be duplicated published or disclosed without PAX prior written permission 169 4 Terminal displays the current timeout setting Input the New timeout and press ENTER 300 Connect Timeout 5 Stop ...

Page 170: ...out for receiving messages from host STEP ACTION DISPLAY 1 From the Main Menu press 5 to access the Comm Menu 2 Operation Settings 5 Communication 3 Host Settings Main Menu 1 Merchant Settings 4 System Settings 2 Input the Password and press ENTER Please Enter Password 3 From the Communication Options men press 4 to select the entry for Receive Timeout 4 Receive Timeout 2 Maximum Tries Communicati...

Page 171: ...nd must be used exclusively for the operation of PAX programs It may not be duplicated published or disclosed without PAX prior written permission 171 4 Terminal displays the current timeout setting Input the New timeout and press ENTER 450 Receive Timeout 5 Stop ...

Page 172: ...7 5 LAN Parameters Note All of the parameters that can be set for LAN communication are sub menus under the LAN Parameters menu 5 7 5 1 LAN Type Note This menu enables or disables DHCP STEP ACTION DISPLAY 1 From the Main Menu press 5 to access the Comm Menu 2 Operation Settings 5 Communication 3 Host Settings Main Menu 1 Merchant Settings 4 System Settings 2 Input the Password and press ENTER Plea...

Page 173: ...mission 173 3 From the Communication Options menu press 5 for LAN parameters 4 Receive Timeout 2 Maximum Tries Communication Options 1 Main Comm 3 Connect Timeout 5 LAN Parameters 6 ECR Comm Type 4 From the Communication Options menu press 1 for LAN Type 1 LAN Type 2 IP Address 3 Subnet Mask LAN Params 4 Gateway IP 5 DNS IP 5 Press 1 for DHCP OR Press 2 for Static IP 1 DHCP LAN Type 1 2 Static 6 S...

Page 174: ...nu sets or displays the IP address STEP ACTION DISPLAY 1 From the Main Menu press 5 to access the Comm Menu 2 Operation Settings 5 Communication 3 Host Settings Main Menu 1 Merchant Settings 4 System Settings 2 Input the Password and press ENTER Please Enter Password 3 From the Communication Options menu press 5 for LAN parameters 4 Receive Timeout 2 Maximum Tries Communication Options 1 Main Comm...

Page 175: ...t may not be duplicated published or disclosed without PAX prior written permission 175 4 Press 2 to select the entry 1 LAN Type 2 IP Address 3 Subnet Mask LAN Params 4 Gateway IP 5 DNS IP 5 If DHCP is enabled IP can be viewed but not edited For static IP type Enter the address then press ENTER 192 168 1 101 IP Address 6 Stop ...

Page 176: ...ts or displays the subnet mask STEP ACTION DISPLAY 1 From the Main Menu press 5 to access the Comm Menu 2 Operation Settings 5 Communication 3 Host Settings Main Menu 1 Merchant Settings 4 System Settings 2 Input the Password and press ENTER Please Enter Password 3 From the Communication Options menu press 5 for LAN parameters 4 Receive Timeout 2 Maximum Tries Communication Options 1 Main Comm 3 C...

Page 177: ... may not be duplicated published or disclosed without PAX prior written permission 177 4 Press 3 to select the entry 1 LAN Type 2 IP Address 3 Subnet Mask LAN Params 4 Gateway IP 5 DNS IP 5 If DHCP is enabled IP can be viewed but not edited For static IP type Enter the address then press ENTER 255 255 255 0 Subnet Mask 6 Stop ...

Page 178: ...sets or displays the Gateway IP address STEP ACTION DISPLAY 1 From the Main Menu press 5 to access the Comm Menu 2 Operation Settings 5 Communication 3 Host Settings Main Menu 1 Merchant Settings 4 System Settings 2 Input the Password and press ENTER Please Enter Password 3 From the Communication Options menu press 5 for LAN parameters 4 Receive Timeout 2 Maximum Tries Communication Options 1 Main...

Page 179: ...t may not be duplicated published or disclosed without PAX prior written permission 179 4 Press 4 to select the entry 1 LAN Type 2 IP Address 3 Subnet Mask LAN Params 4 Gateway IP 5 DNS IP 5 If DHCP is enabled IP can be viewed but not edited For static IP type Enter the address then press ENTER 192 168 1 254 Gateway IP 6 Stop ...

Page 180: ...sets or displays the DNS IP STEP ACTION DISPLAY 1 From the Main Menu press 5 to access the Comm Menu 2 Operation Settings 5 Communication 3 Host Settings Main Menu 1 Merchant Settings 4 System Settings 2 Input the Password and press ENTER Please Enter Password 3 From the Communication Options menu press 5 for LAN parameters 4 Receive Timeout 2 Maximum Tries Communication Options 1 Main Comm 3 Conn...

Page 181: ... It may not be duplicated published or disclosed without PAX prior written permission 181 4 Press 5 to select the entry 1 LAN Type 2 IP Address 3 Subnet Mask LAN Params 4 Gateway IP 5 DNS IP 5 If DHCP is enabled IP can be viewed but not edited For static IP type Enter the address then press ENTER 192 168 1 253 DNS IP 6 Stop ...

Page 182: ...ion Type through the sub menus under ECR Comm Type menu STEP ACTION DISPLAY 1 From the Main Menu press 5 to access the Comm Menu 2 Operation Settings 5 Communication 3 Host Settings Main Menu 1 Merchant Settings 4 System Settings 2 Input the Password and press ENTER Please Enter Password 3 From the Communication Options menu press 6 for ECR Comm Type 4 Receive Timeout 2 Maximum Tries Communication...

Page 183: ...usively for the operation of PAX programs It may not be duplicated published or disclosed without PAX prior written permission 183 4 Select 1 for UART OR Select 2 to Enter the Ethernet sub menu 1 UART ECR Comm Type 1 2 Ethernet 5 Input Comm Port and press ENTER 10009 Comm Port 6 Stop ...

Page 184: ...may not be duplicated published or disclosed without PAX prior written permission 184 6 Function Menu Option 6 1 Review Note Review the transaction records by pressing the buttons on screen STEP ACTION DISPLAY 1 From the Idle Prompt press 1 2 Find 1 Review Function Menu 2 Input the Password and press ENTER Please Enter Password ...

Page 185: ...nd must be used exclusively for the operation of PAX programs It may not be duplicated published or disclosed without PAX prior written permission 185 3 Press Button on touch screen to view the transactions 2 DEBIT 0 0 00 3 EBT 0 0 00 Total 0 0 00 1 CREDIT 0 0 00 ...

Page 186: ...ior written permission 186 6 2 Find Note Find specific records with the last 4 Digits STEP ACTION DISPLAY 1 From the Idle Prompt press 2 2 Find 1 Review Function Menu 2 Input the Password and press ENTER Please Enter Password 3 Input the last 4 digits of the specific records and press ENTER If the records is exist continue to 4 Or it s not exist continue to 5 Please Enter Last 4 Digits ...

Page 187: ...d must be used exclusively for the operation of PAX programs It may not be duplicated published or disclosed without PAX prior written permission 187 4 View the record Transaction 001 Amount 11 11 Account 6781 Sale 5 Record inexistence prompt NO RECORD FOUND 6 Stop ...

Page 188: ...re requesting service for this unit A few simple checks that you can perform yourself may solve your specific problem and restore proper operation If you are still unable to solve this problem contact your technical support help desk A 1 General Troubleshooting Where is the Serial Number located There is a white label on the underside of the terminal the serial number is under the bar code on this...

Page 189: ...initions KEY FUNCTION 0 9 Number Keys Enter any numeric value Or press for more than one time to enter characters of alphabet CANCEL Used to cancel an operation Access to the Function Menu CLEAR Erases character under the cursor when editing parameters ENTER Accepts entered information Executes the current function Access to the main application menu B 2 Function Menu DESCRIPTION 1 Review Review t...

Page 190: ...us Host Parameters for viewing or editing 2 Host URL Params Allows access to the various Host IP Parameters for viewing or editing 3 AutoDial Setup Allows the merchant s terminal to automatically contact the Host and settle the transactions 4 SYSTEM SETTINGS 1 DATE TIME SETUP Sets terminal s date mm dd yyyy and time hh mm ss Clock is 24 Hour Military time 2 WORKING MODE Offers the ability to set T...

Page 191: ... the operation of PAX programs It may not be duplicated published or disclosed without PAX prior written permission 191 APPENDIX C BroadPOS Server Communication C 1 PETE server side resource deployment TBD C 2 PETE BroadPOS terminal side Note Monitor should be loaded ahead of time for PETE TBD ...

Page 192: ...N Personal Identification Number 4 to 16 digit confidential codes used by cardholders to identify themselves as the proper users of a credit or debit card to the Host computer PIN Pad A small terminal used for entering Personal Identification Numbers PINs PIN Pads can encrypt PINs before sending them to a terminal or other controller Some PIN Pads are equipped with built in magnetic stripe card re...

Page 193: ...AX programs It may not be duplicated published or disclosed without PAX prior written permission 193 V Code A unique 3 4 digit value printed on the back front for AmericanExpress of a card to validate card information during the authorization process CID American Express and Discover Card CVC MasterCard CVV Visa ...

Page 194: ...S300_V1 00 00 User Manual S300_V1 00 00 User Manual 2014 9 12 ...

Reviews: