background image

DATASHEET

P8083

5.4  Funzione SLEEP (autospegnimento)

Premendo il tasto SLEEP (H) è possibile attivare lo spegnimento automatico 

a tempo del sintonizzatore. Il tempo massimo previsto è di 90 minuti, che 

può essere ridotto a passi di 10 ogni volta che viene premuto il tasto.

Procedere come segue:

•  Premere il tasto SLEEP, il display mostrerà la scritta 

SLEEP ed il numero 

90 come indicazione dei minuti previsti prima dello spegnimento. 

•  Premere più volte il tasto SLEEP per impostare il tempo desiderato; i 

minuti saranno ridotti a passi di 10. 

•  Impostato il tempo desiderato, dopo due secondi il display tornerà a 

mostrare la frequenza del canale musicale in corso. La scritta 

SLEEP 

piccola resterà attiva.  

•   Per disattivare la funzione di autospegnimento, basta premere 

nuovamente il tasto SLEEP (la scritta 

SLEEP scomparirà dal display).

5.4  SLEEP Function (auto switch-off)

By pressing the SLEEP key (H) you can programme the tuner to switch off 

automatically after a given period of time. The maximum time permitted 

is 90 minutes, which is reduced by steps of 10 each time you press the 

key. Proceed as follows:

• Press the SLEEP key. The word 

SLEEP will appear on the display, 

together with the number 90 indicating the number of minutes to 

switching off. 

• Press 

the 

SLEEP key repeatedly to set the time you require. The number 

of minutes will be reduced in steps of 10. 

•  Set the required time. After two seconds the frequency of the current 

music channel will be shown once again on the display. The word 

SLEEP 

will continue to be visible.  

•  To de-activate the switching off function simply press the SLEEP key 

again (the word 

SLEEP will no longer be displayed).
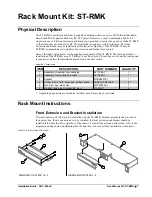
6. MONTAGGIO 

RACK

6.1  Istruzioni di montaggio

Montare l’apparecchio a rack tramite 

le apposite viti (A) e le rondelle (B), 

come in Figura 6.1.1.

Fig. 6.1.1

6. RACK 

MOUNTING

6.1 Mounting instruction

Fix the tuner to the rack by means of 

the screws (A) the relative washers 

(B), see figure 6.1.1.

5.5 Regolazione del volume

Ruotare la manopola LEVEL  (G) per regolare e controllare il volume 

desiderato.

5.5 Volume control

To adjust the volume to the required level, turn the LEVEL knob (G).

CARATTERISTICHE TECNICHE

P8083

TECHNICAL SPECIFICATIONS

Alimentazione da rete  

230 V

AC

 / 115 V

AC

 ±10%  50/60 Hz

Mains power supply

Alimentazione esterna in corrente continua

24 V

DC

DC External power supply

Consumo con alimentazione da rete

45 VA

Mains consumption

Consumo con alimentazione esterna

700 mA (max)

DC consumption

Livello uscita lettore CD/USB/SD

250 mV

CD/USB/SD player output level

Livello uscita sintonizzatore AM/FM

450 mV

AM/FM tuner output level

Peso (netto)

4,5 kg

Weight (net)

Peso (imballato)

5,5 kg

Weight (packaged)

Dimensioni

482 x 44 x 285 mm

Dimensions

Dimensioni imballo

530 x 125 x 370 mm

Package dimensions

Un altro modo per memorizzare una stazione radio è il seguente:

1. 

Premere il tasto MEMORY (D): sul display appare la scritta 

MEMO 

lampeggiante;

2. 

Premere il tasto MemUp (F)  fino a selezionare il numero del canale 

desiderato (da 1 al 10);

3.   Ripremere nuovamente il tasto MEMORY (D) per memorizzare; sul 

display la scritta 

MEMO scomparirà.

Another way of storing a radio station is the following:
1. Press 

the 

MEMORY key (D): the word 

MEMO will start to flash on 

the display;

2. Press 

the 

MemUp key (F) until you reach the channel number you 

require (from 1 to 10);

3. Press 

the 

MEMORY key (D) again to store; the word 

MEMO will 

disappear from the display.

Summary of Contents for P8083

Page 1: ...e Garantie auf jeden Fall eventuell vorliegende Produktionsmängel ab Wir empfehlen Ihnen die hier vorliegende Bedienungsanweisung aufmerksam zu lesen um das Leistungsangebot des Produkts voll nutzen zu können und um Probleme beim Gebrauch zu vermeiden Français Vous remerciant d avoir accordé votre préférence à un produit PASO nous tenons à vous rappeler que nous appliquons à notre production un Sy...

Page 2: ... Il prodotto risultato difettoso dovrà essere inviato alla Paso franco di spese di spedizione e ritorno Questa garanzia non ne comprende altre esplicite od implicite e non comprende danni o incidenti conseguenti a persone o cose Contattare i distributori PASO della zona per maggiori informazioni sulla garanzia Importante L utente ha la responsabilità di produrre una prova d acquisto fattura o rice...

Page 3: ...cchio 2 GENERAL PRECAUTIONS 2 1 Installation All PASO equipment is manufactured in accordance with the most stringent international safety standards and in compliance with European Community requisites In order to use the equipment correctly and effectively it is important to be aware of all its characteristics by reading these instructions and in particular the safety notes carefully While the eq...

Page 4: ...press the same key again To stop playing press the STOP EJ key J The display O will show the total number of tracks on the CD Press the same key J again to stop the CD player and eject the CD If you then press the PLAY PAUSE key I the CD will be inserted again Note If an ERROR message appears on the display or the CD becomes illegible try starting the player again and or taking out the CD and putt...

Page 5: ...switched off or if the CD has been removed 4 8 Funzione FOLDER solo mp3 Una volta inserito un supporto con brani mp3 suddivisi in cartelle il display mostrerà il numero totale delle cartelle e di brani contenuti Premendo i tasti FOLDER E e F a lettore in funzione è possibile selezionare una delle cartelle e scorrere tra i file contenuti all interno utlizzando i tasti REW G e FWD H Premendo nuovame...

Page 6: ...ated with it will appear next to the frequency shown on the display To call up one of the stations stored in channels 1 to 5 it is sufficient to press the MEMORY key corresponding to the required position for stations memorized from 6 to 10 press 5 and the MEMORY key corresponding to the required position 5 1 6 5 10 5 2 Selecting radio stations Press the BAND key C to select the band you require A...

Page 7: ... SLEEP key again the word SLEEP will no longer be displayed 6 MONTAGGIO A RACK 6 1 Istruzioni di montaggio Montare l apparecchio a rack tramite le apposite viti A e le rondelle B come in Figura 6 1 1 Fig 6 1 1 6 RACK MOUNTING 6 1 Mounting instruction Fix the tuner to the rack by means of the screws A the relative washers B see figure 6 1 1 5 5 Regolazione del volume Ruotare la manopola LEVEL G per...

Page 8: ...osphériques Le produit défectueux devra être envoyé à Paso franco de frais d expédition et de réexpédition La présente garantie n en inclut aucune autre explicite ou implicite et ne couvre pas les lésions ou dommages causés aux personnes ou aux choses Pour plus d informations sur la garantie veuillez contacter le distributeur PASO de votre zone Important L utilisateur devra présenter une preuve d ...

Page 9: ...ion Le circuit d alimentation du P8083 est protégé par un fusible installé sur la fiche de secteur de l appareil 2 ALLGEMEINE HINWEISE 2 1 Installation Alle PASO Geräte sind gemäß den strengsten internationalen Sicherheitsvorschriften und unter Einhaltung der Anforderungen der Europäischen Gemeinschaft gebaut Der korrekte und effiziente Einsatz des Geräts setzt die Kenntnis aller Eigenschaften und...

Page 10: ...tarten Drücken Sie die Taste STOP EJ J um die Wiedergabe zu beenden Das Display zeigt dann die Anzahl der auf der CD vorhandenen Stücke an Drücken Sie erneut auf die Taste J um das Gerät zu stoppen und die CD auszuwerfen Wenn die Taste PLAY PAUSE I gedrückt wird wird die CD erneut eingezogen Anmerkung Fall das Display des CD Players eine Fehlermeldung anzeigt oder unlesbar ist versuchen Sie das Ge...

Page 11: ...3 Après avoir relié un support contenant des morceaux mp3 classés par dossiers l afficheur montrera le nombre total des dossiers et des morceaux présents Appuyer sur les touches FOLDER E et F lorsque le lecteur est en marche pour sélectionner l un des dossier et faire défiler les fichiers présents à l aide des touches REW G et FWD H Appuyer de nouveau sur les touches FOLDER pour quitter le menu de...

Page 12: ...nders wird neben der auf dem Display angezeigten Frequenz die ihm zugeordnete Speicherplatznummer eingeblendet Für das Aufrufen eines auf den Kanälen von 6 bis 10 gespeicherten Senders genügt es die Taste der entsprechenden Position zu drücken 5 1 6 5 10 5 2 Auswahl der Radiosender Drücken Sie die Taste BAND C um die gewünschte Empfangsbreite auszuwählen AM FM Drücken Sie Tasten TUNING E um die Em...

Page 13: ... die kleine Anzeige SLEEP wird ausgeblendet 6 MONTAGE EN RACK 6 1 Instructions de montage Monter l appareil dans le rack à l aide de vis A et de rondelle B comme illustré sur la figure 6 1 1 Fig Abb 6 1 1 6 MONTAGE AM RACK 6 1 Montageanweisungen Bauen Sie das Gerät im Rack mit Hilfe der angebrachten Schrauben A und Unterlegscheiben B wie in der Abb 6 1 1 dargestellt 5 5 Réglage du volume Tourner l...

Page 14: ...ersomstandigheden Producten waarbij een defect is geconstateerd dienen franco verzend en retourkosten aan Paso opgestuurd te worden Deze garantie omvat geen enkele andere expliciete of impliciete garantie en dekt geen schade aan personen of zaken Voor verdere informatie over de garantie dient contact opgenomen te worden met de dichtstbijzijnde PASO distributeur Belangrijk De gebruik st er is veran...

Page 15: ...conforme a las más severas normas internacionales de seguridad y según los requisitos de la Comunidad Europea Para una utilización correcta y eficaz del aparato es importante tener conocimiento de todas las características leyendo detenidamente estas instrucciones y en particular las notas de seguridad Durante el funcionamiento del aparato es necesario asegurar una adecuada ventilación evitando en...

Page 16: ...a interrumpir la reproducción presionar la tecla STOP EJ J El display O muestra el número total de las pistas presentes en el CD Presionar de nuevo J para parar el reproductor CD y expulsar el CD Si se presiona la tecla PLAY PAUSE I el CD será introducido de nuevo Nota Si el display del CD muestra un mensaje de error o se vuelve ilegible intentar encender de nuevo el CD Player y o extraer y volver...

Page 17: ...e saca el CD 4 8 FOLDER functie allen mp3 Zodra er een gegevensdrager met in mappen ingedeelde mp3 nummers geplaatst wordt toont het display het totale aantal mappen en nummers Door op de toetsen FOLDER E en F te drukken terwijl de speler aangeschakeld is kan één van de mappen geselecteerd worden en met de toetsen REW G en FWD H door de files in die map worden gescrold Door nog eens op de knoppen ...

Page 18: ... display el número de la posición de memoria asociada con ella Para cargar una emisora memorizada en los canales de 1 a 5 basta pulsar la tecla correspondiente a la posición deseada 1 6 5 10 para cargar los canales de 6 a 10 basta pulsar la tecla 5 y la tecla correspondiente a la posición deseada 5 1 6 5 10 5 2 Selección de emisoras radio Presionar la tecla BAND C para seleccionar la banda de rece...

Page 19: ...tico basta presionar de nuevo la tecla SLEEP el mensaje en letra pequeña SLEEP desaparecerá del display 6 MONTAGE IN REK 6 1 Aanwijzingen voor montage Het apparaat kan met behulp van de geschikte schroeven A en sluitringen B gemonteerd worden zie afbeelding 6 1 1 Afb Fig 6 1 1 6 MONTAJE EN RACK 6 1 Instrucción de montaje El aparato puede ser montado con l ayuda de los apropiados tornillos A y arru...

Page 20: ...erwendung oder Vorgehen entstehen die nicht den Anweisungen dieses Handbuches entsprechen In der Überzeugung die eigenen Produkte beständig verbessern zu wollen behält sich PASO S p A das Recht vor jederzeit und ohne Vorankündigung Änderungen an technischen Zeichnungen und Merkmalen vorzunehmem Recommandations pour l élimination du produit conformément à la Directive Européenne 2002 96 EC Au terme...

Page 21: ...morizzata nei canali da 1 a 5 è sufficiente premere il tasto memoria relativo alla posizione desiderata per le stazioni memorizzate nei canali da 6 a 10 premere 5 ed il tasto memoria relativo alla posizione desiderata 5 1 6 5 10 Storing channels The tuner has 10 storage cells for the FM band and 10 for the AM band To store a previously tuned radio station you must proceed as follows 1 Press the ME...

Page 22: ... you require from 1 to 10 3 Press the MEMORY key D again to store the word MEMO will disappear from the display S p A Nel continuo intento di migliorare i propri prodotti la PASO S p A si riserva il diritto di apportare modifiche ai disegni e alle caratteristiche tecniche in qualsiasi momento e senza alcun preavviso PASO S p A strive to improve their products continuously and therefore reserve the...

Reviews: