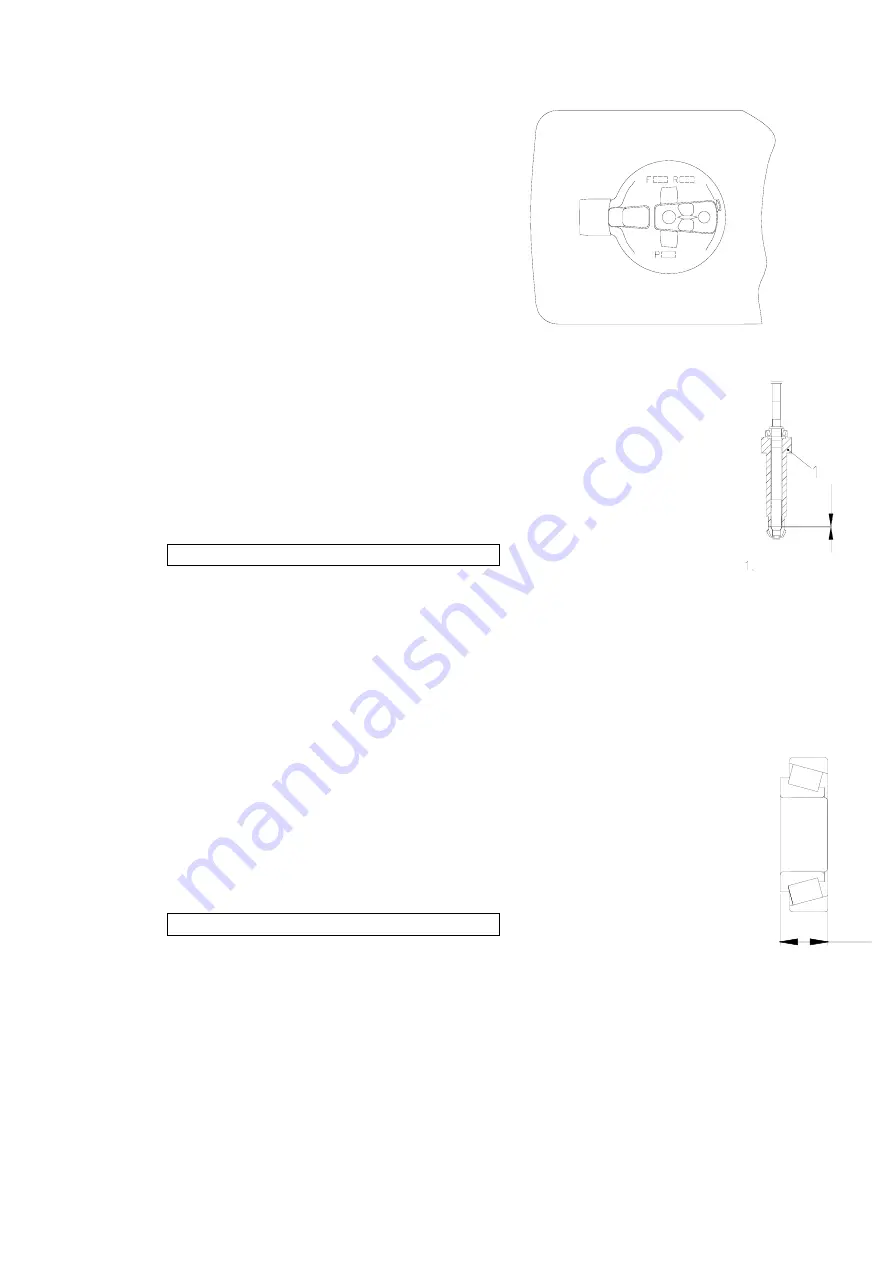
111
deviation value marks, which are F, R and P respectively; they represent the difference
between the actual size and the theoretical size on the housing of the underwater unit.
For example, the mark P is followed by +3, which means that the actual size is 0.03 mm
more than the theoretical size; If no number is engraved after the deviation value, then P is
regarded as 0.
Pinion shim
1.
Check the P value marked on the underwater unit.
2.
Attach the drive shaft to the special tool. Install the pinion and lock the pinion nut
according to the specified torque.
Specified torque: 95 Nm
3.
Measure the clearance between special tool and pinion with stopper gauge
Calculate the thickness T3 with the formula.
Formula: T3=M3
-
(P/100)
4.
Shims that can be selected.
0.10, 0.12, 0.15, 0.18, 0.3, 0.4, 0.5 mm
Note:
The thickness of the shim can be 0~0.05 thicker than T3, and choose the closest size.
Forward gear shim
1.
Check the F value marked on the underwater unit.
2.
Turn the outer ring of the forward gear bearing so that the rollers fall completely into
the bearing outer sleeve.
3.
Measure the bearing height and calculate the thickness T1 with the formula.
Formula: T1=22.75
+
(F/100)
-
M1
Note:
When measuring the thickness, three points are measured. Take the average value.
4.
Shims that can be selected.
0.10, 0.12, 0.15, 0.18, 0.3, 0.4, 0.5 mm
Note:
The thickness of the shim can be 0~0.05 thinner than T1, and choose the closest size.
Reverse gear shim
1.
Check the R value marked on the underwater unit.
2.
Measure the dimension M
2
as shown in the figure with a depth gauge:
M3
专用工具
M1
Summary of Contents for F40 EFI
Page 1: ...1 Maintenance Manual for Outboard Motor F40 30 EFI Suzhou Parsun Power Machine Co Ltd...
Page 17: ...12...
Page 18: ...13 BWS D...
Page 19: ...14 FWL T...
Page 20: ...15 FWS T...
Page 21: ...16 Mounting dimensions of clamp bracket...
Page 30: ...25 Disassembly schematic diagram M20 1 25 mm 157 Nm...
Page 31: ...26 REMARKS...
Page 32: ...27...
Page 33: ...28...
Page 34: ...29...
Page 35: ...30...
Page 36: ...31...
Page 37: ...WIRING DIAGRAM...
Page 38: ......
Page 39: ......
Page 44: ...39 Disassembly schematic diagram...
Page 45: ...40...
Page 46: ...41...
Page 47: ...42...
Page 48: ...43...
Page 54: ...49...
Page 55: ...50...
Page 56: ...51...
Page 57: ...52...
Page 58: ...53...
Page 59: ...54...
Page 60: ...55...
Page 61: ...56...
Page 62: ...57...
Page 63: ...58...
Page 64: ...59...
Page 78: ...73...
Page 80: ...75...
Page 81: ...76...
Page 82: ...77 Continued...
Page 83: ...78 Back operation model...
Page 84: ...79...
Page 85: ...80 Front operation model...
Page 86: ...81...
Page 88: ...83 Steering handle Disassembly schematic diagram...
Page 89: ...84 Disassembly and inspection...
Page 91: ...86 Disassembly schematic diagram...
Page 92: ...87...
Page 93: ...88...
Page 94: ...89...
Page 95: ...90...
Page 96: ...91...
Page 97: ...92 Continued...
Page 98: ...93...
Page 99: ...94...
Page 101: ...96 Hydraulic warping device Disassembly schematic diagram...
Page 103: ...98 Manual warping device Disassembly schematic diagram...
Page 106: ...101 Underwater part Disassembly schematic diagram...
Page 107: ...102...
Page 108: ...103...
Page 109: ...104...
Page 110: ...105 Continued...


