background image

©2015 Parata Systems, LLC

page 3 of 40

Parata Technical Assistance Center

120-0465 Rev 03

1-888-PARATA1 (727-2821)

Customer Guide

HPAC Cell Cleaning

Mini

The Parata Mini utilizes high-pressure air counting (HPAC) cells to dispense pills. Prior to 
replenishing a cell with a new drug, the cell and chute should be properly cleaned to avoid 
cross contamination. 

This guide steps you through the process for cleaning cells. The process and materials 
used apply to both locking and non-locking standard and super cells. This guide also 
includes steps for removing and installing chutes. Chutes should be cleaned using the 
same process your pharmacy uses to clean items that come in contact with pills. 

Please note that some medications require specific precautions in terms of handling for 
control purposes, preservation, or contamination risks. These medications may not be 
suitable for use in automation equipment, either for counting or packaging. Please use 
best pharmacy practices along with an established safety program pertaining to handling 
drugs and dispensing them with pharmacy automation. Dispensing hazardous drugs with 
a Parata dispensing unit is not recommended. For additional information about cleaning 
cells, please contact Parata.

The process for cleaning cells has been reviewed by Bureau Veritas

1

 and is approved for 

cleaning a cell to house a new drug. 

Required parts & materials

The Parata In-Pharmacy Cell Cleaning kit (P/N 650-0458) contains all of the items that you 
will need to clean four cells. The kit includes:

• 4  pairs  of  gloves
• 4 stem caps
• 8 large zip-closure bags
• 16 drying cloths (blue)
• 1 bottle of Cleaning Solution (1 gallon; the label is color-coded red)
• 1 bottle of Rinsing Agent (1 gallon; the label is color-coded green)
• 4 40-gram bottles of Sorbent Powder (absorbing powder)
• 4 pleated breathers
• 4 foam breathers
• 4 foam plugs
• 4 splash guards
• 8 baffle covers

1

According to Bureau Veritas, an accredited, international health, safety, and environmental services firm, 
this cleaning process is within safety standards accepted in pharmaceutical manufacturing, and supports 
patient safety for prescriptions dispensed using the Parata Max and Mini.

Summary of Contents for Mini

Page 1: ...r Guide 120 0465 Rev 03 Parata Systems LLC 2600 Meridian Parkway Durham NC 27713 www parata com The information in this document is proprietary and confidential to Parata Systems LLC Content may be ch...

Page 2: ...son Automation Inc in the US PACMED and PACVISION are trademarks or registered trademarks of McKesson Automation Canada Corporation in Canada GREENGUARD Indoor Air Quality Certified UL and the UL logo...

Page 3: ...ng with an established safety program pertaining to handling drugs and dispensing them with pharmacy automation Dispensing hazardous drugs with a Parata dispensing unit is not recommended For addition...

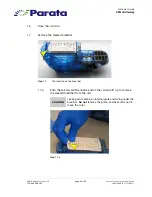
Page 4: ...eting the cell drying process Reassembling the cell Replenishing the cell 1 Prepare the cell for cleaning Note Leave the unit on and the Mini applications running 1 1 Obtain a pair of gloves from the...

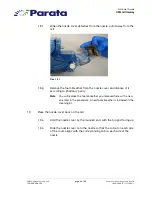
Page 5: ...Close the cell door 1 7 Remove the pleated breather Step 1 7 Tab location on the breather 1 7 a Push the tab toward the nozzle end of the cell and lift up to remove the pleated breather from the cell...

Page 6: ...ther is included in the kit 1 8 Remove the foam breather 1 8 a If there is tape securing the nozzle cover to the cell remove the tape and dispose of it according to pharmacy policy Note There may be t...

Page 7: ...g the cell body with one hand push the index finger of your other hand through one of the center openings in the grid so that your finger depresses the foam breather and brace your thumb against the s...

Page 8: ...nozzle cover and dispose of it according to pharmacy policy Note You will replace the foam breather you removed here with a new one later in the procedure A new foam breather is included in the cleani...

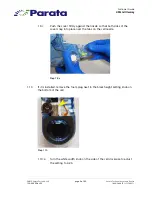
Page 9: ...Push the cover firmly against the nozzle so that both sides of the cover snap into place over the tabs on the cell nozzle Step 1 9 c 1 10 If it is installed remove the foam plug next to the black hei...

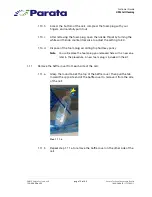
Page 10: ...nterclockwise to adjust the setting to E 0 1 10 d Dispose of the foam plug according to pharmacy policy Note You will replace the foam plug you removed here with a new one later in the procedure A new...

Page 11: ...arata Technical Assistance Center 120 0465 Rev 03 1 888 PARATA1 727 2821 1 11 c Dispose of the baffle covers according to pharmacy policy Note You will replace the baffle covers you removed here with...

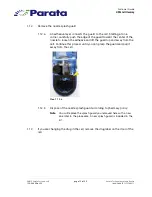
Page 12: ...d toward the center of the nozzle to loosen the adhesive and lift the guard up and away from the cell Continue this process until you can grasp the guard and pull it away from the cell Step 1 12 a 1 1...

Page 13: ...is easier to remove the adhesive when the cell is dry than when the cell is wet 1 14 a Use the sticky side of transparent tape to pull up any excess adhesive Step 1 14 a 1 14 b If necessary use a plas...

Page 14: ...make sure that it is secure If it moves easily or comes off discard the stem cap and obtain another one from the kit 1 16 Verify that the cell is ready for cleaning Pills removed Pleated breather remo...

Page 15: ...ld it and place it on the counter 2 2 Insert the cell into a zip closure bag from the cleaning kit 2 3 Pour one quart of Cleaning Solution red label into the bag Note One quart is the appropriate amou...

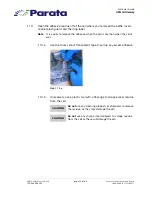
Page 16: ...5 Rev 03 1 888 PARATA1 727 2821 2 5 Roll down the top of the bag This will make it easier to hold Step 2 5 2 6 Shake the cell vigorously for 1 minute Beginning on one side shake the cell front to back...

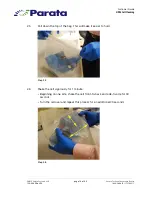
Page 17: ...ce Center 120 0465 Rev 03 1 888 PARATA1 727 2821 2 7 Drain the excess liquid from the cell into the bag 2 7 a Hold the bag so that you can lift the cell by the door end and raise it out of the liquid...

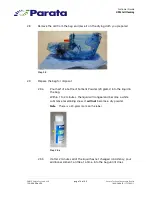
Page 18: ...2 9 Prepare the bag for disposal 2 9 a Pour half of a bottle of Sorbent Powder 20 grams into the liquid in the bag Within 1 to 2 minutes the liquid will congeal and become a white substance resemblin...

Page 19: ...ell 3 1 Obtain a new drying cloth from the cleaning kit unfold it and place it in a location where the drying cell will not be disturbed for 24 hours 3 2 Insert the cell into a new zip closure bag fro...

Page 20: ...so that you can lift the cell by the door end and raise it out of the liquid to drain 3 8 b Gently shake the cell to drain as much of the excess liquid as possible 3 9 Remove the cell from the bag and...

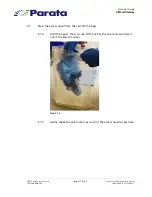
Page 21: ...stem cap and dispose of it according to pharmacy policy Note The cap must be removed to allow air to flow through the cell Step 3 12 4 Air dry the cell for 24 hours 4 1 Position the cell so that the...

Page 22: ...ry for 24 hours Step 4 3 Standard cell left and super cell right positioned door end down on the drying cloth 5 If applicable clean the chute assembly 5 1 Using the T handle driver from your starter k...

Page 23: ...solenoid will retract Step 5 3 Chute Map with the icon unselected left and selected right 5 4 Pull the chute assembly out of the unit 5 5 Clean the chute assembly Note Refer to Appendix Cleaning the c...

Page 24: ...Max and Mini Under certain conditions however it is possible that you still may see pill residue inside the cell even after the second cleaning If any residue remains in the cell or if for any reason...

Page 25: ...kit and fold it to the appropriate size for this cell For a standard cell Fold the cloth into a 6 inch x 1 1 2 inch rectangle For a super cell Fold the cloth into a 12 inch x 1 1 2 inch rectangle Ste...

Page 26: ...into the cell and position it so that it is under the baffle A and as far up toward the nozzle throat B as possible Step 6 6 Position of the drying cloth in a standard cell top and in a super cell bot...

Page 27: ...remaining moisture 6 9 Visually inspect the cell If you see any moisture inside the cell allow it to continue air drying Do not proceed until the cell looks completely dry If the cell looks completely...

Page 28: ...at the opening on the top of the cell then press down on the tab end until the breather snaps into place Step 7 2 b Inserting a new pleated breather 7 3 Install a new foam breather 7 3 a Obtain a new...

Page 29: ...03 1 888 PARATA1 727 2821 7 3 d Hold the replacement foam breather in your other hand with the U shaped part of the foam breather pointed up and the wings pointed down Step 7 3 d 7 3 e Press the U sha...

Page 30: ...the rounded end with the top of the cover facing up 7 3 h Slide the nozzle cover onto the nozzle so that the cutout on each side of the cover aligns with the corresponding tab on each side of the noz...

Page 31: ...p between the nozzle and the body of the cell Then press the remaining tape down onto the side of the nozzle cover Step 7 4 b 7 4 c Use a flat object such as a counting spatula to press the tape again...

Page 32: ...te the cell even if you are placing the same drug in the cell The settings will have changed during the cleaning process Follow the replenishment procedure in the Mini Operator s Guide to load pills i...

Page 33: ...baffle covers on the cell one on each side of the baffle 8 1 a Position the baffle cover with the tab toward the top of the cell and place it over the baffle 8 1 b Apply pressure to the outer edge of...

Page 34: ...ng the chute Parts The chute assembly consists of three parts the dispense chute A the door B and the tube C There are four 4 pins on the inside of the door arms that connect the assembly parts The tw...

Page 35: ...ly 1 3 Lift the arm on the other side of the door away from the assembly to disconnect the door then remove the door 1 4 Slide the tube out of the dispense chute 2 Clean and dry all three parts of the...

Page 36: ...ss of the chute assembly discard the chute assembly and order a new chute assembly If the chute assembly looks completely dry continue to Step 4 4 Reassemble the chute 4 1 Hold the dispense chute in y...

Page 37: ...he channels on the dispense chute A Slide the tube forward until the hole in the rail lines up with the lower end of the angled slot C in the dispense chute Step 4 2 4 3 Hold the door in your dominant...

Page 38: ...he arm into the hole in the tube rail The pin in the center of the arm will fit into the slot on the dispense chute Step 4 5 4 6 On the opposite side of the assembly lift the door arm and insert the p...

Page 39: ...Customer Guide HPAC Cell Cleaning 2015 Parata Systems LLC page 39 of 40 Parata Technical Assistance Center 120 0465 Rev 03 1 888 PARATA1 727 2821 This page intentionally left blank...

Page 40: ...Customer Guide HPAC Cell Cleaning 2015 Parata Systems LLC page 40 of 40 Parata Technical Assistance Center 120 0465 Rev 03 1 888 PARATA1 727 2821...

Reviews: