


53
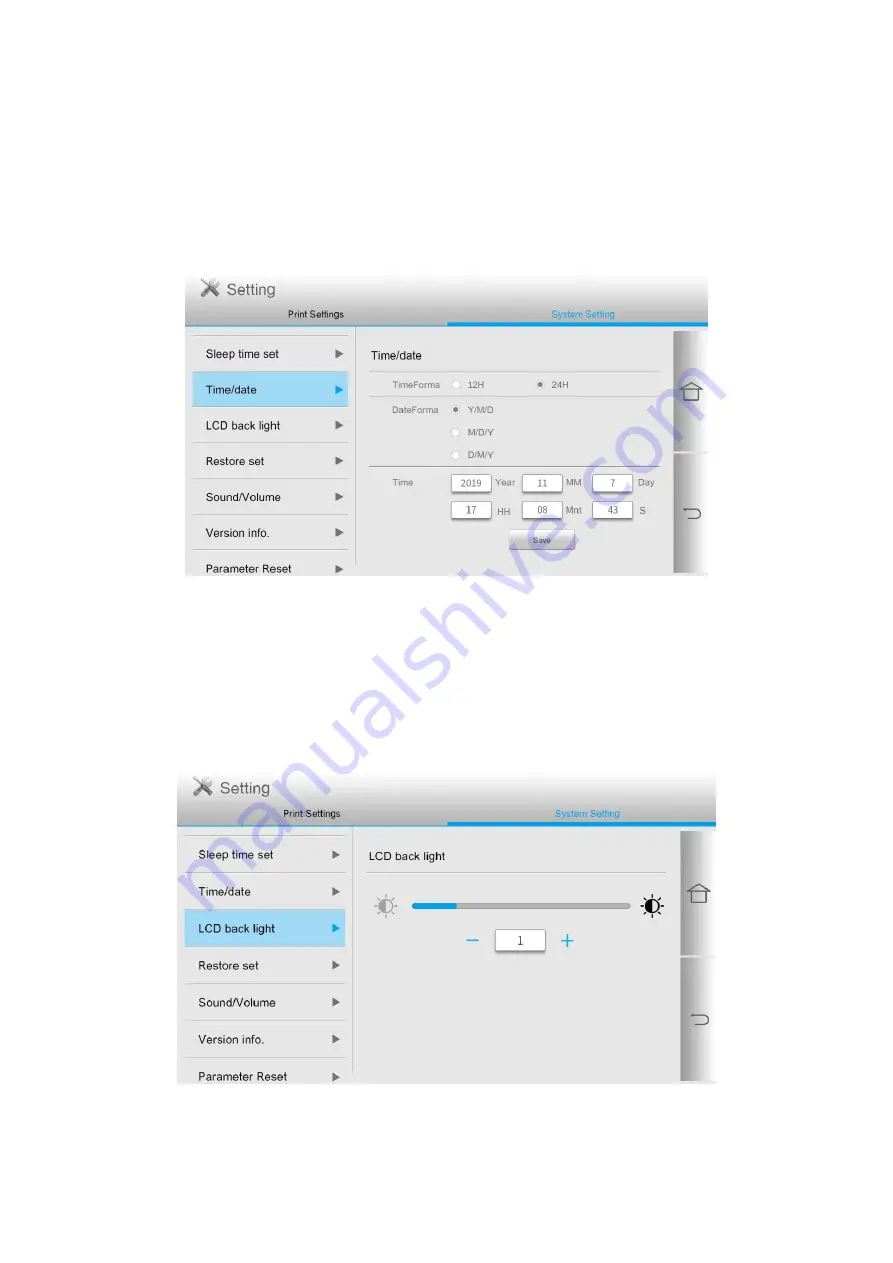
Time/date
You may set the time and date with the Time/Date option.
You can make the settings in the following methods as required:
1. Click the “Settings” button on the home screen to enter the “System Settings” interface.
2. Click and select “Time/Date” to set “Time Format”, “Date Format” and “Time”.
3. Click Save to complete the setup.
Screen brightness
“Screen luminance” is used to adjust the screen brightness of the printer panel.
You can make the settings in the following methods as required:
1. Click the “Settings” button on the home screen to enter the “System Settings” interface.
2. Click and select “Screen luminance” to adjust the screen brightness.
Summary of Contents for M9106 Series
Page 1: ...Pantum M9106 M9706 Series Monochrome Multifunction Printer...
Page 79: ...64 Scanner glass Scanner glass mat...
Page 80: ...65 3 Open the door B1 4 Wipe the following areas ADF glass in door B1...
Page 83: ...68 5 Insert the waste toner bottle and close the door Empty the punching box 1 Open the door H...
Page 84: ...69 2 Remove and then empty the punching box 3 Insert the punching box 4 Close the cover...
Page 86: ...71 5 Insert a new toner cartridge 6 Remove waste toner bottles...
Page 93: ...78 3 Separation roller 1 Power off the printer 2 Remove all trays Standard tray...
Page 95: ...80 5 Find the roller 6 Remove the roller...
Page 98: ...83 4 Loosen the screws that hold the transfer belt 5 Remove the paper guide...
Page 102: ...87 2 Remove the ADF separation pad 3 Remove the ADF separation roller...
Page 104: ...89 Replace the ADF paper pick up and feed rollers 1 Power off the printer 2 Open the door B...
Page 110: ...95 4 Install the stabilizers to the tray and then remove the rubber cover...
Page 112: ...97 7 Connect the tray connector to the printer 8 Open the feed tray 2 3 and 4...
Page 117: ...102 9 Remove the stabilizers from the tray 10 Remove the rubber cover...
Page 121: ...106 18 Connect the tray cable to the printer 19 Install the tray cable cover...
Page 122: ...107 20 Slide the tray until it clicks into place 21 Install the stabilizers to the printer...
Page 143: ...128 2 Open the door J 3 Open the door H...
Page 146: ...131 Area H8 Area H9...
Page 148: ...133 2 Remove the staple box holder 3 Remove the loose staples...
Page 150: ...135 2 Remove the staple box holder 3 Remove the loose staples...
Page 159: ...144...
Page 164: ...149...


