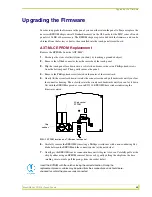
Replacing the Batteries
44
Black/White LCD Mini-Touch Panels
8.
Gently rotate the circuit card backward until you can lay it down flat with the batteries
exposed.
9.
Carefully slide the other battery out of its socket, and insert the new battery.
10.
Rotate the circuit card back to the original position and place it in the touch panel housing.
11.
Place the bottom panel on the panel and align the mini-XLR mounting plate and screw holes.
Insert the four Phillips-head screws and tighten.
12.
Plug the AXlink mini-XLR connector back into the touch panel.
AXM-MLC (/PB) and AXD-MLC (/PB) Battery Replacement
Remove the lithium batteries from the touch panel:
1.
Discharge the static electricity from your body by touching a grounded object and unscrew the
Decor-style faceplate.
2.
Carefully insert a flat-blade tool into the release slot on the panel’s bezel and remove the
engraved overlay.
3.
Remove the four #6-32 mounting screws and carefully lean the touch panel backward to
expose the connectors.
4.
Disconnect all the connectors and remove the touch panel from the Back Box or equipment
rack.
5.
Flip the touch panel facedown onto a soft cloth and remove the touch overlay’s ribbon cable
connector and backlight connector from the circuit card. Do not remove the cable on the
battery-side of the circuit card.
6.
Remove the four circuit card spacers; gently rotate the circuit card backward until you can lay
it down flat with the batteries exposed.
7.
Carefully pry one battery out of its socket and insert the new battery.
8.
Rotate the circuit card back to the original position and place it on the mini-touch panel. Insert
and tighten the circuit card spacers.
9.
Connect the touch overlay’s ribbon cable connector and backlight connector to the circuit card.
10.
Return the touch panel to the Back Box or equipment rack and connect the AXlink connector
for approximately 1 minute; remove the connector from the panel again.
11.
Repeat steps 5 - 9 for the second battery. Then, return the touch panel to the Back Box or
equipment rack and connect the AXlink header.
12.
Insert the four mounting screws and tighten.
13.
Place the faceplate onto the bezel and install the engraved overlay.
AXW-MLC (/PB) Battery Replacement
Replace the batteries in the AXW-MLC (/PB) wood enclosure:
1.
Discharge the static electricity from your body by touching a grounded object.
2.
Disconnect the mini-XLR connector from the AXW-MLC (/PB).
3.
Flip the AXW-MLC (/PB) facedown onto a soft cloth, remove the six panel screws, and
remove the bottom panel.


