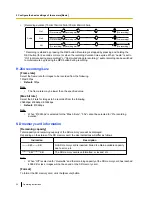
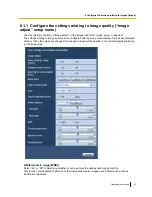
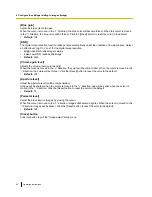
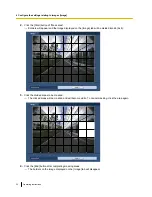
background image

[IP address(IPv4)]

When not using the DHCP function, enter the IP address of the camera. Do not enter an IP address already
in use (for the PCs and the other cameras).

Default:

 192.168.0.10

Note

Multiple IP addresses are unavailable even when using the DHCP function. Refer to the network
administrator for further information about the settings of the DHCP server.

[Subnet mask]

When not using the DHCP function, enter the subnet mask of the camera.

Default:

 255.255.255.0

[Default gateway]

When not using the DHCP function, enter the default gateway of the camera.

Default:

 192.168.0.1

Note

Multiple IP addresses for the default gateway are unavailable even when using the DHCP function.
Refer to the network administrator for further information about the settings of the DHCP server.

IPv6 network

[Manual]

Select “On” or “Off” to determine whether or not to manually configure the IP address for IPv6 network (IPv6
address).

On:

 Enter an IPv6 address manually.

Off:

 Manual entry of an IPv6 address will become unavailable.

Default:

 Off

[IP address(IPv6)]

When “On” is selected for “Manual”, manual entry of the IPv6 address is required. Do not enter an address
already in use.

Note

When connecting to the manually configured IPv6 address beyond the router, use an IPv6 compatible
router and turn on the automatic IPv6 address assignment function. In this case, it is necessary to
configure IPv6 address including prefix information provided from the IPv6 compatible router. Refer to
the manuals provided with the router for further information.

Only use IPv4 for transmissions between the Wearable Camera Agent Software and the camera.

Common

[HTTP port]

Assign the port numbers independently.

Available port number:

 1 - 65535

Default:

 80

The following port numbers are unavailable since they are already in use.
20, 21, 23, 25, 42, 53, 67, 68, 69, 110, 123, 161, 162, 554, 995, 10669, 10670, 59000 - 61000

36

Operating Instructions

8 Configuring the network settings [Network]

Summary of Contents for WV-TW310L

Page 1: ...l No WV TW310L WV TW310S WV TW310LE WV TW310SE Before attempting to connect or operate this product please read these instructions carefully and save this manual for future use The model number is abbreviated in some descriptions in this manual ...

Page 2: ...nted with permission from Microsoft Corporation Adobe Acrobat Reader and Reader are either registered trademarks or trademarks of Adobe Systems Incorporated in the United States and or other countries All other trademarks identified herein are the property of their respective owners Abbreviations The following abbreviations are used in these operating instructions The Wearable Camera is referred t...

Page 3: ...omposition This product is used in combination with the battery container and the conversion box Camera WV TW310 Battery container WV TB311 Option Conversion box WV TC312 Option Operating Instructions 3 Preface ...

Page 4: ...ast packets cannot be configured to be allowed structure your system so that camera and the PC installed with software are on the same network segment Use UDP port 10668 and 10669 for transmissions between the Wearable Camera Agent Software and the camera The router that you use must be configured to allow UDP port 10668 and 10669 PC application It is necessary to install Wearable Camera Agent Sof...

Page 5: ...ting to the SD memory card SD memory card 20 6 Configure the settings relating to images Image 26 6 1 Configure the settings relating to images Image 26 6 1 1 Configure the settings relating to image quality Image adjust setup menu 27 6 1 2 Set mask areas 31 7 Configure the settings relating to the authentication User mng 33 7 1 Configure the settings relating to the user authentication User auth ...

Page 6: ...on the SD memory card tab of the Basic page recording can be automatically started or stopped and recording can be stopped with the timer setting page 20 When Recording extension is selected for Key function and recording is set to be stopped with the timer setting the recording time can be extended by pressing the REC button for less than 2 seconds during recording 1 3 Play images 1 Connect the c...

Page 7: ...8 0 10 Example when entering an IPv6 address http URL registered using IPv6 address http 2001 db8 10 Example of IPv4 access Example of IPv6 access IMPORTANT When the HTTP port number is changed from 80 enter http IP address of the camera colon port number in the address box of the browser Example http 192 168 0 11 8080 When the PC is in a local network configure the proxy server setting of the web...

Page 8: ...Note The maximum number of concurrent access users are 4 users that receive H 264 images or 10 users that receive JPEG images maximum of 2 users during recording Depending on factors such as the settings for Max bit rate and the status of the camera the maximum number of concurrent access users may be restricted even more When the maximum number of users are concurrently accessing the camera the a...

Page 9: ...r software It is necessary to install the viewer software Network Camera View 4S to display images on a PC This software can be installed directly from the camera or by double clicking nwcv4Ssetup exe on the CD ROM provided and then following the on screen instructions Operating Instructions 9 2 Change the camera settings from a PC ...

Page 10: ...played Follow the instructions of the wizard Log onto the PC with administrator rights when installing the Viewer software When the install wizard is displayed again even after completing the installation of the ActiveX restart the PC The viewer software used on each PC should be licensed individually The number of installations of the viewer software from the camera can be checked on the Upgrade ...

Page 11: ...d for Personal ID on the User auth tab will be displayed page 34 Maintenance button When the mouse pointer is placed over this button message regarding the SD memory card s lifetime is displayed Mic input button Turns on off the audio reception hear audio from the camera on a PC This button will be displayed only when On1 not mute during pre recording or On2 mute during pre recording is selected f...

Page 12: ...ter closing a browser Note When operated by a lower access level user images displayed on the screen may be changed temporarily This does not affect operation of the camera Depending on the PC in use screen tearing may occur when the shooing scene drastically changes due to the GDI restrictions of the OS A phenomenon in which portions of the screen are displayed out of alignment The conditions for...

Page 13: ...ORTANT Design and enhance security countermeasures to prevent leakage of information such as image data authentication information user name and password etc Perform the countermeasure such as access restriction using the user authentication After the camera is accessed by the administrator make sure to close the browser for added security Change the administrator password periodically for added s...

Page 14: ...configure the access level 4 1 How to display the setup menu 1 Display the Live page page 7 2 Click the Setup button on the Live page The window with the user name and password entry fields will be displayed 3 Click the OK button after entering the user name and the password The default user name and password are as follows User name admin Password 12345 14 Operating Instructions 4 Display the set...

Page 15: ... The setup menu will be displayed Refer to page 17 for further information about this menu Operating Instructions 15 4 Display the setup menu from a PC ...

Page 16: ...e of the tab 2 Complete each setting item displayed in the frame on the right of the window 3 After completing each setting item click the Set button to apply them IMPORTANT When there are two or more Set and Execute buttons on the page click the respective button to the edited setting item Example A C D B When completing the setting items in field A click the Set button B below field A The edited...

Page 17: ...nfigured on the Image page page 26 User mng button Displays the User mng page The settings relating to the user authentication for accessing the camera can be configured on the User mng page page 33 Network button Displays the Network page The network settings can be configured on the Network page page 35 Maintenance button Displays the Maintenance page System log check firmware upgrade and initia...

Page 18: ...rs Unavailable characters Default WV TW310L WV TW310S Date time Enter the current time and date When 12h is selected for Time display format AM or PM can be selected Available range 01 01 2011 00 00 00 31 12 2035 23 59 59 Time display format Select the time display format from 24h 12h and Off Enter the current hour reflecting this setting when entering the current time and date for Date time To hi...

Page 19: ...orner of the main area on the Live page Default Upper left Status update mode Select an interval of the camera status notification from the following When the status of the camera changes FTP access status indicator will be displayed to notify of the camera status Polling 30s Updates the status each 30 seconds and provide notification of the camera status Real time Provide notification of the came...

Page 20: ... tab on the Basic page page 14 page 16 The settings relating to the SD memory card can be configured on this page IMPORTANT When removing the SD memory card from the camera make sure to turn the Power button off before removing the SD memory card There are limited times to overwrite on an SD memory card When having a high frequency of overwriting the lifetime of the SD memory card may become short...

Page 21: ...s started by Wearable Camera Agent Software the camera enters a recording prohibited state and the recording stops To start recording again disconnect the network charge cable from the conversion box and battery container or disconnect the LAN cable Pre recording duration Select whether or not to perform recording before the REC button is pressed When Recording duration is set to Auto this setting...

Page 22: ... Audio is muting Press the REC button Press and hold the REC button for 2 seconds or more Press and hold the REC button for 2 seconds or more or wait until the recording duration time expires Recording duration Auto Off On1 On2 Audio This operation is not affected by pressing the REC button Recording duration Continue On2 Off On1 Audio Pre recording Pre recording Pre recording Pre recording Pre re...

Page 23: ... or more Press and hold the REC button for 2 seconds or more or wait until the recording duration time expires Recording duration Auto Off On1 On2 Audio The operation is not affected by pressing and holding the REC button for 2 seconds or more When Audio is set to On1 not mute during pre recording or On2 mute during pre recording audio recording can be switched to mute unmute by pressing the REC b...

Page 24: ...he specified value Max bit rate Select the bit rate for images to be recorded from the following 2048kbps 4096kbps 8192kbps Default 8192kbps Note When 8192kbps is selected for the Max bit rate 30s cannot be selected for Pre recording duration SD memory card information Remaining capacity Total capacity and remaining capacity of the SD memory card will be displayed Depending on the status of the SD...

Page 25: ...the total size since the default directory is automatically created in the SD memory card Recommended SD memory card Manufactured by Panasonic option SDHC memory card 32 GB CLASS10 except miniSD card and microSD card Use an SD memory card formatted compliant with the SD memory card standard at the default Possible time of H 264 images that can be saved on the SD memory card as indications IMPORTAN...

Page 26: ...ed the detailed settings menu will be displayed in a newly opened window The detailed settings can be configured while monitoring images displayed on the Image tab The settings relating to image adjust can be configured in this section Image adjust Click the Setup button to display the setup menu that can configure the settings relating to image quality The setup menu will be displayed in a newly ...

Page 27: ... a newly displayed window When the values are changed the changed values will be applied to the currently displayed image on the Image tab Wide dynamic range WDR Select On or Off to determine whether or not to activate the wide dynamic range function This function compensates brightness so that it produces clearer images even if objects have various illumination intensities Operating Instructions ...

Page 28: ...tting mask areas on brighter parts of images brighter On Mask areas will be set automatically Off Mask areas will not be set automatically It is necessary to set them manually Default Off Mask area When Off is selected for Wide dynamic range WDR and Back light compensation BLC it is possible to compensate for back light by masking brighter areas Click the Reset button to reset mask areas to the de...

Page 29: ...ce adjustment from the following White color can be adjusted by Red gain and Blue gain ATW1 Selects the automatic tracing white balance mode The camera will constantly check the color temperature of the light source and adjust the white balance automatically Operating color temperature range is approx 2 700 K 6 000 K ATW2 Selects the automatic tracing white balance mode under a sodium lamp The cam...

Page 30: ...ill become thicker When the cursor is moved in the direction the colors will be thinner Click the Reset button to reset the color to the default Default 128 Aperture level Adjust the aperture level outline compensation Images will be sharper when the cursor is moved in the direction and will be softer when the cursor is moved in the direction Click the Reset button to reset the color to the defaul...

Page 31: ...e dynamic range WDR and Back light compensation BLC page 28 it is possible to compensate for back light by masking brighter areas 1 Display the Image adjust setup menu page 26 Operating Instructions 31 6 Configure the settings relating to images Image ...

Page 32: ...3 Click the divided areas to be masked The clicked areas will be masked and will become white To cancel masking click the area again 4 Click the End button after completing masking areas The borders on the image displayed on the Image tab will disappear 32 Operating Instructions 6 Configure the settings relating to images Image ...

Page 33: ...s relating to the authentication of users who can access this camera from the PC can be configured on this page Up to 18 users can be registered Note When user authentication has failed to pass authentication error 8 times within 30 seconds using the same IP address PC access to the unit will be denied for a while User auth Select On or Off to determine whether or not to authenticate the users Def...

Page 34: ...must have access level 1 Administrator User check From the pull down menu of User check the registered user can be selected and the selected user s information can be checked The registered user will be displayed with the access level Example admin 1 To delete the registered user click the Delete button after selecting the user to be deleted Operation form Select the operation form from the follow...

Page 35: ...ministrator IP address Subnet mask Default gateway when using the gateway server router HTTP port IPv4 network DHCP Select On or Off to determine whether or not to use the DHCP function Configure the DHCP server not to assign the same IP addresses used for the other cameras and PCs whose IP address is unique Refer to the network administrator for further information about the settings of the serve...

Page 36: ...ure the IP address for IPv6 network IPv6 address On Enter an IPv6 address manually Off Manual entry of an IPv6 address will become unavailable Default Off IP address IPv6 When On is selected for Manual manual entry of the IPv6 address is required Do not enter an address already in use Note When connecting to the manually configured IPv6 address beyond the router use an IPv6 compatible router and t...

Page 37: ...ce the camera starts up 20min The camera information display and the network setting operation using the Panasonic IP Setting Software are allowed for 20 minutes since the camera starts up Unlimited The camera information display and the network setting operation using the Panasonic IP Setting Software are allowed without time limitation Default Unlimited Note When using Wearable Camera Agent Soft...

Page 38: ...be overwritten The system logs will be displayed in group of 100 logs each The logs will be saved even when the power of the camera is turned off Next 100 When clicking Next 100 the next 100 system logs will be displayed Previous 100 When clicking Previous 100 the previous 100 system logs will be displayed No The serial number of the system log will be displayed Time date Time and date at the erro...

Page 39: ... be displayed 1 Contact the dealer and download the latest firmware onto a PC IMPORTANT A blank space cannot be used for the name of the directory where the downloaded firmware to be saved 2 Click the Browse button and designate the downloaded firmware 3 Click the radio button respective to the desired option to determine whether or not to initialize the settings after completing the firmware upgr...

Page 40: ...tware licensing 9 3 Reset the settings Reboot the camera Default reset Click the Default reset tab of the Maintenance page page 14 page 16 The settings and the HTML data of the camera can be initialized and reboot of the camera can be performed on this page Reset to the default Except the network settings Click the Execute button to reset the settings to the default Note that the network settings ...

Page 41: ...lding down the initial set button and keep the initial set button held down for about 5 seconds The camera will start up and the settings including the network settings will be initialized in about 3 minutes Do not turn off the power of the unit for about 3 minutes after turning on the power Operating Instructions 41 9 Maintenance of the camera Maintenance ...

Page 42: ...omes full The remaining memory of the SD memory card has run out Format the SD memory card or download the recorded data with the PC application Log indications relating to Conversion box Category Indication Description Conversion box Connected Conversion box has been connected Disconnected Conversion box has been disconnected Log indications relating to the battery Category Indication Description...

Page 43: ...rding start The image recording was started by the REC button Recording extend The image recording was extended by the REC button Recording stop The image recording was stopped by the REC button Audio muted The audio recording was stopped by the REC button Audio unmuted The audio recording was restarted by the REC button Operating Instructions 43 10 About the displayed system log ...

Page 44: ...e camera on Check if the power of the camera is turned on Installation Guide Are the set IP addresses valid 35 Are you accessing the wrong IP address Check the connection as follows With the Windows command prompt ping IP address of the camera If there is reply from the camera the connection is normal If not proceed either of the following Reboot the camera and change the IP address by using the P...

Page 45: ...When the camera and the PC are connected in the different subnet Is the IP address of the default gateway set for the camera correct Authentication window is displayed repeatedly Is the user name and password changed While accessing the camera when changing the user name and password of another user logging into the camera on another web browser the authentication window will be displayed each tim...

Page 46: ...do the following 1 Select Internet Options from Tools on the menu bar of Internet Explorer The Internet Options window will be displayed 2 When using Internet Explorer 7 0 Internet Explorer 8 0 or Internet Explorer 9 0 Click the Settings button in the Browsing history section on the General tab and then select Every time I visit the webpage for Check for newer versions of stored pages in the Tempo...

Page 47: ...oftware the REC button operations are disabled After downloading is completed disconnect the network charge cable from the conversion box and battery container or disconnect the LAN cable and then start recording operations again 21 The FTP access status indicator on the Live page does not display the current status in real time Is the viewer software installed on the PC Confirm that the viewer so...

Page 48: ...update the driver of the display adapter to the latest version If updating the driver does not solve the problem adjust the hardware acceleration as follows The following are descriptions for when Windows XP is installed on the PC in use 1 Right click on the desktop and select Properties from the displayed pop up menu 2 Select Settings from Display Properties and then click the Advanced button 3 C...

Page 49: ...rmation bar Pop up blocked To see this pop up or additional options click here Internet Explorer 6 Internet Explorer 7 or Internet Explorer 8 Click the information bar and select Always Allow Pop ups from This Site The dialog window saying Allow pop ups from this site will be displayed Click the Yes button The following message is displayed on the information bar This webpage wants to run the foll...

Page 50: ...un click here A similar message is displayed for WebVideo Module and WebAudio Module Click the information bar and select for the add on to run If you do not want this message bar to be displayed click Internet Options under Tools of the menu bar of Internet Explorer click the Security tab and then register the IP address of the camera in the trusted sites Or you can click the Custom Level button ...

Page 51: ...Operating Instructions 51 Notes ...

Page 52: ...asonic Way Secaucus New Jersey 07094 U S A Panasonic Canada Inc 5770 Ambler Drive Mississauga Ontario L4W 2T3 Canada 905 624 5010 www panasonic ca For Europe and other countries http panasonic net Importer s name and address to follow EU rules Panasonic Testing Centre Panasonic Marketing Europe GmbH Winsbergring 15 22525 Hamburg F R Germany Panasonic System Networks Co Ltd 2012 PGQP1180YA C0212 10...

Reviews: