background image

Scanning

14

It is possible to output scanned images to a USB flash 
memory device, SD memory card, or external printer.
If multiple output devices are connected to this unit at 
the same time, the output destination will be selected 
in the following priority:

1. USB flash memory device
2. SD memory card
3. External Printer.

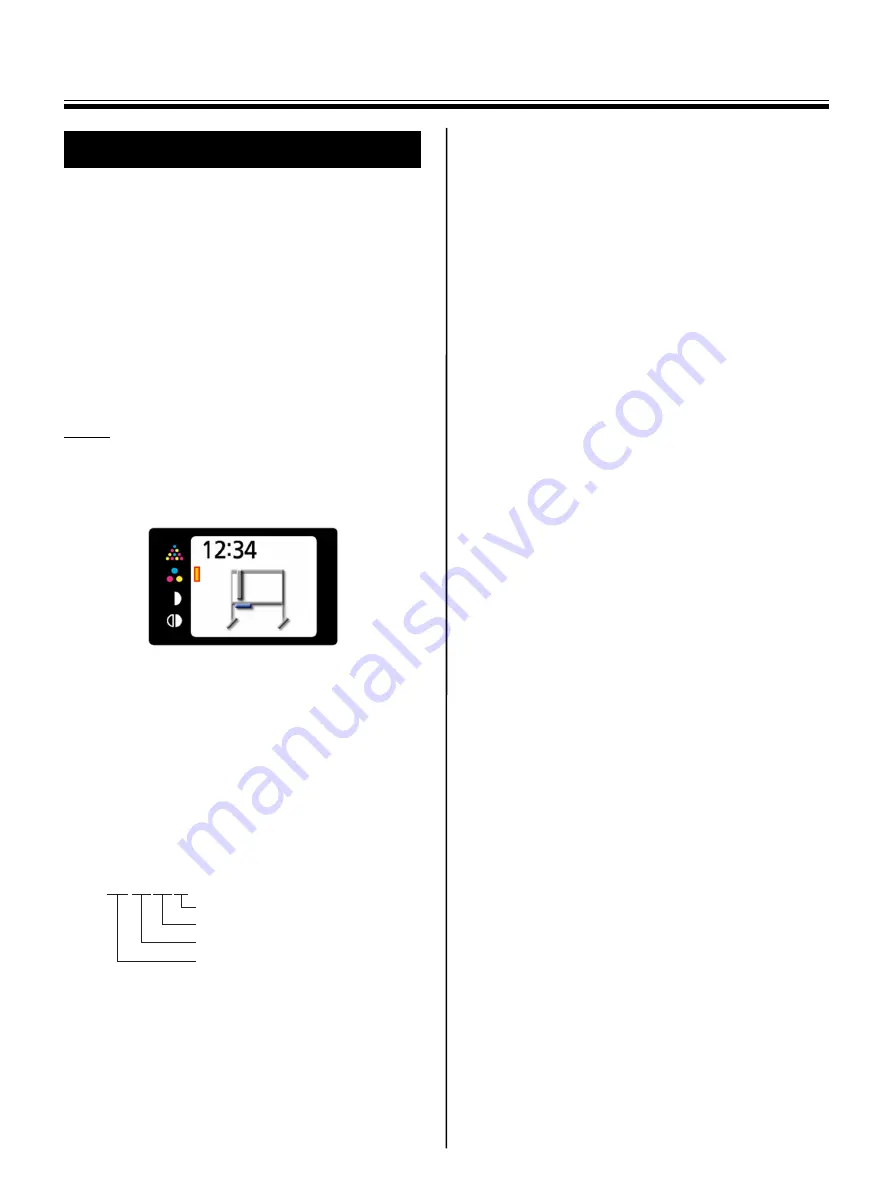
The current destination is shown on the display.

For information on scanning images using a 
computer, refer to “Computer Interfacing” on page 22.

Note

When there is no appropriate output destination 
connected to the unit, an electronic board icon is 
shown on the display. In this case, the unit will not 
start scanning even if you press the Start/Stop key.

When the output destination is a USB flash memory 
device or an SD memory card, the following file 
formats can be selected (refer to “File format set-up” 
on page 19
).

Color: PDF/JPEG format
B/W:

PDF/TIFF format

Images output to a USB flash memory device or an 
SD memory card are saved as follows:

[Folder]

For UB-2815C: “UB-2815C”
For UB-2315C: “UB-2315C”

[File name]

[File Extension]

PDF file:

“MMDDHHxx.pdf”

JPEG file: “MMDDHHxx.jpg”
TIFF file:

“MMDDHHxx.tif”

For information regarding available USB flash 
memory devices, SD memory cards, and printers, 
refer to the following site:
http://panasonic.co.jp/pcc/products/en/eboard/
ub-2815c_info.htm

Scanning

MMDDHHxx.pdf (in the case of PDF file)

Sequential number (00-99)
Hour
Day
Month

Summary of Contents for WORKIO UB-2315C

Page 1: ... this unit please read these instructions completely and keep them carefully for future reference This unit is designed for installation by a qualified servicing dealer Installation performed by non authorized individuals could cause safety related problems with the operation of this equipment For U S A only To locate the closest authorized dealer in your area please call 1 800 449 8989 The unit i...

Page 2: ...ere Things you should keep a record of Accessories Tel Warning about saving data When the system storage device or any of its optional storage device is adversely effected by operational errors static electricity electrical noise vibration dust or when the power has been cut off due to malfunction repair or inadvertently the memory contents may be lost or changed Before operating the system make a...

Page 3: ...s Corporation in the United States other countries or both Pentium is a trademark or registered trademark of Intel Corporation or its subsidiaries in the United States and other countries Adobe Acrobat Acrobat Reader and Reader are either registered trademarks or trademarks of Adobe Systems Incorporated in the United States and or other countries SD Logo is a trademark This software is based in pa...

Page 4: ...t Printing with an External Printer Allows scanned documents or hand written text diagrams to be printed on an external printer via USB cable Computer Interfacing Panasonic Document Management System hereafter referred to as Panasonic DMS is a TWAIN driver compatible software which allows you to scan documents or hand written text diagrams and store them directly onto a computer Panasonic DMS also...

Page 5: ...g the Printer 21 Computer Interfacing 22 System Requirements 22 Contents of CD ROM 22 Installing Drivers Panaboard Software 23 Installing the Panasonic DMS Software 25 Removing Drivers Panaboard Software 26 Removing the Panasonic DMS Software 26 Scanning with the Panasonic DMS 27 Panaboard Operation Panel 28 Daily Care and Maintenance 29 Cleaning the Whiteboard and the Unit 29 Caring for the Erase...

Page 6: ...ontact a licensed electrician to replace the AC outlet with a properly grounded earthed one Do not defeat the grounding earthing plug ex do not use a conversion plug Plug the power cord firmly into an AC outlet Otherwise it can cause fire or electric shock Do not pull bend rest objects on or chafe the power cord and plug Damage to the power cord or plug can cause fire or electric shock Do not atte...

Page 7: ...ed in the Operating Instructions A high voltage component can cause electric shock Do not alter the unit or modify any parts Alteration or modification can cause fire or electric shock CHOKING HAZARD Keep the marker s cap battery SD memory card or USB flash memory device out of reach of children to prevent chocking Battery Use only the specified type of battery Using the incorrect type of battery ...

Page 8: ...eguards If the unit is fallen down or damaged turn the unit off and unplug the power cord Otherwise it may cause fire or electric shock Do not put drinks other liquids or heavy items on the tray or whiteboard Accidental spillage of liquid into the unit may cause severe damage If this occurs turn the unit off unplug the power cord and contact your dealer for service Do not lean against the whiteboa...

Page 9: ...ted into any 13 amp socket If a new plug is to be fitted please observe the wiring code as shown below If in any doubt please consult a qualified electrician WARNING This appliance must be earthed IMPORTANT The wires in this mains lead are coloured in accordance with the following code Green and Yellow Earth Blue Neutral Brown Live As the colours of the wire in the mains lead of this appliance may...

Page 10: ...nated markers and eraser See page 38 Use of accessories other than those included or designated such as oil based markers may damage the whiteboard or result in hard to erase markings Store markers horizontally as vertical storage may stop the ink from coming out Scanner Do not place hands on the top rail of this unit as it may result in problems when scanning Do not place objects other than marke...

Page 11: ...y soft cloth Please take the following precautions regarding the deletion of classified data when discarding the memory device i e USB flash memory device or SD memory card or giving the memory device to another person Using basic operations such as format or delete on a computer may not completely erase the data from the memory device To guarantee that the data you wish to erase will no longer ex...

Page 12: ...Board Stopper Lever Board Stopper Tray Whiteboard White Balance Area Stand Stand Caster with Lock Caster with Lock Caster Caster Fall prevention Extension Leg Fall prevention Extension Leg AC Inlet Power Cord Battery Holder Power Switch OFF ON Control Panel USB Connector A for USB Flash Memory Device SD Memory Card Slot SD Memory Card Cover for Printer USB Connector A USB Connector B for Computer ...

Page 13: ...ing color documents Color Standard For scanning in normal resolution color Recommended for scanning handwritten text diagrams written with a color marker B W Dark For scanning black and white images to be darker than normal density B W Normal For scanning black and white images with normal density Preview mode Returns to the previous screen Set up mode Returns to standby mode Set up Key Press to c...

Page 14: ...y In this case the unit will not start scanning even if you press the Start Stop key When the output destination is a USB flash memory device or an SD memory card the following file formats can be selected refer to File format set up on page 19 Color PDF JPEG format B W PDF TIFF format Images output to a USB flash memory device or an SD memory card are saved as follows Folder For UB 2815C UB 2815C...

Page 15: ...ized by the unit faster 3 Press the Mode Key to select the scanning mode 4 Press the Start Stop Key The unit starts scanning The scanning status is shown on the display When scanning has finished a preview of the scanned image is shown on the display Note Do not remove the USB flash memory device until the preview is shown on the display 5 Press the Multi Copy Key to zoom in on the image It is pos...

Page 16: ... sd_formatter html 3 Press the Mode Key to select the scanning mode 4 Press the Start Stop Key The unit starts scanning The scanning status is shown on the display When scanning has finished a preview of the scanned image is shown on the display Note Do not remove the SD memory card until the preview is shown on the display 5 Press the Multi Copy Key to zoom in on the image It is possible to view ...

Page 17: ...The unit starts scanning and the image is printed The copying status is shown on the display After printing is finished the unit will return to standby mode Note Only remove the USB cable once you have returned to standby mode 1 Disconnect the power cord on both ends and coil it Make sure if there are any other devices connected to the unit If so disconnect them 2 Release the lock A and fold back ...

Page 18: ...therwise the whiteboard may turn unexpectedly resulting in injury Note Be careful not to strike people or objects when rotating the whiteboard The UB 2315C is equipped with one board stopper and one board stopper lever 1 Move the scanner to the left side 2 Unlock the whiteboard by pushing the board stopper levers down Once the board stoppers are unlocked it is possible to rotate the whiteboard 3 R...

Page 19: ... or SD memory card 1 Press the Set up Key The set up screen is displayed 2 Press the Set up Key again File format set up is selected 3 Press the Multi Copy Key repeatedly to select PDF or JPEG TIFF When PDF is selected all images are saved as PDF files When JPEG TIFF is selected images scanned in color are saved as JPEG files and images scanned in black and white are saved as TIFF files 4 Press th...

Page 20: ...15C press the Set up Key 3 times For UB 2315C press the Set up Key twice Time set up is selected 3 Press the Multi Copy Key The time set up screen is displayed Select the desired setting you wish to change by pressing the Multi Copy Key repeatedly The value of each setting can be changed by pressing the Set up Key By pressing the Start Stop Key repeatedly it is possible to change the date format a...

Page 21: ...been fixed If the pattern is not printed as shown below refer to the manual of the printer for details Note This item is only be displayed when an external printer is connected to the unit 1 Press the Set up Key The set up screen is displayed 2 For UB 2815C press the Set up Key 4 times For UB 2315C press the Set up Key 3 times The Test Print feature is selected 3 Press the Multi Copy Key The print...

Page 22: ...nasonic DMS manual Panaboard operating instructions Note The menu window contains links to SD memory card format software and Adobe Reader See page 23 Notes when connecting the unit to a computer First install the USB and TWAIN driver to your computer then connect the unit to the computer refer to Installing Drivers Panaboard Software If you connect the unit to a USB hub it is not guaranteed to wo...

Page 23: ...ow may not appear automatically In such a case execute Menu exe in the CD ROM from My Computer 3 When Welcome window appears click Next 4 Click Panaboard Setup To install Panasonic DMS click Panasonic DMS see page 25 To read the operating instructions in the provided CD ROM the Adobe Reader or Acrobat Reader must be installed in your computer It can be downloaded from the Adobe s Web site if Inter...

Page 24: ...computer 9 Follow the on screen instructions if the wizard windows appear If the wizard window is displayed to connect to the Windows Update in Windows XP SP2 select No If the warning window is displayed in Windows 2000 Windows XP select Yes or Continue Anyway to continue the installation 10 When the installation is completed click OK ...

Page 25: ... and Panasonic Software click Panaboard Setup see page 23 To read the operating instructions in the provided CD ROM the Adobe Reader or Acrobat Reader must be installed in your computer It can be downloaded from the Adobe s Web site if Internet is available 5 Click Install Panasonic DMS Software 6 When wizard window appears click Next 7 Read LIMITED USE LICENSE AGREEMENT carefully choose I accept ...

Page 26: ...rol Panel 4 Select Panaboard UB 2 Software in the Add Remove Programs list and click Change Remove 5 Follows the instructions on the screen 6 After uninstalling restart your computer If you need to remove Panasonic DMS perform the following steps 1 Power on your computer and start Windows Log on as an administrator for Windows 2000 or Windows XP 2 Click Start move the pointer to Programs Panasonic...

Page 27: ...cquire Image or click the scanner icon on the Toolbar The Panaboard Operation Panel appears Note If the Panaboard Operation Panel does not appear check the USB cable connection or the status of the unit 5 Click the Start button Scanning begins and the scanned image will be displayed on the screen of the computer The dialog box for scanning is displayed Click Stop Scanning to stop scanning 6 Click ...

Page 28: ...onfiguration Button Click to set the following items Embed time stamp in image It is possible to select whether the time that an image is scanned is displayed on the image or not If checked the time is displayed on the image Scan Copy in full size UB 2815C only If checked images will be saved in full size mode Date and Time Set the year month day time for the unit clock Date order The order in whi...

Page 29: ...ves or surfactants as this may result in discoloration or difficulty of erasing When the erasing surface of the eraser becomes dirty hold down the sheet under the top sheet with your finger and peel off the dirty sheet white or gray sheet by pulling in the direction of the arrow Note Be sure to peel off only one sheet white or gray sheet of the eraser When the eraser becomes thin make sure that th...

Page 30: ... as this may result in discoloration 3 Move the scanner to the home position If black lines appear or the image is very dark clean the scanner lens 1 Lift the scanner 2 Gently wipe the scanner lens with a water dampened cloth that has been thoroughly wrung or a cotton swab 3 Move the scanner to the home position Note Gently place the scanner back down Dropping the scanner may result in injury or d...

Page 31: ...d on the battery holder 3 Set the battery holder with the battery side upward and retighten the screw in step 1 4 Turn the power on and set the current time See page 20 Replacing the Battery for the unit clock Screw 1 2 Caution New battery Old battery C R 2 0 3 2 C R 2 0 3 2 P a n a s o n i c P S This product contains a CR Coin Cell Lithium Battery which contains Perchlorate Material special handl...

Page 32: ...te http panasonic co jp pcc products en eboard ub 2815c_info htm The USB flash memory device or printer is connected via a USB hub Do not connect via a USB hub It takes a long time for the unit to recognize the USB flash memory device The USB flash memory device is formatted using FAT32 file format Format it using FAT FAT16 file format Note All data on the USB flash memory device is lost when the ...

Page 33: ... the printer When the unit s power is turned on the time set up screen is displayed The battery is drained Change the battery then set time 31 The computer does not recognize this unit Confirm that the USB cable is properly connected on both sides or put the unit into standby mode This unit is connected via a USB hub Do not connect via a USB hub 22 The USB driver does not work properly This unit h...

Page 34: ...ncrease the available space using a computer U306010 There is no available space in the SD memory card Increase the available space using a computer U307001 U307002 U307161 Unsupported USB flash memory device is connected You cannot use a USB flash memory device that is equipped with certain features such as a security feature The time it takes for the unit to recognize a USB flash memory device d...

Page 35: ...ecame full while scanning Increase the available space using a computer then scan again U307144 USB flash memory device writing error occurred Check whether the USB flash memory device is written normally using a computer U306144 SD memory card writing error occurred Check whether the SD memory card is written normally using a computer U407209 USB flash memory device was removed while scanning Con...

Page 36: ... Display 1 8 Color LCD Battery for Clock Lithium Coin Battery CR2032 1 PC interface Full Speed USB 2 0 This unit does not function with Hi Speed USB 2 0 Input Block Panel surfaces 2 steel whiteboard surfaces Panel dimensions Height Width 869 mm 1 781 mm 2 103 16 5 103 32 1 981 mm 78 diagonal 869 mm 1 300 mm 2 103 16 4 35 32 1 563 mm 62 diagonal Scanning area Height Width 797 mm 1 720 mm 2 73 8 5 7...

Page 37: ...olor Fine 2 4 x 2 4 dot mm 62 x 62 dpi Color Standard 2 4 x 1 2 dot mm 62 x 31 dpi B W 2 4 x 2 4 dot mm 62 x 62 dpi Letter Color Fine 2 3 x 2 3 dot mm 58 x 58 dpi Color Standard 2 3 x 1 1 dot mm 58 x 29 dpi B W 2 3 x 2 3 dot mm 58 x 58 dpi Scanning Time Color Fine 48 s Color Standard 26 s B W 18 s Printer Output Block Interface Full Speed USB 2 0 Recommended Printer Refer to the Internet home page...

Page 38: ...re You can also download the formatting software for the SD memory card from the following site http panasonic co jp pavc global cs sd download sd_formatter html SD Memory Card Output Block SD specification Version 1 10 SD I O standard is not supported Support Format FAT16 format 3 Maximum capacity 2 GB Recommended SD memory card Refer to the Internet home page 1 Store File Format Color scanning P...

Page 39: ...l completely CLASS 1 LED PRODUCT Installation Installation Manual for qualified service personnel Table of Contents page For Your Safety 40 Assembling the unit 41 Accessories for assembling 41 Assembly 42 Electronic Board Operations Check 46 Repacking 47 ...

Page 40: ...through the normal wiring The fact that the equipment operates satisfactorily does not imply that the power point is grounded earthed and that the installation is completely safe For your safety if in any doubt about the effective grounding earthing of the power point consult a qualified electrician Do not install the unit except by a qualified service personnel After installing or moving the unit...

Page 41: ...ing The package includes the parts for setting up the unit shown below Make sure that all of these parts are included in the package before proceeding No Part Name Illustration Q ty Remarks Power cord 1 Connector cover 1 Screw 4 Washer 4 Hexagonal wrench 1 4 5 ...

Page 42: ...opper lever The shipping box cushioning material and other packing material will be necessary for repackaging this unit Do not throw them away Shipping box Stand Cushions Electronic board Scanner Shipping box Joints Joints Joints Markers Black Red Blue 1 each Eraser 1 Power cord 1 Software CD ROM 1 Operating Instructions 1 Warranty card 1 1 Connector cover 1 Screw 4 Washer 4 Hexagonal wrench 1 Con...

Page 43: ...transportation plate In the same way remove the other side transportation plate Note Can not attach the stands without removing the transportation plates 4 Put the unit on the cushions lower 1 Lift the bottom control box side of the unit frame and shift it 300 mm 1 3 16 to 400 mm 1 9 16 and place it on the cushion lower 2 Remove the band holding the slider in Transportation plate 300 mm 400 mm 1 3...

Page 44: ...exagonal wrench through holes A and C Note By tightening the two screws with washers through holes A and B the unit will be positioned 100 mm 3 15 16 higher than normal height 1 958 mm 6 5 5 32 6 Stand the unit up and attach the whiteboard 1 Stand the unit up 2 Attach the whiteboard from behind by inserting the metal spindle of the whiteboard in the slot inside the frame of the unit A B C D A B C ...

Page 45: ...ect both cables to the corresponding connectors Secure both cables using the clamper 4 Attach the connector cover with the black resin inside the cover 8 Connect the power cord Securely fit the supplied power cord in the AC inlet of the control box 9 Wipe the whiteboard surfaces Soak a soft cloth with water wring well and wipe the whiteboard surfaces 10 Remove the battery protection sheet 11 Check...

Page 46: ... page 10 Press the Start Stop key The scanner moves smoothly and the scanned image appears on the display Normal operation The scanner does not move smoothly Check the connector See step 7 on page 45 A strange noise is made Check the scanner attachment See step 7 on page 45 The scanned image is not displayed Contact the store or dealer from which the unit was purchased The entire scannable area is...

Page 47: ... 2815C UB 2315C is equipped with one board stopper and one board stopper lever Shipping box Stand Cushions Electronic board Scanner Shipping box Joints Joints Joints Markers Black Red Blue 1 each Eraser 1 Power cord 1 Software CD ROM 1 Operating Instructions 1 Warranty card 1 1 Connector cover 1 Screw 4 Washer 4 Hexagonal wrench 1 Contents of Accessory box Whiteboard 1 For U S A models only ...

Page 48: ...to designated collection points where they will be accepted on a free of charge basis Alternatively in some countries you may be able to return your products to your local retailer upon the purchase of an equivalent new product Disposing of this product correctly will help to save valuable resources and prevent any potential negative effects on human health and the environment which could otherwis...

Reviews: