background image

70

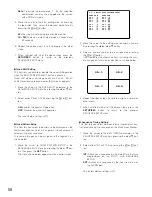
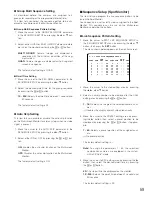
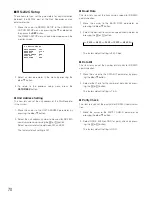
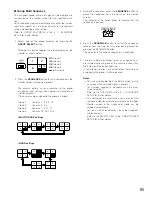
Baud Rate

This item lets you set the transmission speed for RS-232C
communication.

1. Move the cursor to the BAUD RATE parameter by

pressing the 

D

or 

C

button.

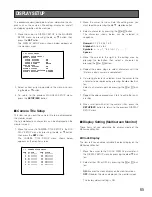
2. Select the desired transmission speed shown below by

pressing the 

+

or 

-

button.

The factory default setting is 9 600 bps.

Data Bit

This item lets you set the number of data bits for RS-232C
communication.

1. Move the cursor to the DATA BIT parameter by press-

ing the 

D

or 

C

button.

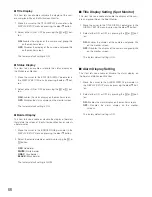
2. Select either 7 or 8 for the number of data bits by press-

ing the 

+

or 

-

button.

The factory default setting is 7 bits.

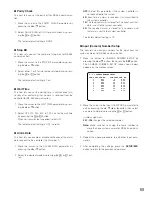
Parity Check

This item lets you set the parity bit for RS-232C communica-
tion.

1. Move the cursor to the PARITY CHECK parameter by

pressing the 

D

or 

C

button.

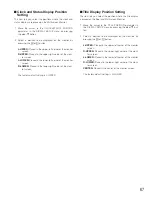
2. Select NONE, EVEN or ODD for parity check by press-

ing the 

+

or 

-

button.

The factory default setting is ODD.

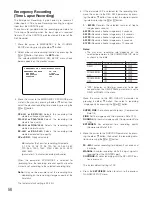
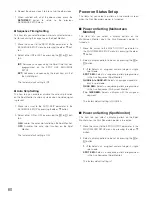
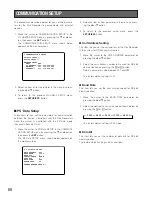
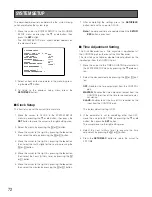
RS-232C Setup

These items let you set the parameters for communication
between the SERIAL port of the Disk Recorder and an
external device.

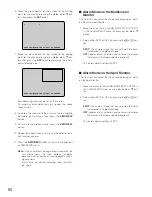
1. Move the cursor to RS232C SETUP in the COMMUNI-

CATION SETUP menu by pressing the 

C

or 

D

button,

then press the 

SET

button.

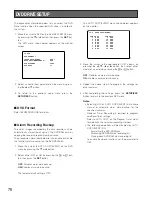
The RS232C SETUP menu shown below appears on the
monitor screen.

2. Select an item parameter in the menu by pressing the

D

or 

C

button.

3. To return to the previous setup menu, press the

SETUP/ESC

button.

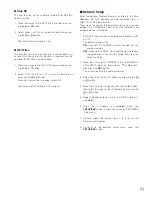
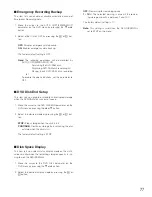
Unit Address Setting

This item lets you set the unit address of the Disk Recorder
in the system.

1. Move the cursor to the UNIT ADDRESS parameter by

pressing the 

D

or 

C

button.

2. Select the unit address number to be used for RS-232C

communication by pressing the 

+

or 

-

button.

Select a parameter value between 001 and 099.

The factory default setting is 001.

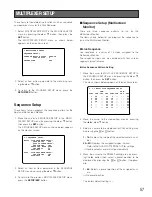
8-2 RS232C SETUP

UNIT ADDRESS   001
BAUD RATE      9600
DATA BIT       7
PARITY CHECK   ODD
STOP BIT       1
WAIT TIME      OFF

 2 400 

 4 800 

 9 600 

19 200 

 38 400 

Summary of Contents for WJ-HD500B

Page 1: ... WJ HD500B Ver 2 Digital Disk Recorder Operating Instructions REMOTO ALARM GROUP SELECT PLAY PPAUSE REV FWD INDEX ALARM SEARCH DISPLAY ALARM RESET ALARM SUSPEND HDD FULL TIMER OPRATE Digital Disk Recorder WJ HD500 500B LOCK SPOT MULTISCREEN MULTISCREEN SELECT EL ZOOM REC REVIEW REC STOP 1 2 3 4 5 6 7 8 9 10 11 12 13 14 15 16 SET FS 16 16 ...

Page 2: ...nges or modifications not expressly approved by the party responsible for compli ance could void the user s authority to operate this equip ment For U S A WARNING To prevent fire or electric shock hazard do not expose this appliance to rain or moisture The apparatus shall not be exposed to dripping or splashing and that no objects filled with liquids such as vases shall be placed on the apparatus ...

Page 3: ...e Shot Recording Internal Timer 55 Emergency Recording Time Lapse Recording 56 MULTIPLEXER SETUP 57 Sequence Setup 57 Sequence Setup Multiscreen Monitor 57 Sequence Setup Spot Monitor 59 Power on Status Setup 60 Power on Setting Multiscreen Monitor 60 Power on Setting Spot Monitor 60 Secret View Setting 61 ALARM SETUP 62 Alarm Port Setting 62 Alarm Auto Reset Setting 62 Alarm Output Setting 62 Ala...

Page 4: ...sible to record several images simultane ously depending on the system requirements such as varied input image quality recording time etc Reliable recording of events Obtain reliable records of important events by selecting the recording mode best suited There are three recording modes One Shot Multi Shot and Time Lapse Recording Easy image search Three search modes for quick and easy images searc...

Page 5: ...ll the disk recorder horizontally Do not operate the appliance beyond its specified temperature humidity or power source ratings Use the appliance at temperatures within 5 C 45 C 41 F 113 F and a humidity below 85 The input power source for this appliance is 120 V AC 60 Hz Fully charge up the backup battery Keep the appliance turned on for at least 48 hours to recharge the backup battery This proc...

Page 6: ...light when the alarm is reset automatically To turn the indicator off press the ALARM RESET but ton u Sequence Button SEQUENCE Runs the assigned sequence on the selected monitor screen for the specified duration During the sequence pressing this button will pause the sequence that is being run on the monitor screen The LED indicates the status as follows On Sequence is being run Blinking Sequence ...

Page 7: ...s shown below On Indicates that the playback mode is selected Blinking Indicates that the pause mode is selected 0 Record Button REC Pressing this button will start the recording manually when the Timer parameter is set to OFF in the setup menu The indicator in the button lights up to indicate that the recording mode is selected 1 JogDial Rotate in paused playback to move forward or back ward to t...

Page 8: ...Port CONTROL The port has the functions listed below Make connec tions to these pins as needed for operating your sys tem Pin No 1 2 3 4 5 6 7 8 9 10 11 12 13 Group Recording Output Manual Recording Output Emergency Recording Output Sequence Timing Output DVD Remain Space Output HDD Remain Space Output Thermal Error Input Extension 1 Thermal Error Input Extension 2 Thermal Error Input Extension 3 ...

Page 9: ...ork Board can be installed in the Disk Recorder This port is used to exchange control data with Ethernet via an Ethernet Hub 6 Cooling Fan Prevents the temperature of the Recorder from rising Do not block the ventilation opening on the cover 7 AC Inlet Socket AC IN Plug the power cord supplied as a standard accesso ry into this socket and connect it to an AC outlet 8 Power Switch POWER ON OFF This...

Page 10: ...n will change the screen pattern as follows 4 7 9 10 13 16 4 screen segments 4 Recording Preview Button REC PREVIEW Use this button to display the playback image with the live images on the Multiscreen Monitor The LED indicates the status as shown below On The selected playback image is displayed Blinking Prompts you to select the numeric button for displaying the playback image 5 Sequence Button ...

Page 11: ... selected images on to the DVD RAM disk when the system is equipped the DVD Extension Unit 3 Numeric Buttons 1 16 Use these buttons to select the desired camera number while recording and playing back Entering the preset password with these buttons will release the button lock function 4 Set Button SET Use this button to select multiple records in the list for coping to the DVD RAM disk 5 Incremen...

Page 12: ...control panel by tightening the screws INSTALLATION The installations described below should be made by qualified service personnel or system installers Installing the Optional Hard Disk At the time of shipment from the factory the WJ HD500B Disk Recorder is equipped with one hard disk drive an optional drive can be installed to increase the hard disk storage capacity To install the optional hard ...

Page 13: ... the supplied flat cable to the brown colored receptacle on the main board as shown in the figure 6 Place the main board and CN403 as before and secure them by tightening the reinstalled screws 7 Remove a screw on the bracket as shown in the figure and then fix a supplied grounding wire by tightening the removed screw 8 Place the Network Board on the brackets as shown in the figure then secure it ...

Page 14: ...otion Detector Board WJ HDB501 is installed exclu sively in the WJ HD500B Disk Recorder 1 Unplug the power cord from the WJ HD500B Digital Disk Recorder or disconnect the plug from the AC out let 2 Remove the top cover of the Disk Recorder by remov ing the 11 screws as shown below 3 Remove the 6 screws on the board as shown below and disconnect the CN403 4 Turn over the Main Board with the front s...

Page 15: ...ng it with four screws not includ ed Cautions The cooling fan inside the Disk Recorder is subject to wear and needs to be replaced periodically Do not block the ventilation opening or slots in the cover to prevent the appliance from overheating Always keep the temperature in the rack below 45 C 113 F If the rack is subject to vibration secure the rear of the appliance to the rack by using addition...

Page 16: ...ULL HDD SEQUENCE SET LOCK ALARM ALARM RESET ALARM SUSPEND MULTISCREEN SELECT SET UP ESC GROUP SELECT SPOT MULTISCREEN DAYLIGHT SAVINGS EL ZOOM COPY REC PREVIEW INDEX STOP PLAY PAUSE REC FWD REV ALARM SEARCH DISPLAY REC STOP 1 2 3 4 13 14 15 16 9 10 11 12 5 6 7 8 Digital Disk Recorder WJ HD FS 16 16 ON OFF POWER Spot Monitor Multiscreen Monitor Digital Disk Recorder WJ HD500B Extension Unit WJ HDE5...

Page 17: ...t to the VIDEO IN connectors 1 to 16 on the rear of the Disk Recorder with the coaxial cable Connection with the Monitors Connect the monitors to the SPOT OUT connector and MULTISCREEN OUT connector on the rear of the Disk Recorder with the coaxial cable 16 16 15 15 14 14 IN OUT REMOTE WV CU50 Remote Controller WV CU50 SPOT OUT OUT MULUTISCREEN ON OFF POWER ON OFF POWER Spot Monitor Multiscreen Mo...

Page 18: ...gnation Ground Alarm Input 5 Alarm Input 6 Alarm Input 7 Alarm Input 8 Alarm Input 9 Ground 5 V Output 0 2 A Recording Timer Select Input Alarm Input 14 Alarm Input 15 Alarm Input 16 ALARM 1 13 14 25 The sequence timing can be assigned to one of the recorders when the multiple Disk Recorders are equipped in the system Connect the CONTROL port and ALARM port as shown below Refer to the SEQ TIMING i...

Page 19: ...ermal Error Out Thermal Error Out Thermal Error Out Thermal Error Out Thermal Error Out G G G G G G Terminal board on the Extension Unit G THERMAL ERROR OUT NC WJ HD500B CONTROL Port 1 13 14 25 20 21 WJ HD500B CONTROL Port 1 13 14 25 20 24 Time Adjustment Output Designation Pin No 1 2 3 4 5 6 7 8 9 10 11 12 13 Group Recording Output Manual Recording Output Emergency Recording Output Sequence Timin...

Page 20: ...er failures When a power failure detect input is received from the UPS the disk recorder s power failure process starts to process this signal to turn off its power supply When the power failure process is completed the disk recorder outputs a signal to the UPS When the UPS receives the completion signal from the disk recorder the disk recorder s power is turned off Connection with CONTROL output ...

Page 21: ...IN SCSI ID SCSI ID EXT OUT EXT OUT EXT IN EXT IN TERMINA TERMINATOR OR GND GND THERMAL ERR THERMAL ERROR OUT OR OUT NC NC OFF OFF ON ON ON ON OFF OFF SIGNAL GND SIGNAL GND PO POWER WER AC IN C IN SCSI ID SCSI ID EXT OUT EXT OUT EXT IN EXT IN TERMINA TERMINATOR OR GND GND THERMAL ERR THERMAL ERROR OUT OR OUT NC NC OFF OFF ON ON ON ON OFF OFF SIGNAL GND SIGNAL GND PO POWER WER AC IN C IN SCSI ID SCS...

Page 22: ...he EXT IN port on the 2nd Extension Unit with the supplied WJ HDE510B SCSI cable Plug the cable end with magnetic core into the EXT STORAGE port and the other ends into the EXT IN port The system can be expanded by up to 6 Extension Units To connect the other Extension Units refer to the operating instructions of each unit for further informa tion SCSI ID TERMINATOR 1 GND ON OFF SIGNAL AC IN POWER...

Page 23: ... Extension Unit with an optional HDD 2 Set the SCSI ID for the DVD Extension Unit and each subsequent Extension Unit with the or selector on the rear of each Unit 0 to 5 IDs for Extension Units Note SCSI ID 6 and 7 are reserved for the WJ HD500B Digital Disk Recorder 3 Set the termination switches on the rear of the Extension Units to ON or OFF ON Is applied to the extension unit located at the en...

Page 24: ...oller and is controlled through the Disk Recorder for example set DIP switch 3 of the MODE selector to ON position Note If the system has a system controller set DIP switch 3 to OFF position RS 485 Cable POWER ON OFF ALARM Data Multiplex Unit WJ MP204 ALARM SUSPEND 1 2 3 4 ESC SET RESET SUSPEND SET UP ALARM UNIT 0 9 8 7 6 5 4 3 2 1 POWER ON OFF ALARM Data Multiplex Unit WJ MP204 ALARM SUSPEND 1 2 ...

Page 25: ...puter LAN Hub Digital Disk Recorder 10 100BASE T Cable Locally Procured 16 16 15 15 14 14 13 13 12 12 11 11 10 10 9 9 8 8 7 7 6 6 5 5 4 4 3 2 2 3 1 1 SIGNAL GND 10 100BASE T SPOT OUT IN EXT STORAGE COPY CONTROL ALARM VIDEO MODE DATA REMOTE WV CU50 GEN LOCK OUT SERIAL POWER ON AC IN OFF IN OUT OUT MULTISCREENOUT AUDIO Personal Computer Digital Disk Recorder D sub9 D sub9 or D sub25 16 16 15 15 14 1...

Page 26: ...26 ...

Page 27: ...27 PREPARATIONS ...

Page 28: ...K MENU Display indicates the status of the hard disks and shows the causes why this menu was called up Optional Extension Unit is installed ADD Requires disk formatting in the Extension Unit Replaced Hard Disk Requires disk formatting for a replaced Hard Disk Detached Hard Disk LOST Requires disk relocation in the system Hard Disk malfunctions Refer servicing to qualified service personnel Hard Di...

Page 29: ...PLEASE WAIT 3 Move the cursor to FORMAT in the menu by pressing the A or B button then press the SET button The FORMAT MENU shown below appears on the mon itor screen 4 Select the ALL password 5 digit by pressing the Numeric buttons 1 10 Refer to the password setup in the SYSTEM SETUP menu for further details The factory default setting is 12345 To select 0 for numeric input press the numeric 10 b...

Page 30: ...er of the menu 1DISK Selection Then the menu display will return to step 6 for for matting another Hard Disk Repeat the procedure 6 to 8 to format the another disk To quit formatting move the cursor to RESTART in the menu by pressing the A B D or C button then press the SET button to restart the Disk Recorder Normal camera images will appear on the monitor ALL Selection Normal camera images will a...

Page 31: ... that the AUTO COPY EVENT and AUTO COPY EMERGENCY parameters in the DVD menu are set to OFF Otherwise disk formatting is disabled Follow the procedures described below to format the DVD RAM Disk in the unit 1 Insert the DVD RAM disk into the DVD Extension Unit 2 Press and hold the SETUP ESC button for two seconds or more to display the WJ HD500 SETUP menu on the screen of the Multiscreen Monitor 3...

Page 32: ...ecorder will run through a series of instructions for the system on the Multiscreen Monitor MIRRORING FUNCTION Camera Images Recording Auxiliary Recording Manual Recorder Group 1 Timer Recorder Group 2 Group 3 Group 4 Emergency Recorder Manual Recorder Group 1 Timer Recorder Group 2 Group 3 Group 4 Emergency Recorder WJ HD500 Disk 1 Master WJ HD500 Disk 2 Slave SYSTEM CHECK PLEASE WAIT 3 If the Di...

Page 33: ...orner of the menu 7 Move the cursor to ALL MIRROR on the table by pressing the A B D or C button then press the SET button The ALL MIRROR FORMAT menu will appear on the monitor 8 Select YES in the menu by pressing the A or B but ton then press the SET button to start formatting 9 When the formatting is completed FORMAT DONE appears in the lower center of the menu Normal camera images will appear o...

Page 34: ...he DISK MENU as shown below on the monitor 2 Move the cursor to REMOVE in the menu by pressing the A B D or C button then press the SET button The DISK REMOVE menu as shown below will appear on the monitor screen The disk remove is applied to hard disks displayed with LOST and in the menu DISK MENU MAIN 1 GB 2 GB EXT5 1 GB 2 GB 3 GB 4 GB EXT4 1 2 3 ADD 4 ADD EXT3 1 LOST 2 LOST 3 LOST 4 LOST EXT2 1...

Page 35: ... two Monitors The monitor displays the video signal according to the con nection made as shown below Spot Monitor The monitor that is connected to the SPOT OUT connector on the rear of the Recorder It only displays the video input in single spot or sin gle sequence Displaying the Disk Recorder s playback is dis abled Multiscreen Monitor The monitor that is connected to the MULTISCREEN OUT connecto...

Page 36: ... is not ready or is being accessed REMOVED HD Indicates that the HDD has been removed due to access errors Identify the removed HDD on DISK MENU and replace GETTING IP Indicates that the recorder is acquir ing an IP address from the server when DHCP is on t System Status Display Displays the system status of the Disk Recorder 5 Indicates that data are being played back 5 X Indicates that data are ...

Page 37: ...F for the timer Power on recording is also enabled by selecting EXT for the timer Timer Recorder Records the assigned camera group input with the internal timer in three recording modes by selecting INT for timer The same camera input can not be assigned to another group Emergency Recorder This recording is given priority to record all video inputs in Time Lapse Recording while the input is receiv...

Page 38: ...with an image at that time Multi Shot Recording The Multi Shot Recording is an event recording function reacting to an alarm input when the recording timer is set to the inter nal timer INT It records the number of images in pre and post recording Pre recording is the recorded images during standby prior to the input of an alarm signal Post recording is the recorded images after the input of the a...

Page 39: ...particular images that have activated the alarm When the system is equipped with specified combination camera it starts recording alarm images after the camera moves to the specified preset position The One Shot Recording mode records images on the Timer Recorder corresponding to the alarm input as shown below Notes The thumbnails are based on an image each time an alarm is received The recording ...

Page 40: ...40 ...

Page 41: ...41 SETUP PROCEDURES ...

Page 42: ...e cursor to the right button Selects an item parameter SET button Executes the selection and displays a submenu for an item with the mark SETUP ESC button Returns to the previous setup menu 4 Press the SETUP ESC button for two seconds or more to close the setup menu and to return to the normal screen Notes The playback operation is disabled during the setup The Disk Recorder can record the images ...

Page 43: ...agement Error Report System Information Password Lock Setting Buzzer Setting User Defined Setting Manual Recording Setup Timer Recording Setup Time Lapse Recording Multi Shot Recording Multiscreen Monitor Spot Monitor One Shot Recording Emergency Recording MULTIPLEXER SETUP ALARM SETUP Camera Title Setup DISPLAY SETUP COMMUNICATION SETUP SYSTEM SETUP DVD DRIVE SETUP SETUP Page 44 Page 45 Page 45 P...

Page 44: ...g as sched uled in the programmed menu EXT Selects the external timer for power on recording when detecting power on and off OFF Timer recording is disabled To record manually set to this mode The factory default setting is OFF Note When the parameter is set to something other than OFF the Disk Recorder does not start record ing even if the REC button is pressed WJ HD500 SETUP TIMER OFF REC SETUP ...

Page 45: ...y pressing the or but ton FRAME 3DIM ON High resolution 720 x 480 distor tion free image FRAME 3DIM OFF High resolution 720 x 480 image FIELD Normal resolution 720 x 240 image The factory default setting is FIELD Color Mode Setting This item lets you enable or disable recording in color or black and white 1 Move the cursor to the COLOR MODE parameter in the COMMON SETUP menu by pressing the D or C...

Page 46: ...COMMON SETUP menu ON Select this mode when the cameras are gen locked to the system OFF Select this mode when asynchronous cameras are used in the system The default setting is OFF Note Confirm camera synchronization in the system The incorrect setting will cause improper recording Group Setup As described before the Disk Recorder activates the recording function of the assigned cameras in four gr...

Page 47: ...ing of the Title Display This item lets you enable or disable recording of the cam era and group titles with the image on the Hard Disk 1 Move the cursor to the TITLE EMBEDDED parameter in the COMMON SETUP menu by pressing the D or C button 2 Select either ON or OFF by pressing the or but ton ON Enables recording of the titles on the Hard Disk OFF Disables recording of the titles on the Hard Disk ...

Page 48: ...ive mode for manual recording 1 Move the cursor to MANUAL in the WJ HD500 SETUP menu by pressing the D or C button 2 Pressing the or button will toggle the display on the cursor as shown below 3 Pressing the SET button will call up the MANUAL REC SETUP menu according to the specified audio function as shown below 4 To return to the previous WJ HD500 SETUP menu press the SETUP ESC button Manual Rec...

Page 49: ...The factory default setting is SUPER FINE Event Recording Manual Recording These items let you set the recording mode in Time Lapse Recording when an alarm is received during manual recording 1 Move the cursor to the EVENT REC MODE parameter by pressing the D or C button then select a recording time mode by pressing the or button The parameters are the same as MANUAL REC MODE The factory default s...

Page 50: ...four event times common to the recording groups and is programmed in the setup 1 Move the cursor to TIMER in the WJ HD500 SETUP menu by pressing the D or C button 2 Select either audio recording display by pressing the or button then press the SET button The TIMER REC SETUP menu according to the speci fied audio function will appear on the monitor screen Program Timer These items let you set the p...

Page 51: ...ly the Group 1 editing area 5 Move the cursor to the time editing area NO 1 by pressing the D or C button 6 Move the cursor to the time to start and end the record ing by pressing the A or B button then select the time by pressing the or button Notes If the time No 1 to end the recording is set to 24 00 the editing function for the timers No 2 to No 4 is disabled If the time No 1 to end the record...

Page 52: ...anced fine quality FQ H or FQ A H Selects the recording time mode in fine quality NQ H or NQ A H Selects the recording time mode in normal quality EX H or EX A H Selects the recording time mode in extended quality SP or SP A Freely selectable indicates the hours for recording time mode 2 12 18 24 48 72 96 120 180 240 360 480 720 960 1200 1440 2160 2880 3600 4320 6480 8640 parameter A indicates rec...

Page 53: ... rate by pressing the or button For details refer to REC RATE in this menu 3 Move the cursor to the REC QUALITY parameter by pressing the D or C button then select a recording image quality by pressing the or button For details refer to REC QUALITY in this menu 4 Move the cursor to the DURATION parameter by press ing the D or C button then select the alarm recording duration by pressing the or but...

Page 54: ...ecording rate depends on the selected parameters in the COMMON SETUP menu as shown in the table FIELD FRAME CAMERA GENLOCK REC RATE FIELD ON 60FPS OFF 30FPS FRAME 3DIM ON 10FPS ON OFF 10FPS FRAME 3DIM ON 30FPS OFF OFF 15FPS FPS indicates as field per second or frame per second when the FIELD FRAME parameter is set to FIELD or FRAME in the menu 4 Move the cursor to the REC QUALITY parameter by pres...

Page 55: ...etting is REC ALM 3 Move the cursor to the REC RATE parameter in the menu by pressing the D or C button then select the desired recording rate by pressing the or button 1 60FPS Records the selected number of the freeze image per second The factory default setting is 15FPS Notes The maximum recording rate depends on the selected parameters in the COMMON SETUP menu as shown in the table FIELD FRAME ...

Page 56: ...f the parameter SP is selected for the recording time move the cursor to the REC RATE parameter by press ing the D or C button then select the desired record ing rate by pressing the or button 1 60FPS Records the selected number of freeze images every second 0 5FPS Records a freeze image every 2 seconds 0 4FPS Records a freeze image every 2 5 seconds 0 3FPS Records a freeze image every 3 3 seconds...

Page 57: ... is These items let you determine functions such as sequence and power on status for this Disk Recorder 1 Select MULTIPLEXER SETUP in the WJ HD500 SETUP menu by pressing the D or C button then press the SET button The MULTIPLEXER SETUP menu as shown below appears on the monitor screen 2 Select an item or item parameter in the menu by press ing the D or C button 3 To return to the WJ HD500 SETUP me...

Page 58: ...or button 0S The step will not be displayed on the monitor 1S 30S Selects a dwell time between 1 second and 30 seconds 6 Repeat the above steps 2 to 5 to program the other steps 7 When satisfied with all of the above steps press the SETUP ESC button to return to the previous SEQUENCE SETUP menu Quad Shift Setting This item lets you enable or disable the quad shift operation when the MULTISCREEN SE...

Page 59: ...ing As described before the cameras are assigned to 4 groups for recording with a programmed internal timer This item lets you select the sequence pattern to be dis played of each group on the Multiscreen Monitor Group Multi Sequence Pattern Setting 1 Move the cursor to the GROUP SEQ MODE parameter in the SEQUENCE SETUP by pressing the D or C but ton 2 Select either QUAD or MULTI GROUP display mod...

Page 60: ...wer on Status Setup The items let you select a pattern on the monitor screen when the Disk Recorder s power is turned on Power on Setting Multiscreen Monitor This item lets you select a display pattern on the Multiscreen Monitor when the Disk Recorder s power is turned on 1 Move the cursor to the MULTI OUTPUT parameter in the MULTIPLEXER SETUP menu by pressing the D or C button 2 Select a display ...

Page 61: ...selected input image This function is called Secret View and the item lets you enable or disable this function on the Multiscreen Monitor 1 Move the cursor to the SECRET VIEW parameter in the MULTIPLEXER SETUP menu by pressing the D or C button 2 Select either OFF or ON by pressing the or but ton OFF Disables the secret view function ON Enables the secret view function The factory default setting ...

Page 62: ... O 14CH 14 N O 7CH 7 N O 15CH 15 N O 8CH 8 N O 16CH 16 N O 4 Move the cursor to the INPUT editing area by pressing the B button then select the type of contact to meet the system requirement by pressing the or but ton N O Accepts alarm input from Normally Open con tacts N C Accepts alarm input from Normally Closed con tacts The factory default setting is N O 5 Repeat the above steps 2 to 4 to desi...

Page 63: ...s ON Video Motion Detector Setting The following settings are available when the Motion Detector Board Optional is installed This item lets you enable or disable the motion detector function when the Disk Recorder detects a motion on the video image 1 Move the cursor to the VIDEO MOTION DETECTION parameter in the ALARM SETUP menu by pressing the D or C button 2 Select either ON or OFF by pressing ...

Page 64: ...In this case set up the detecting area sensitivity etc again 1 AREA SET ERASE PRESS SET AT CORNER 1 AREA SET ERASE PRESS SET AT CORNER Alarm Mode on the Multiscreen Monitor This item lets you select the mode for displaying an alarm on the Multiscreen Monitor 1 Move the cursor to the ALARM MODE MULTI OUTPUT in the ALARM SETUP menu by pressing the D or C button 2 Select either SPOT or OFF by pressin...

Page 65: ...N or OFF by pressing the or but ton ON Enables the clock display on the monitor screen OFF Disables the clock display on the monitor screen The factory default setting is ON The procedure described below let you determine the dis play such as the cameras title editing display on and off and displays position on the monitors 1 Move the cursor to DISPLAY SETUP in the WJ HD500 SETUP menu by pressing ...

Page 66: ...or or selects a border color 1 Move the cursor to the BORDER LINE parameter in the DISPLAY SETUP menu by pressing the D or C button 2 Select the desired mode or color by pressing the or button OFF No border WHITE White border GRAY Gray border BLACK Black border The factory default setting is WHITE Title Display Setting Spot Monitor This item lets you enable or disable the display of the cam era an...

Page 67: ...rner of the moni tor screen CENTER Placed in the center of the monitor screen The factory default setting is R LOWER Clock and Status Display Position Setting This item lets you select the positions where the clock and status displays are placed on the Multiscreen Monitor 1 Move the cursor to the CLOCK STATUS POSITION parameter in the DISPLAY SETUP menu by pressing the D or C button 2 Select a pos...

Page 68: ...revious setup menu press the SETUP ESC button Unit Address Setting This item lets you set the unit address of the Disk Recorder in the system for RS 485 communication 1 Move the cursor to the UNIT ADDRESS parameter by pressing the D or C button 2 Select the unit address number to be used for RS 485 communication by pressing the or button Select a parameter value between 001 and 099 The factory def...

Page 69: ...n 2 Select the desired mode by pressing the or but ton OFF Select this parameter if the system controller is not connected to the system 0S Each time an alarm is received it is transmitted to the system controller 1S The received alarm is stored for 1 second and that data is sent to the system controller 5S The received alarm is stored for 5 seconds and that data is sent to the system controller T...

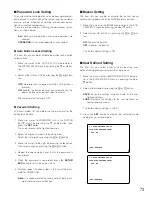
Page 70: ...The factory default setting is ODD RS 232C Setup These items let you set the parameters for communication between the SERIAL port of the Disk Recorder and an external device 1 Move the cursor to RS232C SETUP in the COMMUNI CATION SETUP menu by pressing the C or D button then press the SET button The RS232C SETUP menu shown below appears on the monitor screen 2 Select an item parameter in the menu ...

Page 71: ...set the parameters for communication between the 10 100BASE T port of the Disk Recorder and outboard device via Ethernet 1 Set DHCP Dynamic Host Configuration Protocol to ON or OFF The default setting is OFF ON Uses DHCP The DHCP server will assign the net work parameters OFF Does not use DHCP You need to enter the follow ing parameters if you wish to change them from the default settings 2 Move t...

Page 72: ...CLOCK JAN 1 00 0 00 TIME ADJUSTING OFF SET TIME 0 00 AUTO KEY LOCK OFF PASSWORD ALL OPERATION BUZZER ON USER DEFINED SETUP LOAD DISK MANAGEMENT ERROR REPORT SYSTEM INFORMATION SYSTEM SETUP 7 After completing the setting press the SETUP ESC button to move the cursor to CLOCK Note The date and time are updated when the SETUP ESC button is pressed Time Adjustment Setting This Disk Recorder has a time...

Page 73: ...nd setup operations are allowed OPERATION Only normal operations are allowed Auto Button Locked Setting This item lets you enable or disable the button lock function automatically 1 Move the cursor to the AUTO KEY LOCK parameter in the SYSTEM SETUP menu by pressing the C or D but ton 2 Select either ON or OFF by pressing the or but ton OFF No protection is applied until the LOCK button is pressed ...

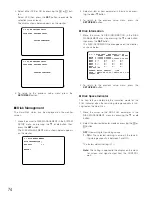
Page 74: ...The factory default setting is 1 Note This setting is applied to the display on the moni tor screen and signal output from the CONTROL port 4 Select either YES or NO by pressing the or but ton Select YES then press the SET button to execute the selection save or load The display shown below appears on the monitor 5 To return to the previous setup menu press the SETUP ESC button Disk Management The...

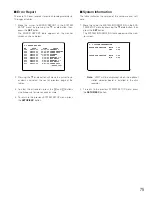
Page 75: ...en press the SET button The ERROR REPORT table appears on the monitor screen as shown below 2 Pressing the C or D button will move the cursor to up or down and select the next or previous page of the tables 3 To clear the all records press the and buttons simultaneously for two seconds or more 4 To return to the previous SYSTEM SETUP menu press the SETUP ESC button 9 4 ERROR REPORT NO DATE TIME CA...

Page 76: ...factory default setting is OFF The AUTO COPY EVENT menu shown below appears on the monitor 3 Move the cursor to the appropriate COPY column by pressing the D C A or B button then select either mode for a camera by pressing the or button OFF Disables camera alarm backup ON Enables camera alarm backup 4 Repeat the above step 3 to program the settings for other cameras 5 After completing the settings...

Page 77: ... the DVD RAM disk runs out of space 1 Move the cursor to the DVD DISKEND parameter on the DVD menu by pressing the D or C button 2 Select the desired mode by pressing the or but ton STOP Stops storage when the disk is full CONTINUE Continues storage by overwriting the old est data when the disk is full The factory default setting is STOP Disk Space Display This item lets you select status display ...

Page 78: ...78 ...

Page 79: ...79 OPERATING PROCEDURES ...

Page 80: ...essing a numeric button 1 16 Note You can also enable the Auto Skip function to skip any steps where no video signal is present Refer to the AUTO SKIP in the 5 1 SEQUENCE SETUP for further details CONTROLLING THE VIDEO INPUT AND MONITORS Controlling the Spot Monitor The operations descried below are available on the Spot Monitor Selecting the Spot Monitor 1 Select the Spot Monitor by pressing the ...

Page 81: ...teps x8 x4 x2 5 To cancel this mode press the EL ZOOM button to return to the image previously shown Controlling the Multiscreen Monitor The operations descried below are available on the Multiscreen Monitor Selecting the Multiscreen Monitor 1 Select the Multiscreen Monitor by pressing the SPOT MULTISCREEN button repeatedly The indicator in the button is off to indicate the Multiscreen monitor is ...

Page 82: ...r in the button lights to indicate that the sequence mode is selected GROUP SELECT 1 2 4 5 3 2 2 Single Sequence Live A series of camera images can be displayed in succession on the monitor screen for the specified duration Refer to the 5 1 3 SPOT LIVE SEQUENCE SETUP for fur ther details 1 Select the input mode for all groups by pressing the GROUP SELECT button indicator off Pressing this button t...

Page 83: ...9 10 1 2 3 4 5 6 7 1 2 3 4 5 6 7 8 9 1 3 2 4 The indicator in the numeric button lights up and the camera image corresponding to the button appears on the monitor screen 4 During the sequence press the SEQUENCE button to pause the sequence that is being run on the monitor screen The indicator in the button blinks to indicate that the sequence is paused 5 Press the SEQUENCE button to restart the se...

Page 84: ... 4 5 1 2 3 4 5 1 3 2 4 1 2 3 4 5 1 1 2 3 4 5 1 2 3 4 5 1 2 3 4 5 4 During the sequence press the SEQUENCE button to pause the sequence that is being run on the monitor screen The indicator in the button blinks to indicate that the sequence is paused 5 Press the SEQUENCE button to restart the sequence forward from the step that was previously paused by pressing the SEQUENCE button The indicator in ...

Page 85: ... 1 2 6 9 15 15 3 5 4 7 10 8 11 12 14 13 16 1 2 9 6 3 During the sequence press the SEQUENCE button to pause the sequence that is being run on the monitor screen The indicator in the button blinks to indicate that the sequence is paused 4 Press the SEQUENCE button to restart the sequence forward from the step that was previously paused by pressing the SEQUENCE button The indicator in the button cha...

Page 86: ...If another alarm is received during output of the previous alarm the alarm signal is output for the programmed dura tion Alarm Buzzer The buzzer beeps for the programmed duration The buzzer stops beeping before that duration when the alarm is reset Alarm Log The alarm logs are stored in the Record List table or the ERROR REPORT table The tables also indicate the alarm mode Alarm Notice When the op...

Page 87: ...e ALARM indicator blinks The indicator keeps blinking until all alarms are cleared by pressing the ALARM RESET button The blinking or lit indicator goes off Auto Reset The alarm is automatically reset after the programmed alarm Auto Reset time has elapsed or the lost video signal has been recovered The ALARM indicator changes from blinking to a steady light Pressing the ALARM RESET button will cle...

Page 88: ...he TIMER parameter to EXT in the WJ HD500 SETUP menu Manual Recording The video signal supplied to the VIDEO IN connectors is recorded in Time Lapse Recording mode with the parame ters which were preset in the MANUAL REC SETUP menu recording mode field rate and image quality The following procedure describes how to record manually in the selected mode Note When the TIMER parameter is set to someth...

Page 89: ... Recording mode with the specified recording rate quality and duration The recording pattern varies according to the setting for the Dynamic Recording DYNAMIC REC parameter Set to OFF Records all input images in sequence starting from video input which have activated alarm C1 C3 C2 C3 C4 C2 C4 C5 C6 C3 C4 C5 C6 T T T Start Thumbnail Thumbnail Thumbnail Alarm 2 in Alarm 3 in Set to ALM PRI Records ...

Page 90: ...m recording The procedure described below is an example for alarm recording in the Time Lapse Recording mode Time Lapse Recording When the Time Lapse Recording mode is selected for Timer recording it records the alarm activated images in this mode with the specified recording rate image quality and duration as shown below The recording pattern varies according to the setting of the Dynamic Recordi...

Page 91: ...duration Refer to EMERGENCY REC SETUP menu for further details Set to ALM MULTI Records alarm images and creating thumbnails that have received an alarm most recent Records alarm images that is chosen detecting the rest of alarm duration every alarm inputs Records alarm images according to the REC RATE BASE in evenly until reaches REC RATE MAX Then the sum exceeds the maximum recording rate it rec...

Page 92: ... is selected 4 To resume playback press the PLAY PAUSE button The indicator in the button lights again and B appears on the monitor screen 5 To stop playback press the STOP button The indicator in the PLAY PAUSE button goes off and the live images previously selected appear BPLAY PAUSE y BPLAY PAUSE y Forward or Backward search The recorded images can be searched playing back at variable speeds Du...

Page 93: ...y pressing the button Clockwise Jumps to the beginning of the next record ing in a forward direction Counterclockwise Jumps to the beginning of the next recording in a backward direction Alarm jump search The recorded alarm images can be searched by jump ing to the next alarm recording from the currently selected record while the ALARM SEARCH button is on During playback rotate the JogDial clockwi...

Page 94: ...rsor to the record to be displayed on the monitor 10 Press the PLAY PAUSE button to start playback The list or thumbnail search window is closed and the selected playback image appears on the monitor While the record list is displayed on the monitor pressing the DISPLAY button will toggle the window between time and date and alarm log search as shown in the figure DISPLAY DATE NOV19 99 ALL GROUP 2...

Page 95: ...below are an example display ing the playback on the Multiscreen Monitor Single and Multiscreen Spot Playback 1 Select the group to be played back by pressing the GROUP SELECT button 2 Pressing the PLAY PAUSE button will play back the most recent recording in the forward direction The selected group images appear with the minimum segment screen on the monitor B and recording number appear on the m...

Page 96: ...ELECT button 2 Press the REC PREVIEW button The indicator in the button starts to blink 3 Select a numeric button 1 16 corresponding to the image to be played back on the monitor The indicator in the REC PREVIEW button changes to a steady light and the selected image is displayed in the upper left segment of the multiscreen 4 To quit this function press the REC PREVIEW button The indicator in the ...

Page 97: ...e will display the list as shown below On Displays only the Alarm and Emergency Record List of the selected group Off Displays all Record Lists for the selected group 3 Press the INDEX button to display the list selected on the Multiscreen Monitor as shown below Pressing the INDEX button will toggle the window between List and Thumbnail search The backup function is enabled only the list table is ...

Page 98: ...r in the menu DATE NOV19 99 ALL GROUP NO GROUP TIME REC MODE 000010008 G1 22 15 40 M S ALM TRM2 000010007 G3 21 00 07 O S ALM VMD2 000010005 ALL 7 23 11 T L ALM TRM2 000010004 G4 6 59 44 M S ALM PC2 000010002 G3 0 01 28 T L ALM TRM2 000009995 G2 8 55 28 M S ALM VMD2 000009991 G2 7 30 23 M S ALM VMD2 010009989 ALL 3 58 34 T L ALM VMD2 TOTAL 931RECORD SEARCH ALM12 TIME DATE SEARCH DISPLAY SEL ts CHG...

Page 99: ...Disables auto erase function 1 180 DAYS The auto erase function is activated after the set number of days has passed The factory default setting is OFF 6 Press the SETUP ESC button for two seconds or more to close the menu and return to the normal view The recorded data will be automatically erased the storage days set in step 5 are passed The data erase is executed at midnight 0 00 on the specifi...

Page 100: ...S by pressing the A or B button then press the SET button to execute erase The recorded data before the specified date will be erased from the disk 5 When the erase is completed DONE appears on the lower center in the menu 6 Press the SETUP ESC button for two seconds or more to close the menu and return to the normal screen 9 3 2 ERASE AUTO ERASE OFF ERASE DATA BEFORE SEP12 00 ARE YOU SURE TO EXEC...

Page 101: ...d protect ed to prevent malfunction of the system due to accidental erasure of data alteration of settings or erroneous opera tions by unauthorized persons There are two passwords shown below corresponding to a limit of operations ALL Both normal operations and setup operations are allowed OPERATION Normal operations are allowed Note The button locked function is disabled even the LOCK button is p...

Page 102: ...Dial clockwise or counterclockwise to move the cursor to the record to be displayed on the monitor 10 Press the PLAY PAUSE button to start playback The list or thumbnail search window is closed and the selected playback image appears on the monitor Caution To unload the DVD RAM disk press the COPY button for two seconds or more when none of the menus and lists is displayed on the monitor DVD UNLOC...

Page 103: ...Audio Output 10 dB unbalanced RCA standard jack Extension Storage Port SCSI Interface 50 pin Half Pitch D sub connector x1 Copy Port SCSI Interface 50 pin Half Pitch D sub connector x1 Control Port 25 pin Full Pitch D sub connector x1 Alarm Port 25 pin Full Pitch D sub connector x1 Data Port RS 485 6 conductor modular jack RJ 11 Remote Port For Exclusive Remote Controller serial interface RJ 11 Se...

Page 104: ...munications Security Company Unit of Matsushita Electric Corporation of America Security Systems Group www panasonic com cctv Executive Office One Panasonic Way 3E 7 Secaucus New Jersey 07094 Zone Office Eastern One Panasonic Way Secaucus NJ 07094 201 348 7303 Central 1707 N Randal Road Elgin IL 60123 847 468 5205 Western 6550 Katella Ave Cypress CA 90630 714 373 7840 2003 Matsushita Electric Indu...

Reviews: