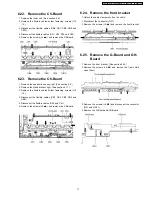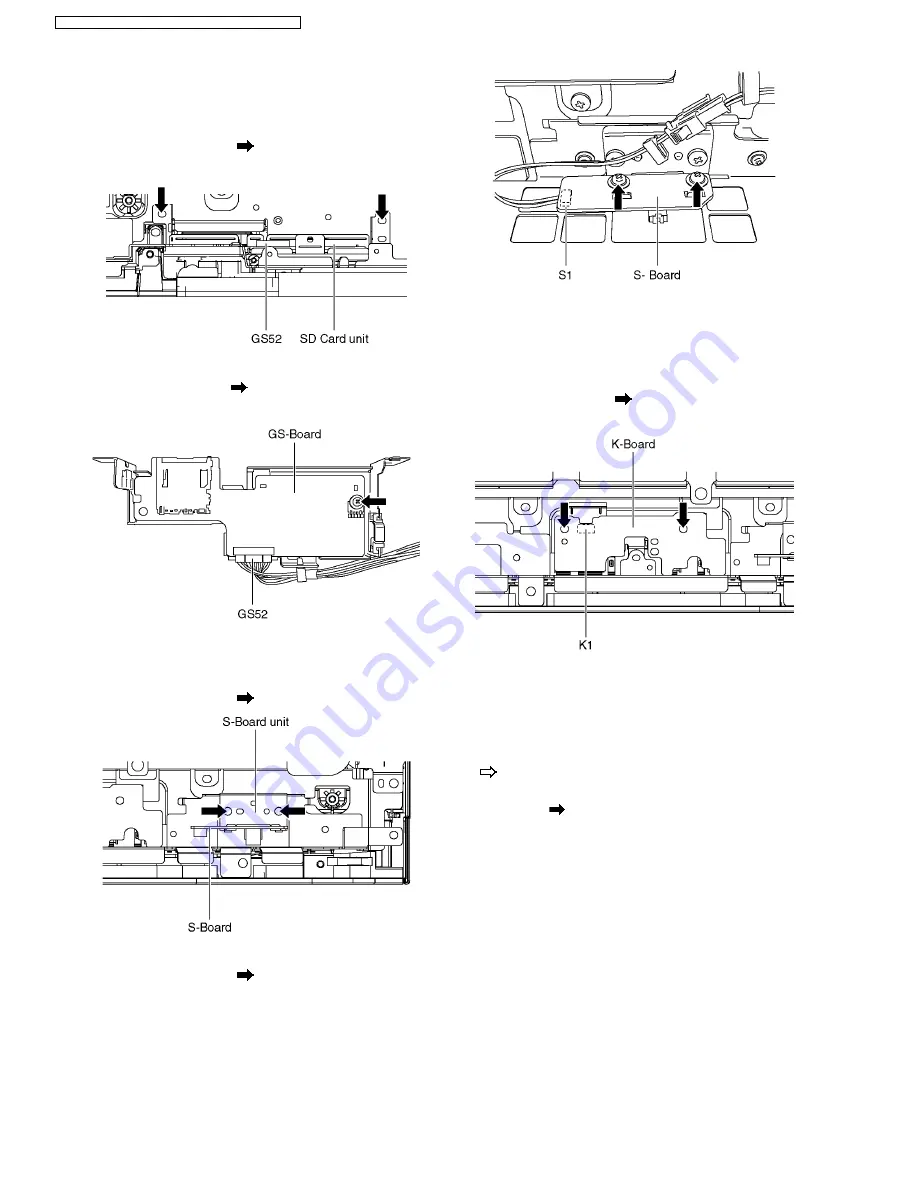
6.26. Remove the GS-Board
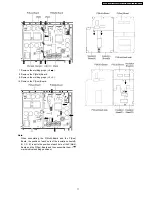
1. Remove the stand bracket right. (See section 6.17.)
2. Unlock the cable clampers to free the cable.
3. Remove the screws (×2
).
4. Remove the SD card unit.
5. Disconnect the connector (GS52).
6. Remove the screw (×1
).
7. Remove the GS-Board.
6.27. Remove the S-Board
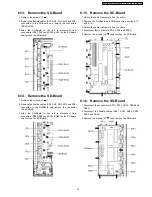
1. Remove the speaker box assy left. (See section 6.9.)
2. Remove the screws (×2
) and remove the S-Board unit.
3. Disconnect the connector (S1).
4. Remove the screws (×2
) and remove the S-Board.
6.28. Remove the K-Board
1. Remove the speaker box assy left. (See section 6.9.)
2. Remove the S-Board. (See section 6.27.)
3. Unlock the cable clampers to free the cable.
4. Remove the screws (×2
).
5. Disconnect the connectors (K1) and remove the K-Board.
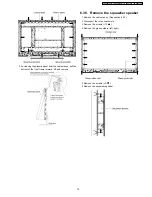
6.29. Remove the Plasma panel
section from the Cabinet assy
(glass)
1. Remove the stand brackets (left, right) fastening screw (×1
each).
2. Remove the cabinet assy and the plasma panel fastening
screws (×13
).
18
TH-50PZ700B / TH-50PZ700E / TH-50PY700F / TH-50PY700P
Summary of Contents for Viera TH-50PZ700B
Page 5: ...1 Applicable signals 5 TH 50PZ700B TH 50PZ700E TH 50PY700F TH 50PY700P ...
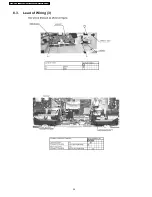
Page 23: ...8 2 Lead of Wiring 2 23 TH 50PZ700B TH 50PZ700E TH 50PY700F TH 50PY700P ...
Page 24: ...8 3 Lead of Wiring 3 24 TH 50PZ700B TH 50PZ700E TH 50PY700F TH 50PY700P ...
Page 28: ...9 4 No Picture 28 TH 50PZ700B TH 50PZ700E TH 50PY700F TH 50PY700P ...
Page 40: ...40 TH 50PZ700B TH 50PZ700E TH 50PY700F TH 50PY700P ...
Page 158: ...16 2 Packing Exploded Views 1 158 TH 50PZ700B TH 50PZ700E TH 50PY700F TH 50PY700P ...
Page 159: ...16 3 Packing Exploded Views 2 159 TH 50PZ700B TH 50PZ700E TH 50PY700F TH 50PY700P ...
Page 160: ...16 4 Packing Exploded Views 3 160 TH 50PZ700B TH 50PZ700E TH 50PY700F TH 50PY700P ...
Page 161: ...16 5 Replacement Parts List Notes 161 TH 50PZ700B TH 50PZ700E TH 50PY700F TH 50PY700P ...

