9 Adjustment Procedure
9.1.
Cut off Adjustment
Preparation
Picture Menu : Dynamic
WB-B-G-ST1 : 255
C Temp : Standard
High-RGB : 128
AI : ON
Low-RGB : 640
P-NR : AUTO
Scan Mode : 100Hz (PAL) G-Limit : 255
Screen VR : Full Counterclockwise
B-Limit : 255
Adjustment
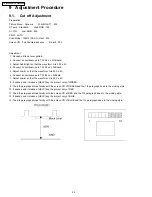
1. Receive a Black Level pattern.
2. Connect an oscilloscope to TPLG1 on LG-Board.
3. Adjust Sub Bright so that the waveform A is 200 ± 2V.
4. Connect an oscilloscope to TPLR1 on LR-Board.
5. Adjust Low-R so that the waveform A is 200 ± 2V.
6. Connect an oscilloscope to TPLB1 on LB-Board.
7. Adjust Low-B so that the waveform A is 200 ± 2V.
8. It pushes and it makes a [HELP] key the project only of GREEN.
9. The 6th paragraph shines faintly with the screen VR of GREEN and the 7th paragraph does to the sinking style.
10. It pushes and it makes a [HELP] key the project only of RED.
11. The 6th paragraph shines faintly with the screen VR of RED and the 7th paragraph does to the sinking style.
12. It pushes and it makes a [HELP] key the project only of BLUE.
13. The 6th paragraph shines faintly with the screen VR of BLUE and the 7th paragraph does to the sinking style.
26
TX-47P800HQ / TX-47P800HZ
Summary of Contents for TX-47P800HQ TX-47P800HZ
Page 15: ...15 TX 47P800HQ TX 47P800HZ ...
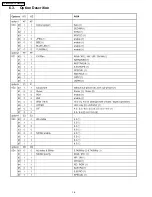
Page 16: ...6 3 Option Descrition 16 TX 47P800HQ TX 47P800HZ ...
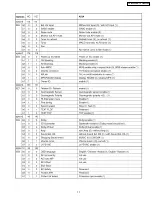
Page 17: ...17 TX 47P800HQ TX 47P800HZ ...
Page 18: ...18 TX 47P800HQ TX 47P800HZ ...
Page 41: ...Fine Convergence Control Chart 41 TX 47P800HQ TX 47P800HZ ...
Page 42: ...42 TX 47P800HQ TX 47P800HZ ...
Page 44: ...11 4 Location of Lead Wiring 4 44 TX 47P800HQ TX 47P800HZ ...
Page 48: ...11 6 Location of Lead Wiring 6 11 7 Location of Lead Wiring 7 48 TX 47P800HQ TX 47P800HZ ...
Page 49: ...11 8 Location of Lead Wiring 8 11 9 Location of Lead Wiring 9 49 TX 47P800HQ TX 47P800HZ ...
Page 50: ...50 TX 47P800HQ TX 47P800HZ ...

