background image

26

27

V

iewing

 V

iewing from SD Card

-

Accessing

Slide

Slide

3

On

On

No

Standard

+30

0

0

0

+10

Picture

1/2

Normal

Pic. mode

Picture

Brightness

Color

Tint

Sharpness

To display/hide Navigation Area 

To previous photo

Rotate 90 degree
(clockwise)

To next photo

Rotate 90 degree
(counter-clockwise)

Viewing from SD Card

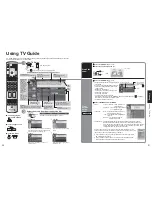
You can view photos taken with a digital camera or a digital video camera saved on SD card.
(Media other than SD Cards may not be reproduced properly.)

View

4

Select the data to be viewed

3

While reading
the data

1

2

Select the SD mode

 or

 Select “Memory card” using “TVG/Photo”

 select

 view

Thumbnail view

Navigation Area

Selected picture information is displayed.

No.

 : Image number or file name is displayed.

Date

 : Date of recording is displayed.

Pixel

 : Display resolution is displayed.

Insert the SD Card

For cautions and details on SD Cards (p. 28 and 53)

Displayed
in slide show

Navigation
Area

Ŷ

Press to return to 
TV

Ŷ

Press to exit

Ŷ

Press to return 
to the previous 
screen

Note

The SD mode can also be selected from the MENU screen.

Total number of images

Note

Depending on the JPEG type, Info contents may not be displayed correctly.

Ŷ

To adjust picture

Adjust

SD
Card

In

 select

 set

Start
single play mode

 select 

 ok

Picture menu
(p. 32)

Remove the card

 Press in lightly on SD Card, then 

release.

Label
surface

Push until a
click is heard

Compliant card type (maximum capacity): SD Card (2 GB), Mini SD Card (1 GB) (requiring mini 
SD Card adapter)

To change the view 

(single play mode, adjusting images, etc.)

Ŷ

To watch photos in single play mode 

In

ok

Insert the card

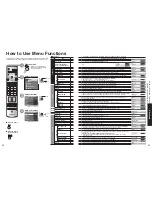
When MENU is pressed, the Picture Adjust menu is displayed.

Mode

Set to Single/Slide to view single images or perform a slide show.

Disp time

You can set how many seconds each image is displayed in Slide mode.

Repeat

Turn the slide show Repeat function On or Off.

Note

For large image sizes, the display time will be longer than the number of seconds 
set.

To stop in mid-cycle   Press “OK” button

To display/hide Navigation Area

Summary of Contents for TH-50PX600U

Page 1: ...u televisor y gu rdelas para consultarlas en el futuro Las im genes mostradas en este manual tienen solamente fines ilustrativos TQB2AA0665 1 For assistance please call 1 888 VIEW PTV 843 9788 or cont...

Page 2: ...factors may make it impossible for TV GUIDE to be used Panasonic shall in no way be liable for any damages or losses related to the use of TV GUIDE R Manufactured under license from Dolby Laboratories...

Page 3: ...ivated after a few minutes if no signals are sent or no operations are performed p 59 Do not display a still picture for a long time Do not place the unit where it s exposed to sunlight or other brigh...

Page 4: ...levision If the unit is knocked or children climb onto the pedestal with the Plasma TV installed the plasma television may fall over and personal injury may result Two or more people are required to i...

Page 5: ...e clamps 4 to the plasma TV using the removed screws Use strong wire or chain which is commercially available to secure the plasma television to a solid area of the wall or a pillar Wood Worktop Front...

Page 6: ...band in the direction indicated by the arrow Band Tab Fixing connection cables and AC cord How to release AC cord Band Connect power plug to the socket of the main body Fix the AC cord in Cable clamp...

Page 7: ...Remote control sensor Adjust the volume level Move cursor to right or left during menu mode Video Input 3 connector Switches TV to On or Standby Sets the remote to communicate with other equipment p 4...

Page 8: ...lity video and sound Press to exit INITIAL GUIDE SETUP for TV Guide 5 start Follow the instructions on the screen to perform setup p 20 25 INITIAL GUIDE SETUP for TV Guide The TV Guide Welcome Screen...

Page 9: ...e setup Complete Setup 6 The setup progress screen appears each time you enter the Guide prior to receiving your initial eight days of show listings To close the screen press or OK View Setup Progress...

Page 10: ...the favorite tune screen Select the desired broadcast station with the cursor or using number keys see below Switches the unit OFF in a preset amount of time from 0 to 90 minutes in 30 minute interval...

Page 11: ...nel lineup p 21 LISTINGS Select LISTINGS in p 20 LISTINGS Select LISTINGS in p 20 Lock Unlock icon Indicates status of the Video Windows 2 Select the menu item from the service bar SCHEDULE LISTINGS S...

Page 12: ...button To reserve shows for recording Select the upcoming show and press MENU button Select set recording on the panel menu Select an item and follow the on screen instructions for further settings Se...

Page 13: ...ution A conflict message appears when a show you schedule to Record overlaps with any part of another show previously set to record Record overlaps with a reminder previously set to auto tune Remind a...

Page 14: ...tion Area Press to return to TV Press to exit Press to return to the previous screen Note The SD mode can also be selected from the MENU screen Total number of images Note Depending on the JPEG type I...

Page 15: ...orated or damaged data or erratic operation of the unit Panasonic is not liable for any deterioration or damage of recorded data No file The card has no data or this type of data is not supported Watc...

Page 16: ...rom the G connector Dot clock Alleviates the problem if a picture appears to be vertically striped flickers partially or is blurred H position Adjust the horizontal position V position Adjust the vert...

Page 17: ...log Auto Automatically selects Analog Digital signal Auto HDMI1 in Auto HDMI2 in Audio leveler Minimizes volume disparity after switching to external inputs 0 Audio leveler Timer Sleep Timer1 5 The TV...

Page 18: ...TV and home theater volume control Ctrl with HDMI must be set to On Limited to newer Panasonic Home Theater RAM theater and DIGA DVD models with Control with HDMI Display menu Select Home theater or...

Page 19: ...ctly recognize the connected equipment and check that DIGA RAM theater and Player theater playback operates Back of the unit HDMI cable Setting of this unit after connection After making connections a...

Page 20: ...s EAS messages weather warnings and others Locally originated programming News Political Public Service Announcements Religious Sports Weather Select up to 7 1 7 channels to be blocked out These chann...

Page 21: ...ion Favorite Add Caption Preset Caption detail Rename maximum 7 characters available Select the number Favorite Favorite Add Press OK button to select Yes add or No delete Select Apply Press to move c...

Page 22: ...providing a text display of the audio The program being viewed must be transmitting Closed Captioning CC information p 52 Select the item and set Size Text size Font Text font Style Text style Raised...

Page 23: ...time settings p 13 0 30 60 90 minutes To set Timer 1 5 On Off Timer Select the item and set Operating Peripheral Equipment You can operate other manufacturers components using this TV s remote contro...

Page 24: ...Cord Connect after all the other connections Back of the unit Digital audio amplifier Theater system IR Blaster Supplied VCR Only VCR G LINK CableCARD Insert a card to watch cable channels serving dig...

Page 25: ...1972 Daewoo 0045 1278 Dell 1972 Denon 0042 DirecTV 0739 Durabrand 0039 Dynatech 0000 Electrohome 0037 0043 Electrophonic 0037 Emerex 0032 Emerson 0000 0037 0043 1278 1479 Fuji 0033 0035 Funai 0000 Ga...

Page 26: ...w violent scenes or one or more sufficiently violent scenes to affect them Adult supervision strongly suggested 16 ans Programming may not be suitable for children under the age of 16 Contains frequen...

Page 27: ...c net This site is in English only Photo Still images recorded with digital still cameras compatible with JPEG files of DCF and EXIF standards Data format Baseline JPEG 160X120 2 560X1 920 pixels Sub...

Page 28: ...default Provides enhanced picture contrast and sharpness for viewing in a well lit room Standard Recommended for normal viewing conditions with subdued room lighting Cinema For watching movies in a d...

Page 29: ...e surface coating If using a chemically treated cloth follow the instructions supplied with the cloth Do not attach sticky tape or labels as they can make the surface of the pedestal dirty Do not allo...

Page 30: ...local Panasonic dealer or Panasonic Service center for assistance For details p 63 64 No sound is produced Whirling sound is heard Sound is unusual Is Sound Mute active p 12 Is the volume set to the m...

Page 31: ...A PIN Type 1 1 0 V p p 75 AUDIO L R RCA PIN Type 2 0 5 V rms DIGITAL AUDIO OUT PCM Dolby Digital Fiber Optic FEATURES 3D Y C FILTER CableCARD slot CLOSED CAPTION V Chip Split Screen BBE VIVA 3D Photo...

Page 32: ...RE ARE NO EXPRESS WARRANTIES EXCEPT AS LISTED UNDER LIMITED WARRANTY COVERAGE THE WARRANTOR IS NOT LIABLE FOR INCIDENTAL OR CONSEQUENTIAL DAMAGES RESULTING FROM THE USE OF THIS PRODUCT OR ARISING OUT...

Page 33: ...OR CONSEQUENTIAL DAMAGES In certain instances some jurisdictions do not allow the exclusion or limitation of incidental or consequential damages or the exclusion of implied warranties so the above lim...

Page 34: ...66 67 Note Note...

Page 35: ...ew Jersey 07094 U S A Panasonic Puerto Rico Inc PSC Ave 65 de Infanteria Km 9 5 San Gabriel Industrial Park Carolina Puerto Rico 00985 Panasonic Canada Inc 5770 Ambler Drive Mississauga Ontario L4W 2T...

Page 36: ...caso Gemstar TV Guide International Inc y o sus compa as afiliadas ser n responsables de cualquier da o que se produzca en relaci n con la exactitud o la disponibilidad de la informaci n sobre la pro...

Page 37: ...ADVERTENCIA PRECAUCION Esto har que la imagen permanezca en la pantalla de plasma imagen remanente Esto no se considera como una falla de funcionamiento y no est cubierto por la garant a Im genes fij...

Page 38: ...se suben al pedestal para televisor con pantalla de plasma instalada el televisor con pantalla de plasma puede caerse pudiendo causar da os a las personas Es necesaria la ayuda de dos o m s personas p...

Page 39: ...tilice un cable cadena fuerte de venta en los comercios para asegurar el televisor con pantalla de plasma a una parte s lida de la pared pilar Encimera de madera Adelante Accesorios para soporte de fi...

Page 40: ...ido indicado por la flecha Banda Leng eta Fijaci n de los cables de conexi n y del cable de CA C mo soltarlo Cable de alimentaci n de CA Banda Conecte la clavija de alimentaci n al z calo del cuerpo p...

Page 41: ...cia la izquierda durante el modo del men Terminales INPUT3 Conecta la alimentaci n del televisor la pone en espera Configura el mando a distancia para hacer la comunicaci n con otros dispositivos p g...

Page 42: ...TE DE GU A INICIAL para Gu a de TV 5 Inicie Siga las instrucciones de la pantalla para hacer el ajuste p g 20 25 AJUSTE DE GU A INICIAL para Gu a de TV La pantalla de bienvenida de la Gu a de TV se vi...

Page 43: ...o de la configuraci n aparece cada vez que usted entra en la gu a antes de recibir sus listas de programas correspondientes a los ocho d as iniciales Para cerrar la pantalla pulse u OK Vea la pantalla...

Page 44: ...r un periodo de tiempo de 0 a 90 minutos que puede ajustarse a intervalos de 30 minutos Visualice elimine la bandera de canales Seleccione el modo de audio para ver la televisi n Modo digital Pulse SA...

Page 45: ...aci n Icono HD Se lista los programas de grupo de canales p g 21 LISTINGS LISTADOS Seleccione LISTINGS en p g 20 LISTINGS LISTADOS Seleccione LISTINGS en p g 20 Icono de bloqueo desbloqueo Indica el e...

Page 46: ...Seleccione set recording en el men del panel Seleccione un elemento y siga las instrucciones de la pantalla para seguir configurando Seleccione SETUP en p g 20 SETUP CONFIGURACI N Cambio de configura...

Page 47: ...para ser grabado Cuando un programa que usted ha programado para grabar se superpone con un recordatorio programado previamente para ser sintonizado autom ticamente Cuando un recordatorio y sintoniza...

Page 48: ...p g 28 y 53 Visualizado en diaporama rea de navegaci n Para volver al televisor Para salir Para volver a la pantalla anterior Nota El modo SD se puede seleccionar tambi n desde la pantalla MENU N mer...

Page 49: ...funciona de forma err tica Panasonic no acepta ninguna responsabilidad por el deterioro da o que puedan sufrir los datos grabados No existe archivo La tarjeta no tiene datos este tipo de datos no es...

Page 50: ...e introducida por el conector G Pto de Reloj Alivia el problema si una imagen parece que tiene franjas verticales o parpadea o queda borrosa parcialmente Pos Horiz Ajusta la posici n horizontal Posici...

Page 51: ...DMI Auto Digital An logo Auto Selecciona autom ticamente la se al anal gica digital Auto Ent HDMI1 Auto Ent HDMI2 Norm de audio Minimiza la diferencia de vol men despu s de cambiar a entradas externas...

Page 52: ...diante la entrada HDMI 1 2 aparece Altavoces ext con el icono de altavoz Al pulsar el bot n OK se cambia entre el control del vol men del televisor y del equipo de cine para casa Ctrl con HDMI debe po...

Page 53: ...anasonic Equipo de cine para casa RAM de Panasonic Reproductor de cine para casa de Panasonic Nota Los equipos HDMI individuales tal vez requieran configuraciones de men s espec ficas adicionales para...

Page 54: ...tecnolog a V chip permite que los programas restringidos sean bloqueados seg n las calificaciones de televisi n Seleccione Programa Seleccione la categor a de calificaci n que quiera seguir Aceptar Se...

Page 55: ...e Todos los canales memorizados previamente se borrar n Establezca Seleccione Seleccione Ent ANT Seleccione Modo Seleccione Iniciar escaneo Seleccione Editar Seleccione el elemento que quiera editar S...

Page 56: ...raci n Seleccione Inicializar CC y pulse el bot n OK 1 3 Seleccione Establezca La televisi n incluye un decodificador incorporado capaz de proporcionar una visualizaci n de texto del audio El programa...

Page 57: ...U LUN C U MAR C U MIE C U JUE C U VIE C U SAB El canal que va a encenderse CNL El d a de encendido D a Seleccione el canal Encender Seleccione el d a Apagar Ajuste del temporizador S No Fijar Cuando...

Page 58: ...onar su VCR Line 1 L 1 y poner su videograbadora en la condici n de desactivada Consulte el manual de instrucciones de su videograbadora Conexiones AV recomendadas Estos diagramas muestran nuestras re...

Page 59: ...03 Toshiba 0000 Zenith 0000 0525 0899 Receptor de sat lite ABS 1972 Adventura 0000 Aiwa 0000 0037 0124 Akai 0175 Alienware 1972 American High 0035 Audiovox 0037 Broksonic 1479 Calix 0037 Canon 0035 Ci...

Page 60: ...locked Bloqueado Todos los ni os Los temas y elementos en este programa est n especialmente dise ados para un p blico infantil incluyendo ni os de 2 6 a os TV Y7 FV Bloquear FV Viewable Visible Blocke...

Page 61: ...gitales compatibles con archivos JPEG de las normas DCF y EXIF Formato de datos Baseline JPEG 160X120 2 560X1 920 p xeles Submuestreo 4 4 4 4 4 2 4 2 0 M ximo n mero de archivos 9 999 Resoluci n de im...

Page 62: ...0p 1080i y 1080p Procure que concuerde con el ajuste de salida del dispositivo digital Para conocer detalles de las se ales HDMI aplicables vea m s abajo Marca Se al de entrada aplicable para componen...

Page 63: ...nitidez Forma de las patillas para el terminal de entrada PC Informaci n t cnica Mantenimiento Panel de la pantalla El frente del panel de la pantalla ha recibido un tratamiento especial Limpie suave...

Page 64: ...local para solicitar ayuda No se produce sonido Se escucha sonido de giro El sonido es extra o Est activo Silenciamiento del sonido p g 12 Est ajustado al m nimo el vol men Est Altavoces en No p g 32...

Page 65: ...Tipo RCA PIN 2 0 5 V rms DIGITAL AUDIO OUT PCM Dolby Digital Fiber Optic CARACTER STICAS FILTRO Y C 3D ranura CableCARD T TULO OCULTO V Chip Pantalla dividida BBE VIVA 3D Visualizador de Fotos Guid d...

Reviews: