22
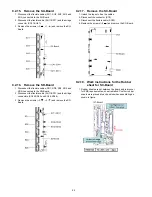
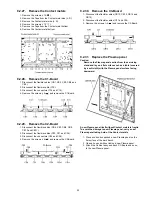
9.2.15. Remove the SU-Board
1. Disconnect the flexible cables (SU1, SU2, SU3, SU4 and
SU5) connected to the SU-Board.
2. Disconnect the flexible cable (SU11-SD11) and the bridge
connector (SC41-SU41).
3. Remove the screws (
×
3 ,
×
1
) and remove the SU-
Board.
9.2.16. Remove the SD-Board
1. Disconnect the flexible cables (SD1, SD2, SD3, SD4 and
SD5) connected to the SD-Board.
2. Disconnect the flexible cable (SU11-SD11) and the bridge
connectors (SC42-SD42 and SC46-SD46).
3. Remove the screws (
×
3 ,
×
2
) and remove the SD-
Board.
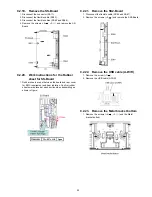
9.2.17. Remove the SC-Board
1. Unlock the tapes to free the cables.
2. Disconnect the connector (SC2).
3. Disconnect the flexible cable (SC20).
4. Remove the screws (
×
9
) and remove the SC-Board.
9.2.18. Work instructions for the Rubber
sheet for SC-Board
1. Rubber sheets are put between the board and rear cover
for EMC requirement and heat radiation. Confirm rubber
sheets were placed at each portion when assembling as
shown in figure.
Summary of Contents for TCP60ZT60
Page 28: ...28 ...
Page 34: ...34 ...
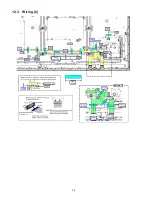
Page 36: ...36 12 3 Wiring 2 ...
Page 37: ...37 12 4 Wiring 3 12 5 Wiring 4 ...
Page 38: ...38 12 6 Wiring 5 ...
Page 39: ...39 12 7 Wiring 6 ...
Page 40: ...40 12 8 Wiring 7 ...
Page 41: ...Model No TC P60ZT60 Exploded View 1 1 3 ...
Page 42: ...Model No TC P60ZT60 Exploded View 2 2 3 ...

