92
VQT3J03
With a PC
Setup
2
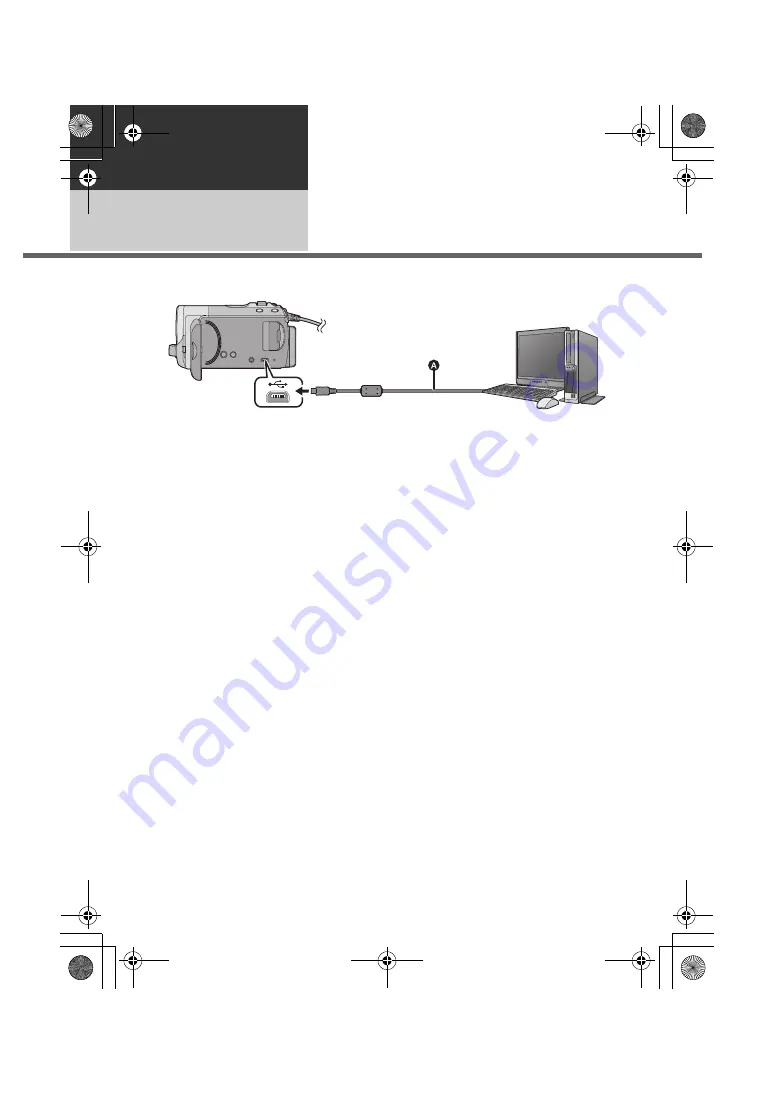
Connecting to a PC
≥
Connect this unit to the PC after the software applications are installed.
≥
Remove the supplied CD-ROM from your PC.
A
USB cable (supplied)
1
Connect this unit to the AC
adaptor.
≥
It is possible to use it connected to the PC
with the batteries only, but you will not be
able to write data into the unit.
≥
Use the AC adapter to free you from
worrying about the battery running down.
2
Turn on the unit.
≥
This function is available in all modes.
≥
When using the battery, the LCD monitor
will be turned off after about 5 seconds.
Operating the joystick will cause the LCD
monitor to turn on again.
3
Connect this unit to a PC.
≥
Insert the USB connectors as far as they
will go.
≥
Do not use any other USB cables except
the supplied one. (Operation is not
guaranteed with any other USB cables.)
≥
The Smart wizard screen is automatically
displayed when VideoCam Suite 3.5 is
installed.
≥
This unit is automatically recognised as an
external drive of the PC. (
l
95)
≥
A USB function selection screen will be
displayed if VideoCam Suite 3.5 has not
been installed. Use the joystick to select
[PC], then press the centre of the
joystick.When you select an option other
than [PC], reconnect the USB cable.
≥
When Windows is used as the PC
operating system, a message prompting
to format may display when a SDXC card
is read. (Please be aware that if a media is
formatted, then all the data recorded on
the media will be erased.)
http://panasonic.net/avc/sdcard/
information/SDXC.html
SDRH101&T76&S71GC-VQT3J03_mst.book 92 ページ 2010年11月22日 月曜日 午後4時49分


