background image

6

T

Q

BJ

213

4

Preparing the media

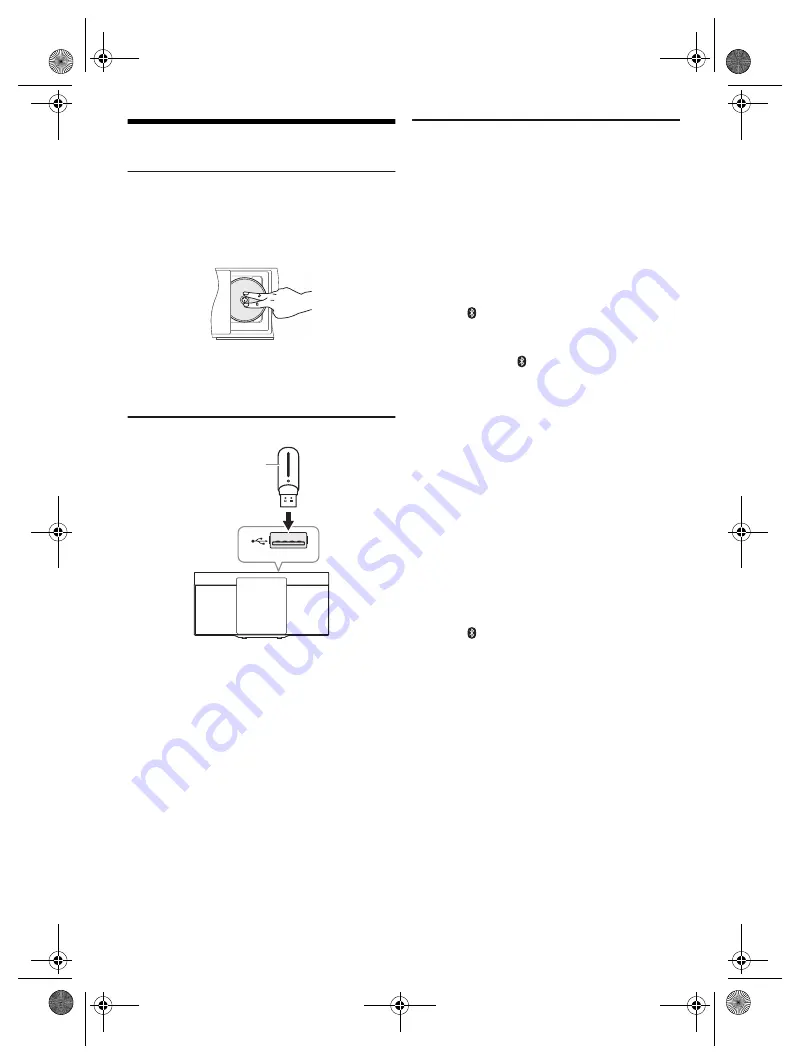
Disc

1

Press [USB/CD] to select “CD”.

2

Press [CD

x

] (main unit: [

x

]) to open the sliding 

door.

Put in a disc with the label facing towards you.

3

Press [CD

x

] (main unit: [

x

]) again to close the 

sliding door.

Keep fingers away from the sliding door when it is 
closing.

USB

Press [USB/CD] to select “USB”.

Note:

Do not use a USB extension cable. The system cannot 
recognise USB device connected through a cable.

Bluetooth

®

You can connect and play an audio device wirelessly 
through Bluetooth

®

.

Preparation

• Switch on the Bluetooth

®

 feature of the device and put 

the device near the system.

• Read the operating instructions of the device for details.

Pairing a device

Preparation

If this system is connected to a Bluetooth

®

 device, 

disconnect it. (

~

7)

1

Press [   ] to select “BLUETOOTH”.

If “PAIRING” is shown, continue with step 3.

2

Press [PLAY MENU] to select “PAIRING”.

Or press and hold [   –PAIRING] on the main unit until 
“PAIRING” is shown. 

3

Select “SC-HC200” from the Bluetooth

®

 menu of 

the device.

If prompted for a passkey, input “0000”.
The device connects with this system automatically 
after pairing is complete.
The MAC address (example: 6C:5A:B5:B3:1D:0F) 
may be shown before “SC-HC200” is shown.
The name of the connected device is shown for a few 
seconds.

Note:

You can pair up to 8 devices with this system. If a 9th device is 
paired, the device that has not been used for the longest time 
will be replaced.

Connecting a device

Preparation

If this system is connected to a Bluetooth

®

 device, 

disconnect it. (

~

7)

1

Press [   ] to select “BLUETOOTH”.

“BLUETOOTH READY” is shown.

2

Select “SC-HC200” from the Bluetooth

®

 menu of 

the device.

The name of the connected device is shown for a few 
seconds.

3

Start playback on the device.

Note:

• A device must be paired to connect.
• This system can only connect to one device at a time.
• When “BLUETOOTH” is selected as the source, this system 

will automatically try to connect to the last connected device. 
(“LINKING” is shown during this process.)

USB device

(not supplied)

HC200.GN.GA TQBJ2134 En_rev1.fm  Page 6  Friday, March 23, 2018  3:41 PM

Summary of Contents for SC-HC200GN-K

Page 1: ...SC HC200 Thank you for purchasing this product For optimum performance and safety please read these instructions carefully Please keep this manual for future reference GN TQBJ2134 1 GA HC200 GN GA TQ...

Page 2: ...adio interference caused by mobile telephones during use If such interference occurs please increase separation between this unit and the mobile telephone This unit utilizes a laser Use of controls or...

Page 3: ...NBTC technical requirement Disposal of Old Equipment and Batteries Only for European Union and countries with recycling systems This symbol is only valid in the European Union If you wish to discard t...

Page 4: ...ot use the system Some settings will be lost after you disconnect the system You have to set them again Note These speakers do not have magnetic shielding Do not put them near TVs PCs or other equipme...

Page 5: ...ring or disconnect a Bluetooth device press and hold the corresponding button C Basic playback control D View the setup menu E View the content information F Select or confirm the option G Open or clo...

Page 6: ...shown 3 Select SC HC200 from the Bluetooth menu of the device If prompted for a passkey input 0000 The device connects with this system automatically after pairing is complete The MAC address example...

Page 7: ...vel and then press OK Note The default setting is LEVEL 0 Select LEVEL 0 if the sound is distorted Media playback The following marks indicate the availability of the feature Basic playback CD USB BLU...

Page 8: ...M or AM For Asia Press RADIO to select FM Manual tuning 1 Press PLAY MENU repeatedly to select TUNE MODE 2 Press R T to select MANUAL and then press OK 3 Press 2 3 or 5 6 to tune in to the station To...

Page 9: ...s OK To check the time Press SETUP repeatedly to select CLOCK and then press OK In standby mode press DISPLAY Note Reset the clock regularly to maintain accuracy Sleep timer The sleep timer switches o...

Page 10: ...mber and then press OK Others Auto off This system automatically switches off when you do not use it for approximately 20 minutes 1 Press SETUP repeatedly to select AUTO OFF 2 Press R T to select ON a...

Page 11: ...ents in it are not compatible with the system USB devices with storage capacity of more than 32 GB cannot work in some conditions Slow operation of the USB device Large content size or large memory US...

Page 12: ...of 4 seconds When REMOTE 2 is shown press and hold OK and USB CD for a minimum of 4 seconds SOUND 1 NOT SET SOUND 2 NOT SET SOUND 3 NOT SET You have not saved the sound effects into the sound setting...

Page 13: ...l speed Media file format support MP3 mp3 Audio support format MP3 2 Sampling frequency 32 kHz 44 1 kHz 48 kHz Audio word size 16 bits Channel count 2 ch USB device file system FAT12 FAT16 FAT32 Bluet...

Page 14: ...e Range of use Use this device at a maximum range of 10 m The range can decrease depending on the environment obstacles or interference Interference from other devices This system may not function pro...

Page 15: ...re and only if valid proof of purchase is presented when the warranty service is requested This warranty only applies if the product has been installed and or used in accordance with the manufacturer...

Page 16: ...Panasonic Corporation Web Site http www panasonic com Panasonic Corporation 2018 TQBJ2134 1 L0318YS2038 En HC200 GN GA TQBJ2134 En_rev1 fm Page 16 Friday March 23 2018 3 41 PM...

Reviews: