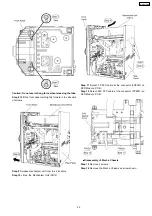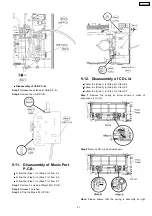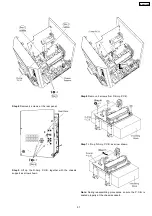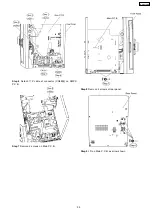
Step 3 Detach 5P cable at connector (CN8002) on USB
P.C.B..
Step 4 Detach 21P FFC cable at connector (CN2803) on Main
P.C.B..
Step 5 Detach 10P FFC cable at connector (CN2806) on Main
P.C.B..
Step 6 Detach 2P cable at connector (CN2812) on Main
P.C.B..
Step 7 Detach the front panel unit in direction of arrow.
9.8. Disassembly of Panel P.C.B.,
Tact Switch P.C.B. & Remote
Sensor P.C.B., Side Bar (L)
LED P.C.B. and Side Bar (R)
LED P.C.B.
•
•
•
•
Follow the (Step 1) to (Step 5) of Item 9.4
•
•
•
•
Follow the (Step 5) to (Step 7) of Item 9.5
•
•
•
•
Follow the (Step 1) to (Step 7) of Item 9.7
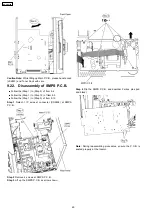
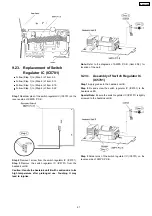
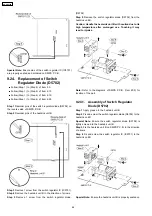
Step 1 Remove Volume knob as arrow shown.
Step 2 Detach 7P cable at the connector (CN6702) on Mic
P.C.B..
Step 3 Remove 9 screws at Panel P.C.B..
47
SA-VK470EE
Summary of Contents for SA-VK470EE
Page 3: ...3 SA VK470EE ...
Page 12: ...12 SA VK470EE ...
Page 40: ...40 SA VK470EE ...
Page 42: ...9 3 Main Components and P C B Location 42 SA VK470EE ...
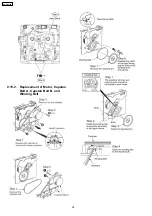
Page 54: ...9 15 2 Replacement of Motor Capstan Belt A Capstan Belt B and Winding Belt 54 SA VK470EE ...
Page 88: ...SA VK470EE 88 ...
Page 98: ...98 SA VK470EE ...
Page 116: ...SA VK470EE 116 ...
Page 124: ...SA VK470EE 124 ...
Page 136: ...136 SA VK470EE ...
Page 137: ...24 Exploded Views 24 1 Cabinet Parts Location SA VK470EE 137 ...
Page 138: ...SA VK470EE 138 ...
Page 139: ...24 2 Deck Mechanism Parts Location RAA4111 S SA VK470EE 139 ...
Page 140: ...24 3 Packaging SA VK470EE 140 ...

