41
Advanced
Operation
1
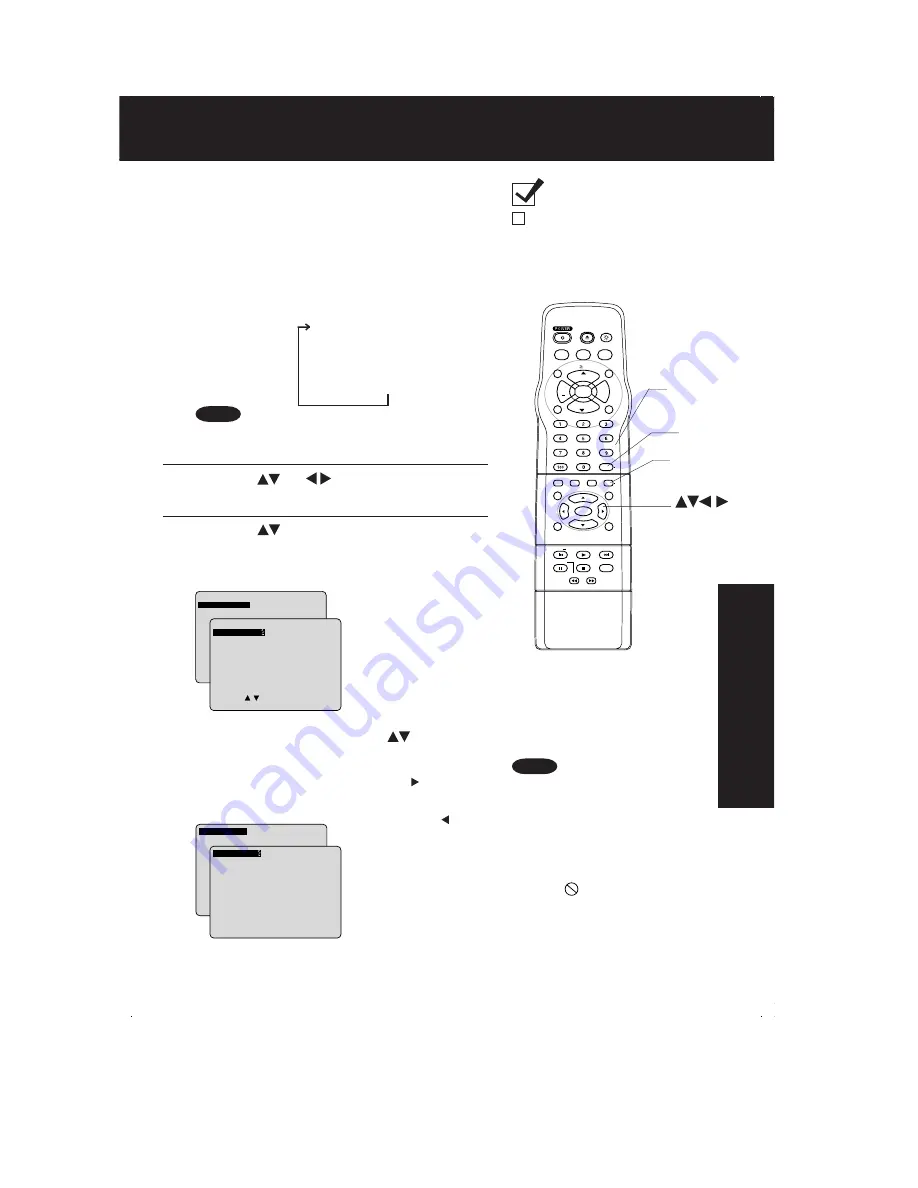
Press DISPLAY in Play or Stop mode to
display “On-Screen Display.”
When DISPLAY is pressed, On-Screen Displays
show disc information (title/chapter/track number,
elapsed playing time) and unit information (repeat
play, Play mode).
• Each press of DISPLAY changes the on-screen
display as follows. (Please refer to page 42 or 43.)
DVD Operation using On-Screen Displays
Ready Checklist
Unit is in DVD mode, press DVD.
•
DISPLAY button does not function while DVD
TITLE MENU is displayed.
Note
1) Press
to select the setting.
2) Press SET to set.
2
1) Press
(or ) to select an item.
2) Press SET to set.
Selected disc information
Selected unit information
Normal Screen
➛➛➛➛➛
➛➛➛➛➛
To make corrections,
press
and SET
repeatedly to move to
error, then correct.
• Pressing is effective
for elapsing time
instead of the above
buttons. Press
repeatedly to delete
the error, then
correct.
• For some functions the
setting will be
registered immediately
without pressing SET.
• When numbers are
displayed (e.g. title
number), the NUMBER
keys are also available.
To return to the
normal screen,
press CLEAR or
DISPLAY repeatedly.
<Example of DVD>
<Example of Video CD>
• When DISPLAY is pressed
during playback of a Video CD
with Playback control, the
NUMBER keys are not available
on the displayed screen. In this
case, press DISPLAY again to
remove the displayed screen.
• When
appears on the screen
while a button is being operated,
it means that the corresponding
operation is prohibited by the unit
or the disc.
Notes
SELECT :
SET
: SET
NEXT : D I SPLAY
T I TLE
: 12
DVD
CHAPTER : 11
0 : 12 : 34
SELECT :
SET
: SET
NEXT : D I SPLAY
T I TLE
: 12
DVD
CHAPTER : 24
0 : 12 : 34
SET
: SET
NEXT : D I SPLAY
TRACK
: 12
V I DEO CD
PBC
: OFF
0 : 12 : 34
SET
: SET
NEXT : D I SPLAY
TRACK
: 17
V I DEO CD
PBC
: OFF
0 : 12 : 34
LIGHT
TITLE
MENU
DISPLAY
ADD/DLT
PAUSE
DSS
CABLE
+
SKIP
SKIP
PLAY
STOP
SLOW/SEARCH
+
VOL
CH
CH
VOL
10
SUB TITLE
ANGLE
ZOOM
AUDIO
OPEN/CLOSE
CLEAR
ENTER
MU
TE
S
U
R
R
O
U
N
D
TIME
R
R
-T
U
N
E
ACTION
RETURN
D V D
FM/TV
S E T
NUMBER
keys
SELECT
SET
CLEAR
DISPLAY
Summary of Contents for PV 20DF62
Page 21: ...Fig D2 ...
Page 22: ...Fig D3 ...
Page 23: ...6 1 1 1 Notes in chart 1 Removal of DVD Ass y Fig D4 ...
Page 45: ...the black screen starts to turn gray lighting only 7 3 TEST POINTS AND CONTROL LOCATION ...
Page 115: ......
Page 180: ...11 2 CHASSIS FRAME SECTION 2 ...
Page 181: ...11 3 CHASSIS FRAME SECTION 3 ...


