background image

New P2 Instructions 7/11/10 


8

To Set the 300 Series Camera for DVCPro 25, 16:9 aspect ratio 


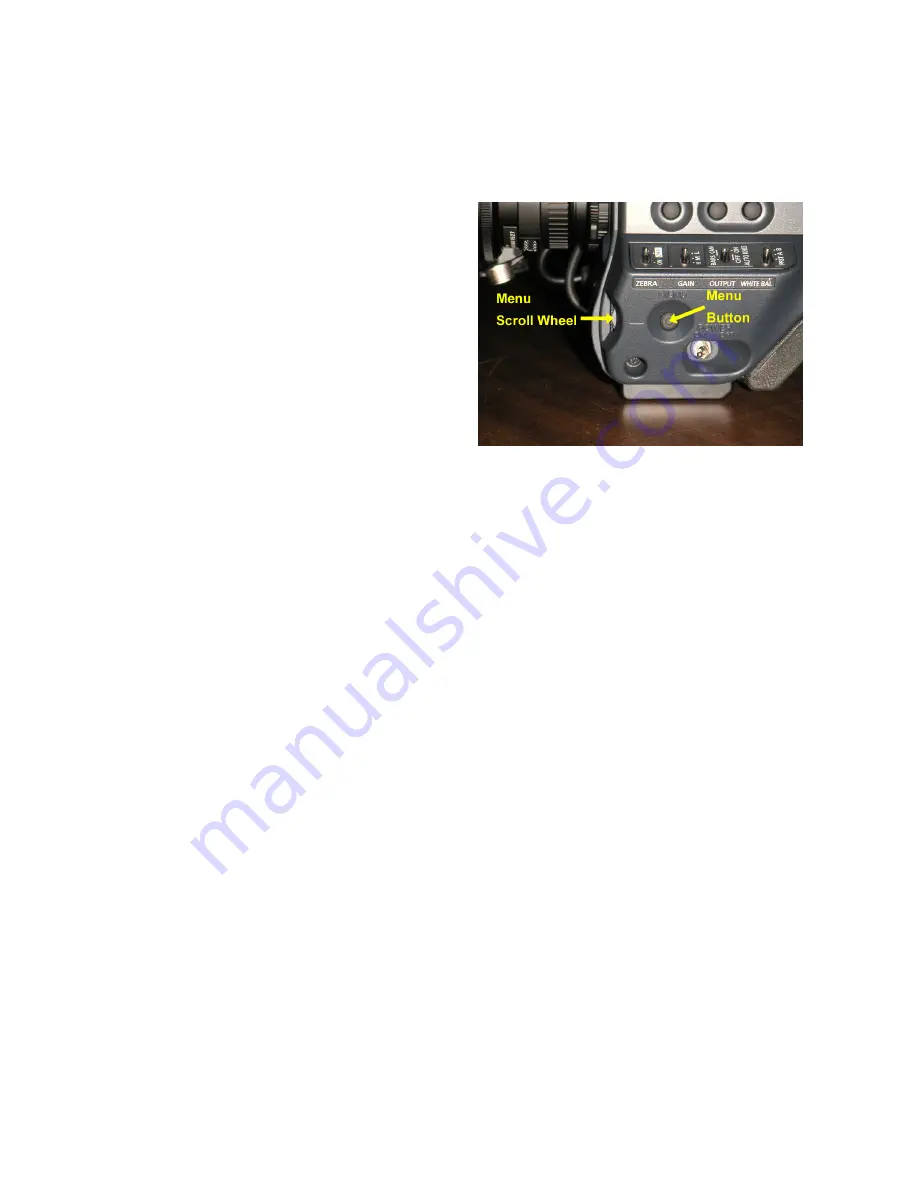
The system menu is accessed by a button deeply recessed on the lower front left side of 
the camera, directly below the Zebra and 
Gain switches.  Pressing this button once 
reveals the menu in the LCD display and 
pressing it again exits the menu function. 


Once the menu is activated, it is operated 
by a small thumbwheel on the front left 
of the camera. 


Turning the wheel scrolls through menu 
items, and pressing inward on the wheel 
selects whatever is highlighted. 


Once you have activated the menu 
function, use the wheel to scroll to item 
#2, System Setup.  It should be set as 
follows: 


System Mode   

480-59.94i 

Rec Signal 


Camera 

Rec Format   

DVCPro/60i 

Scan Reverse   

Off 

Aspect Conv   

Squeeze 

Setup 

  7.5% 


Set other menu functions as discussed above for the 500 series cameras. When you are 
satisfied with the setup, press the recessed button on the side of the camera to exit menu 
mode. 


Shooting in High Definition, 16:9 aspect ratio 
 

While both the 300 and 500 series P2 cameras will shoot in a huge variety of formats including 
1080i, we do not have Blu-Ray burners at present, so standard definition, 16:9 as described 
above will create stunning quality DVD release copies. 
 
For special projects, however, students may want to shoot in a higher resolution.  DVCPro HD is 
a very attractive compromise between increased image quality and reasonable file size.  Simply 
change System Mode to 720p/60p (59.94p for the 300 series).  Rec Format only relates to 480i 
recording on the 500 series cameras.  Check settings on the 300 series cameras and set to 
720p/60p if necessary. 
 
Please remember to return settings to the Standard Definition settings when turning the camera in 
to the Student Workers. 

Summary of Contents for P2HD AG-HPX500P

Page 1: ...ight To remove the battery press the release button and slide the battery to the left The AC power supply is attached to the camera in the same manner as the battery The AC power supply is also a battery charger It will charge a battery when the charger is not attached to the camera and a battery is attached to the power supply A bar graph located in the viewfinder indicates the charge remaining f...

Page 2: ...elect OPERATION Æ FORMAT Use the cursor buttons to select the SLOT Press CURSOR AND SET Confirm format Use cursor to select YES Repeat for all cards if more than one used Deleting Some Clips Open the LCD display and VCR panel Press the MODE button to change to MCR mode Select the clip to delete by using the cursor to highlight it Press the THUMBNAIL button to select OPERATION Æ DELETE Use the curs...

Page 3: ... balances settings Set White BAL Switch to A or B to do a white balance using a white card Perform a white balance by holding a white card in the light which will illuminate your subject zooming in and focusing the camera on it Carefully reach under the lens and push UP on the AWB auto white balance switch The viewfinder will display AWB A OR AWB B OK depending on if you have the preset set to A o...

Page 4: ...ot is complete press the record button a second time to pause the recording The gray button to the left of VTR labeled Q Z C Z is a quick zoom that will allow you to quickly zoom in and focus when it is depressed The lens will zoom back out when released Audio The camera mic mounted on the top of the camera can and should be used ONLY to record natural or ambient sound in the field Microphones can...

Page 5: ...When you see a vertical line displayed you are peaking and audio will become distorted if not corrected The MONITOR pot on the front left side of the camera will adjust the level of the speaker or headphone Note do not use this to determine recording levels Headphones should always be used to monitor field audio The headphone jack can be found on the rear left of the camera Camera Mic A camera mic...

Page 6: ...ffload the footage you shot onto a DVCPro tape as well as make DVD copies This should be done prior to handing in your camera so where possible plan on this extra time when signing out your equipment and determining its return time LC 31 will be the room for this process Place the battery pack on the camera and power it up Open the LCD door and along with the door housing the playback controls Mov...

Page 7: ...e student worker Using the Panasonic P2HD AG HPX300P Camcorder The HPX300P series camcorders are a scaled down version of the HPX500 series They use 1 3 inch chips rather than 2 3 inch which allows for a smaller lens and a lighter less expensive camera overall The video quality may be slightly less than with the 500s but these are still network quality camcorders used by NBC News Battery installat...

Page 8: ... 5 A Set other menu functions as discussed above for the 500 series cameras When you are satisfied with the setup press the recessed button on the side of the camera to exit menu mode Shooting in High Definition 16 9 aspect ratio While both the 300 and 500 series P2 cameras will shoot in a huge variety of formats including 1080i we do not have Blu Ray burners at present so standard definition 16 9...

Reviews: