New P2 Instructions 7/11/10
3
•
Make sure Recording Format is set to 480i/60i, DVCPro Normal.
•
Use menu button to return to main menu.
To Begin Camera Setup
•
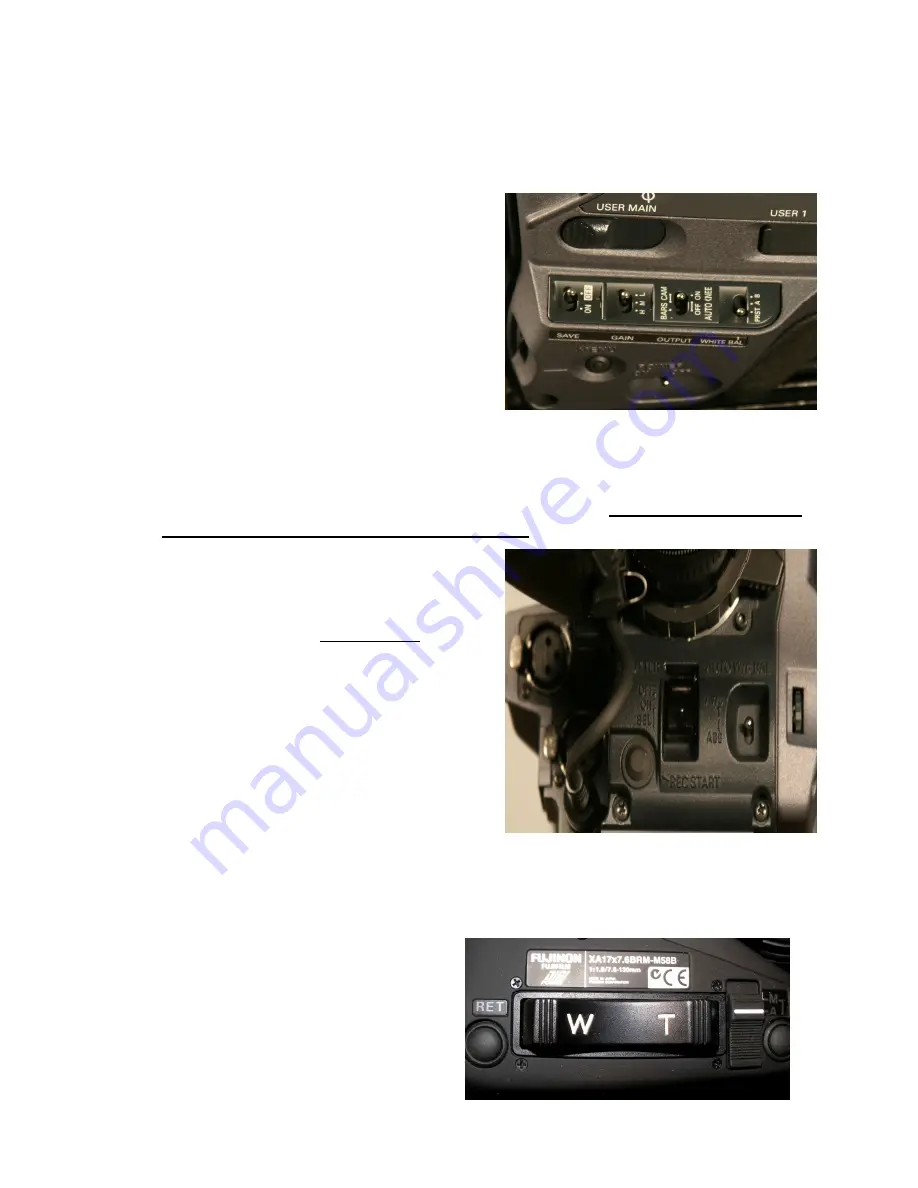
Locate the controls just above the power
switch.
•
Set the SAVE (VTR) to the OFF position to
record.
•
Set the GAIN to the L (low) setting for no
gain, or unless shooting in very low light set
to M (medium) gain.
•
The OUTPUT switch has 3 setting: BARS,
CAMERA AUTO KNEE ON, and
CAMERA AUTO KNEE OFF. Auto Knee adjusts the black level and contrast for scenes
with high contrast or strong backlight. Set the OUTPUT switch to CAM AUTO KNEE
OFF for normal recording.
•
The WHITE BAL switch has 3 settings: Preset, A, and B. Preset is 3200. A and B are
memory locations to store 2 different white balances settings.
Set White BAL Switch to
A or B to do a white balance using a white card.
•
Perform a white balance by holding a white
card in the light, which will illuminate your
subject, zooming in and focusing the camera
on it. Carefully reach under the lens and push
UP
on the AWB (auto white balance) switch.
The viewfinder will display AWB A OR
AWB B OK depending on if you have the
preset set to A or B.
•
Perform a black balance by pressing
DOWN
on the same the ABB Switch (auto black
balance). The iris on the lens will close and
perform the balance. The viewfinder will
then display the message ABB OK.
•
Perform a white balance again using the
procedure above.
•
White balance each time the lighting is changed
. A black balance is only necessary for
the first shoot in that location.
•
Set the iris to either automatic or manual
operation. The switch is located in the front
of the zoom rocker and is labeled A (auto)
and M (manual).


