background image

New P2 Instructions 7/11/10 


4


Frame your shot as desired using the zoom rocker switch (above). The pressure applied 
controls the speed of the zoom. Set focus by zooming all the way in on the subject and 
turning the wheel behind the sunshade on the front of the lens until the image appears in 
focus. Then zoom out to the desired shot. If the subject does not remain in focus, check that 
the MACRO switch on the back of the lens is in the off position or adjust back focus if 
necessary 


Depress the record button (VTR), normally under your 
right thumb if your hand is through the strap on the lens of 
the camera. Remember to start recording at least 10 
seconds before cueing talent or when shooting in general. 
When the shot is complete, press the record button a 
second time to pause the recording.  The gray button to the left of VTR (labeled Q-Z & C-Z) 
is a quick zoom that will allow you to quickly zoom in and focus when it is depressed.  The 
lens will zoom back out when released.  


Audio 


The camera mic mounted on the top of the camera can and should be used 

ONLY

 to 

record natural or ambient sound in the field.   Microphones can be plugged into the XLR 
connectors located under the battery on the back of the camera. The camera has 4 channels of 
audio 

however

, channels 1&3 are the same and channels 2&4 are the same. Therefore, these 

instructions will only cover the use of channels 1 and 2.  


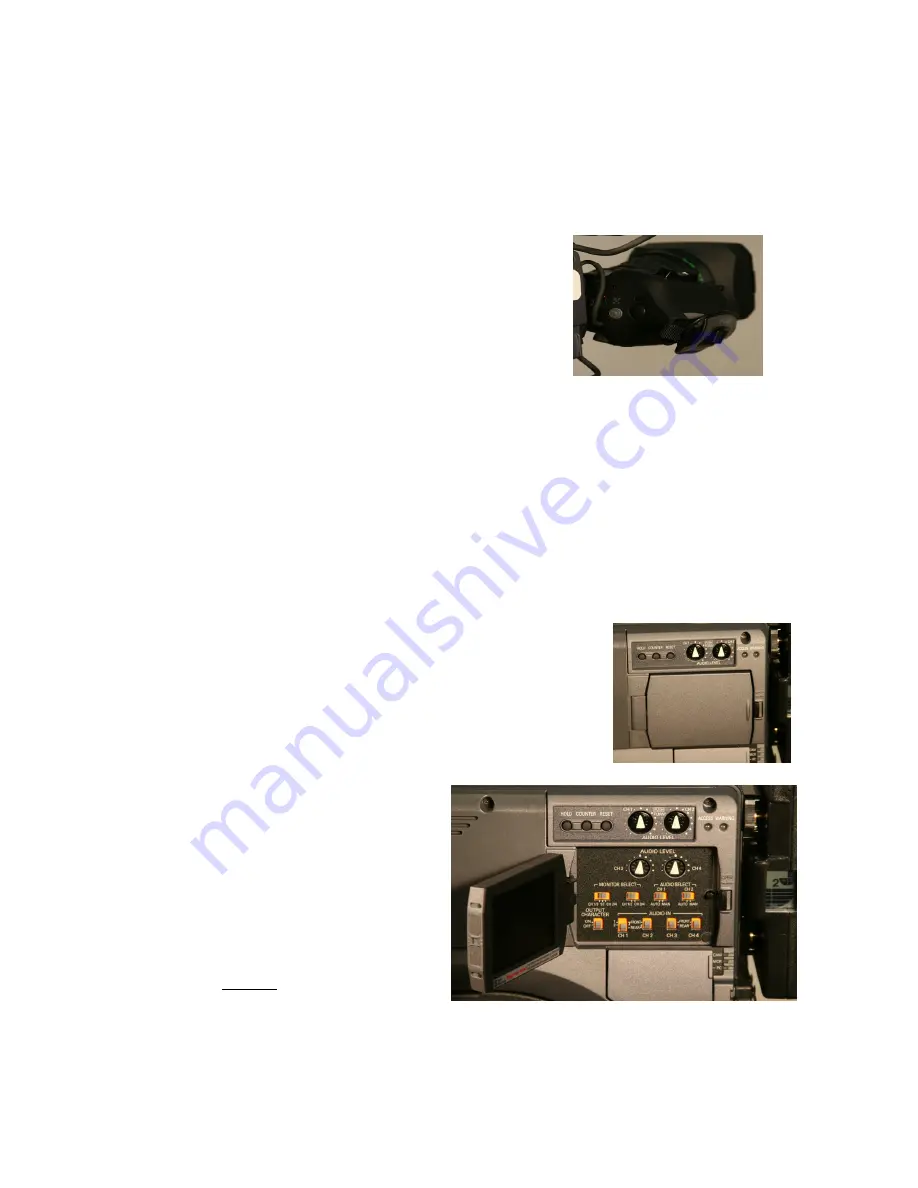
Open the audio panel located on the left back-side of the camera.   


MONITOR SELECT switch  


Set to ST for stereo (Channel 1 and 2) 


Set CH1/2 


AUDIO SELECT Ch1, CH2  


Set to MAN for manual control of 
audio or AUTO for automatic gain 
control. Manual is recommended. 

Summary of Contents for P2HD AG-HPX500P

Page 1: ...ight To remove the battery press the release button and slide the battery to the left The AC power supply is attached to the camera in the same manner as the battery The AC power supply is also a battery charger It will charge a battery when the charger is not attached to the camera and a battery is attached to the power supply A bar graph located in the viewfinder indicates the charge remaining f...

Page 2: ...elect OPERATION Æ FORMAT Use the cursor buttons to select the SLOT Press CURSOR AND SET Confirm format Use cursor to select YES Repeat for all cards if more than one used Deleting Some Clips Open the LCD display and VCR panel Press the MODE button to change to MCR mode Select the clip to delete by using the cursor to highlight it Press the THUMBNAIL button to select OPERATION Æ DELETE Use the curs...

Page 3: ... balances settings Set White BAL Switch to A or B to do a white balance using a white card Perform a white balance by holding a white card in the light which will illuminate your subject zooming in and focusing the camera on it Carefully reach under the lens and push UP on the AWB auto white balance switch The viewfinder will display AWB A OR AWB B OK depending on if you have the preset set to A o...

Page 4: ...ot is complete press the record button a second time to pause the recording The gray button to the left of VTR labeled Q Z C Z is a quick zoom that will allow you to quickly zoom in and focus when it is depressed The lens will zoom back out when released Audio The camera mic mounted on the top of the camera can and should be used ONLY to record natural or ambient sound in the field Microphones can...

Page 5: ...When you see a vertical line displayed you are peaking and audio will become distorted if not corrected The MONITOR pot on the front left side of the camera will adjust the level of the speaker or headphone Note do not use this to determine recording levels Headphones should always be used to monitor field audio The headphone jack can be found on the rear left of the camera Camera Mic A camera mic...

Page 6: ...ffload the footage you shot onto a DVCPro tape as well as make DVD copies This should be done prior to handing in your camera so where possible plan on this extra time when signing out your equipment and determining its return time LC 31 will be the room for this process Place the battery pack on the camera and power it up Open the LCD door and along with the door housing the playback controls Mov...

Page 7: ...e student worker Using the Panasonic P2HD AG HPX300P Camcorder The HPX300P series camcorders are a scaled down version of the HPX500 series They use 1 3 inch chips rather than 2 3 inch which allows for a smaller lens and a lighter less expensive camera overall The video quality may be slightly less than with the 500s but these are still network quality camcorders used by NBC News Battery installat...

Page 8: ... 5 A Set other menu functions as discussed above for the 500 series cameras When you are satisfied with the setup press the recessed button on the side of the camera to exit menu mode Shooting in High Definition 16 9 aspect ratio While both the 300 and 500 series P2 cameras will shoot in a huge variety of formats including 1080i we do not have Blu Ray burners at present so standard definition 16 9...

Reviews: