New P2 Instructions 7/11/10
6
If you do not need the camera mic, be sure to turn the channel not being used by the rear XLR
connection to “rear”, which will disengage the front mic.
Capturing footage into an FCP Project
Make sure your FCP project settings are set for
NTSC Anamorphic
! Use
Transfer
and
Capture rather than Log and Capture. Set your Capture/Scratch directory as usual and then insert
P2 card into card reader. Select clips you wish to capture by checking the round dot to the left of
each clip, or you can select all. Add Selection to Cue will actually transfer selected clips to the
server, allowing you to name them if desired.
Eject the P2 card(s) when done and return them to the camera(s). Save your FCP project as
usual.
Offloading footage to DVCPro tape
Once you return it will be necessary to offload the footage you shot onto a DVCPro tape (as
well as make DVD copies). This should be done prior to handing in your camera so where
possible, plan on this extra time when signing out your equipment and determining its return
time. LC 31 will be the room for this process.
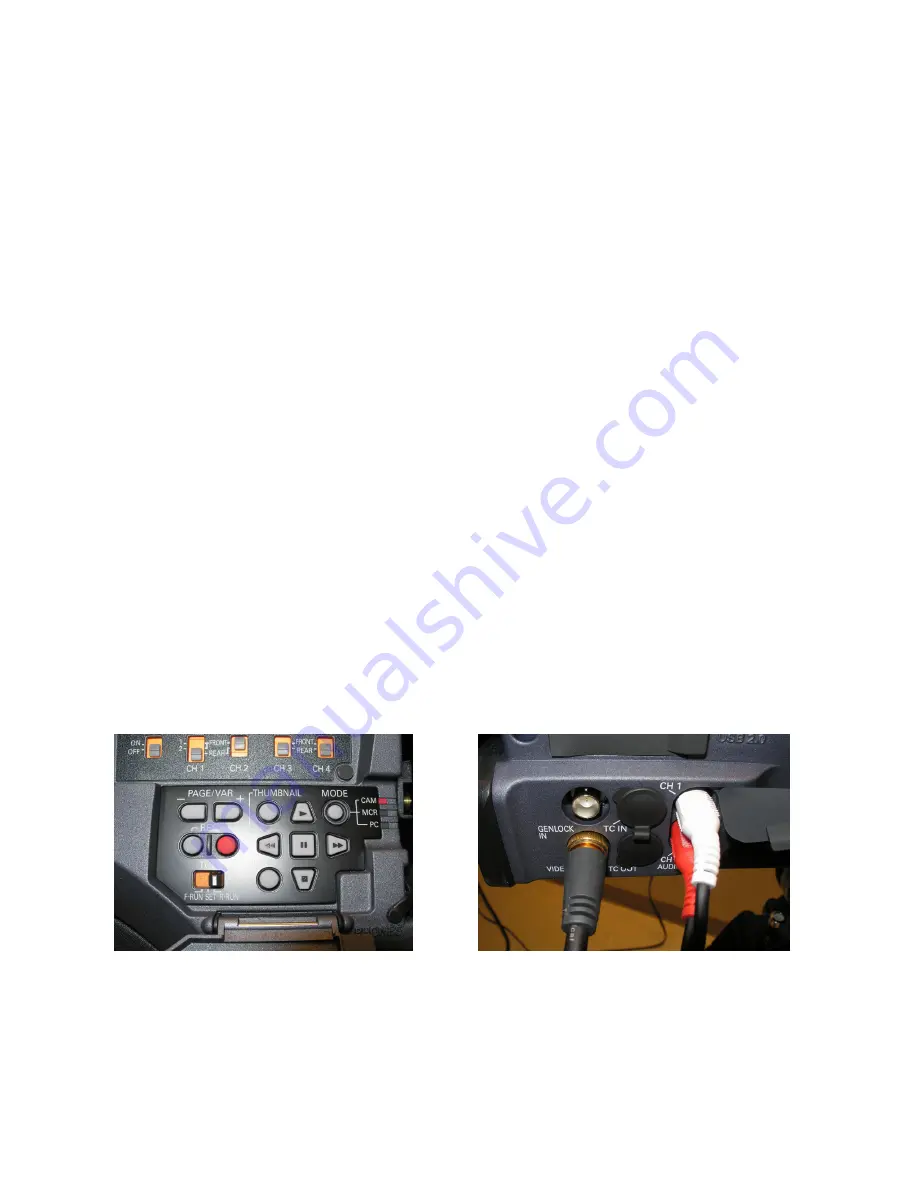
Place the battery pack on the camera and power it up. Open the LCD door and along with the
door housing the playback controls. Move the switch on the right to “MCR”. Select “MODE”
which will then show you thumbnails of each scene in the LCD panel. Be sure the first “scene is
highlighted in the LCD panel. Each of the 3 DVCPro decks in LC 31 will have a bundle of
cables attached to the back. Take the BNC and red and white RCA audio cables and hook them
up as in the diagram. The BNC connector is hooked to the video out on the camera (located on
the back right side), the white audio cable is plugged in to CH 1, while the red cable is plugged
in to CH 2.
•
Place your DVCPro tape into the deck.
•
Turn on the television monitor
•
Turn on the DVD player


