23
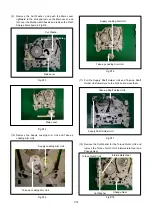
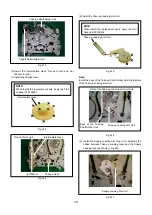
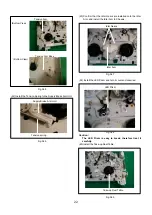
(26) Install the Take-up Brake Arm Unit, and then hook the
Take-up Brake Spring to Chassis.
Fig.A40
Fig.A41
(27) Confirm the Mechanism Phases so that see through the
Adjustment Hole and hole of Chassis at three Adjustment
portions.
Fig.A42
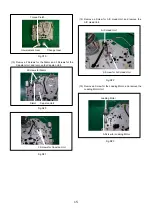
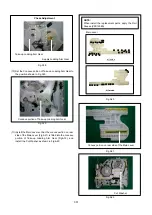
INSTALLATION OF THE SLOT-IN UNIT
(28) Confirm the phase of Sector Gear.
Fig.A43
(29) Place the Cassette Holder on front end of the Slot-in
Unit.
(30) Insert the convex portions of the Slot-in Unit into the
grooves of Chassis.
Fig.A44
(31) Reconfirm Slot-in Unit is correct phase as shown in
Fig.A35 (Sharp edge of Wiper Arm R is in line with the
Sector Gear Hole).
Fig.A45
Take-up Brake Arm Unit
Take-up Brake Spring
Hook the Take-up Brake Spring
1
3
2
Confirm that the Adjustment
Holes of Sector Gear and
Chassis are seen through.
Convex portions
Grooves of Chassis
(Right side)
(Left side)
Front View
Wiper Arm R
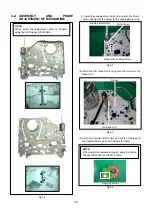
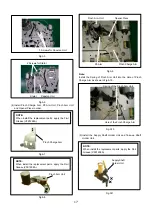
NOTE:
When install the replacement parts; apply the Floil
Grease (VFK1298A).
Summary of Contents for NV-HV61GN
Page 21: ...2 REMOVAL OF THE BACK PANEL Remove 2 Screws C Remove Screw D Unlock 4 Tabs E Fig D3 21 ...
Page 29: ...10 2 CASING PARTS SECTION 29 ...
Page 30: ...10 3 PACKING PARTS SECTION 30 ...
Page 31: ...11 REPLACEMENT PARTS LIST 31 ...
Page 41: ...C4537 ECJ2VC1H560G CHIP CAPACITOR 41 ...
Page 44: ...D2002 B0AAED000003 DIODE 44 ...
Page 47: ...Q1152 2SC3311ASA TRANSISTOR 47 ...
Page 49: ...R1502 ERJ3GEYJ273V CHIP RESISTOR 49 ...
Page 54: ...W519 ERJ3GEY0R00V CHIP JUMPER 54 ...
Page 109: ...4 1 3 PARTS NAME OF R4 MECHANISM Fig M2 ...
Page 139: ...34 ...

