17
A
Standard
Multi
Album
Calendar
Zoom
A
Calendar
1 month
2 months
12 months
A
Calendar
Year : 2001
Month: November
2
1
B
D
A
C
1
B
D
A
Calendar
Calendar type
Set colour
Date
Month:November
Date : 9
Green
Reset
A
A
Calendar
Calendar type
Set colour
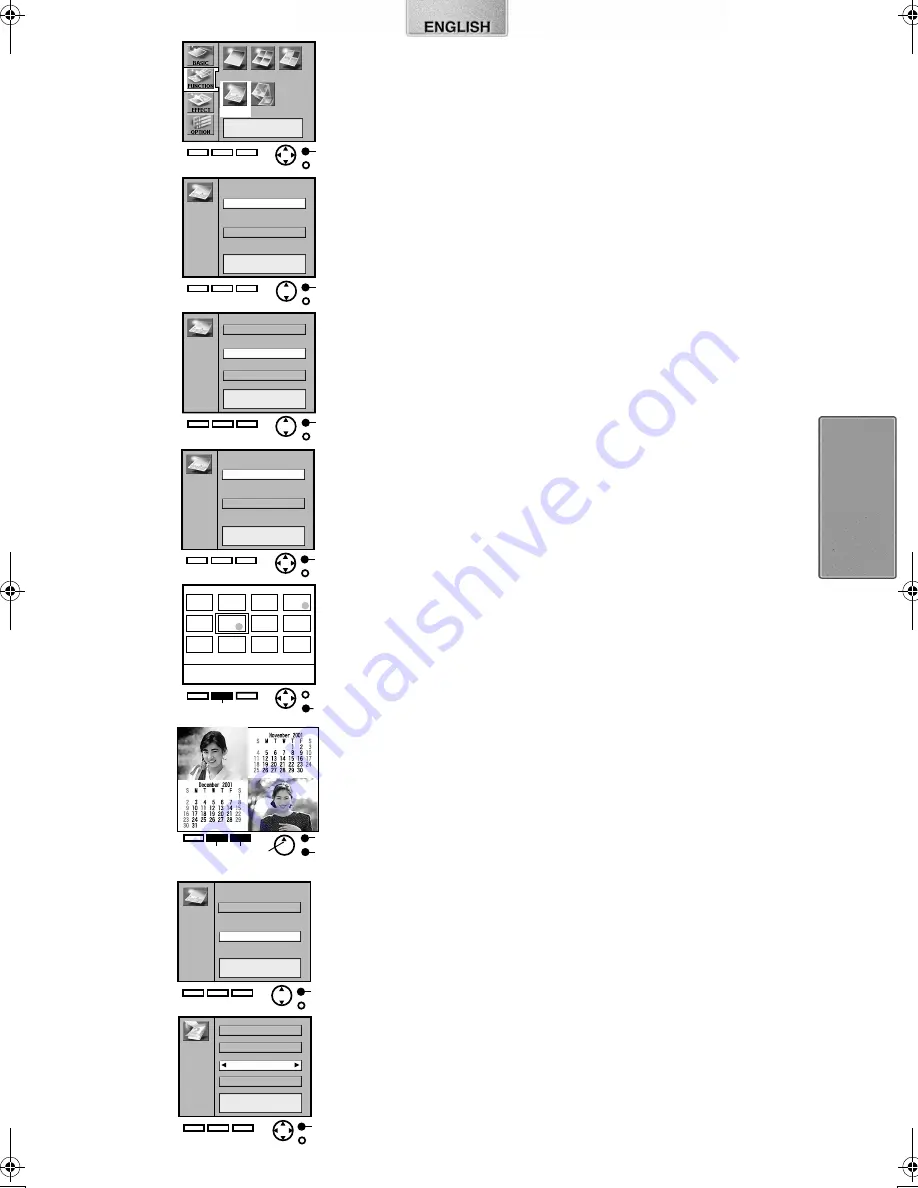
Creating a Personalized Picture Calendar
The Digital Photo Printer can insert a picture and create a 1-month, 2-
month, or 12-month personalized calendar.
≥
Select the INPUT method.
ª
Card Input
1
Select [Calendar] under [FUNCTION] on the MENU
screen, and press
A
.
2
Select [Calendar type], and press
A
.
3
Choose [1 month], [2 months], or [12 months], and press
A
.
4
Select the beginning year and month for the calendar,
and press
A
.
5
Select a picture, press
D
, then press
B
to switch the
screen.
≥
If you are not in Index Display, press
B
before Step 4.
≥
When creating 2-month calendars, choose 2 pictures. You cannot
change the picture location on the calendar.
6
After confirming the picture, press
C
to print.
≥
Press
A
to bring up the MENU screen.
≥
After storing pictures to memory, they can be deleted one at a time
by pressing
1
.
ª
Video Input
1
Select [Calendar] under [FUNCTION] on the MENU
screen, and press
A
.
2
Select [Calendar type], and press
A
.
3
Choose [1 month], [2 months], or [12 months], and press
A
.
4
Select the beginning year and month for the calendar,
and press
A
.
5
While watching the screen, press
D
at the scene you
wish to print (repeat once more for 2-month calendars),
and press
C
to print.
≥
To reenter pictures into memory when creating 1-month and 12-month
calendars, press
B
. Then press
D
to store a new picture to memory.
≥
For 2-month calendars, pressing
1
in the memory screen after
pictures have been stored will delete them one at a time.
Tips For Card Input/Video Input
≥
Characters may appear disfigured in the LCD Monitor, but will not be
so when printed.
≥
Video Input pictures and pictures from various cards cannot be
combined together.
≥
If you change the Ink Cassette type after selecting pictures in Card
Input, you must reselect the pictures.
≥
When an Ink Cassette for 16 Pre-Cut Adhesive paper is inserted, the
screen will automatically be divided into 16 sections. If the Ink Cassette
is removed, the calendar screen will not automatically return.
≥
For Card Input, selected images will disappear once printing is complete.
ª
Altering the Colour of Holidays and Special Days
1
1
1
1
Select [Set colour], and press
A
.
2
2
2
2
Select the date on the calendar that you wish to change
the colour of, and select the colour, and then press
A
.
21
Buttons: Date/Colour Change
34
Buttons: Move Cursor
≥
Selecting [Reset] changes the colour settings of all the dates to [Black].
≥
The colour of Year, Month and Day displays cannot be selected.
≥
Colours set in [Set colour] remain stored even after the power has
been turned off.
1
3
4
5
6
Video
5
2
2
Input
Card
Input
Card
Input
1
9063‑VP430.book 17 ページ 2001年8月31日 金曜日 午後9時9分


