Chapter 6
Additional Operations 39
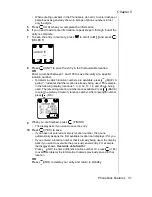
7
Press
repeatedly to position the cursor in front of the phone number
and then enter the 3-digit area code.
8
Press
(OK) to place the call.
Saving a Number
1
From standby, press
(MENU) to enter the Main Menu.
2
Scroll to Call History and press
(OK).
3
Scroll to Dialed, Missed, or Received and press
(OK).
4
Scroll to the number you want to save and press
(OPTION).
5
Scroll to Save and press
(OK).
6
Scroll to
Home #,
Work #,
Cell #, or
Other # and press
(OK).
7
To enter additional information, scroll to an item and press
(SELECT).
8
Follow the prompts to enter the name and email address. See Chapter
4, “Text Entry Operations” for information on entering text.
9
After entering the information for one item, press
(OK).
10 When you have entered all the information, press
(FINISH).
11 When prompted to save the information, press
(YES).
Deleting a Number
1
From standby, press
(MENU) to enter the Main Menu.
2
Scroll to Call History and press
(OK).
3
Scroll to Dialed, Missed, or Received and press
(OK).
4
Scroll to the phone number you want to delete and press
(OPTION).
5
Scroll to Delete Entry and press
(OK).
6
When prompted to confirm, press
(YES) to delete the entry.
OR
Press
(NO) to cancel the deletion.
Deleting All Entries in a List
1
From standby, press
(MENU) to enter the Main Menu.
2
Scroll to Call History and press
(OK).
3
Scroll to Dialed, Missed, or Received and press
(OK).
4
Press
(OPTION).
5
Scroll to Delete All and press
(OK).
• The display prompts you to confirm the deletion of
all entries.
6
Press
(YES) to delete all entries or
(NO) to cancel the deletion.
Summary of Contents for EBTX320 - Cell Phone ATLAS
Page 2: ......
Page 8: ...vi ...
Page 38: ...Chapter 4 28 Text Entry Operations ...
Page 46: ...Chapter 5 36 Phonebook Features ...
Page 63: ...Chapter 6 Additional Operations 53 ...
Page 64: ...Chapter 6 54 Additional Operations ...
Page 84: ...Appendix B 72 Phone Accessories ...
Page 93: ......


