


■
Turning ON Remote Camera by Turning ON AW-RP50 Power Supply
*
You can turn ON the camera connected via IP ([Network]) or serial ([Serial]) connection by turning ON the power
switch of AW-RP50 controller.
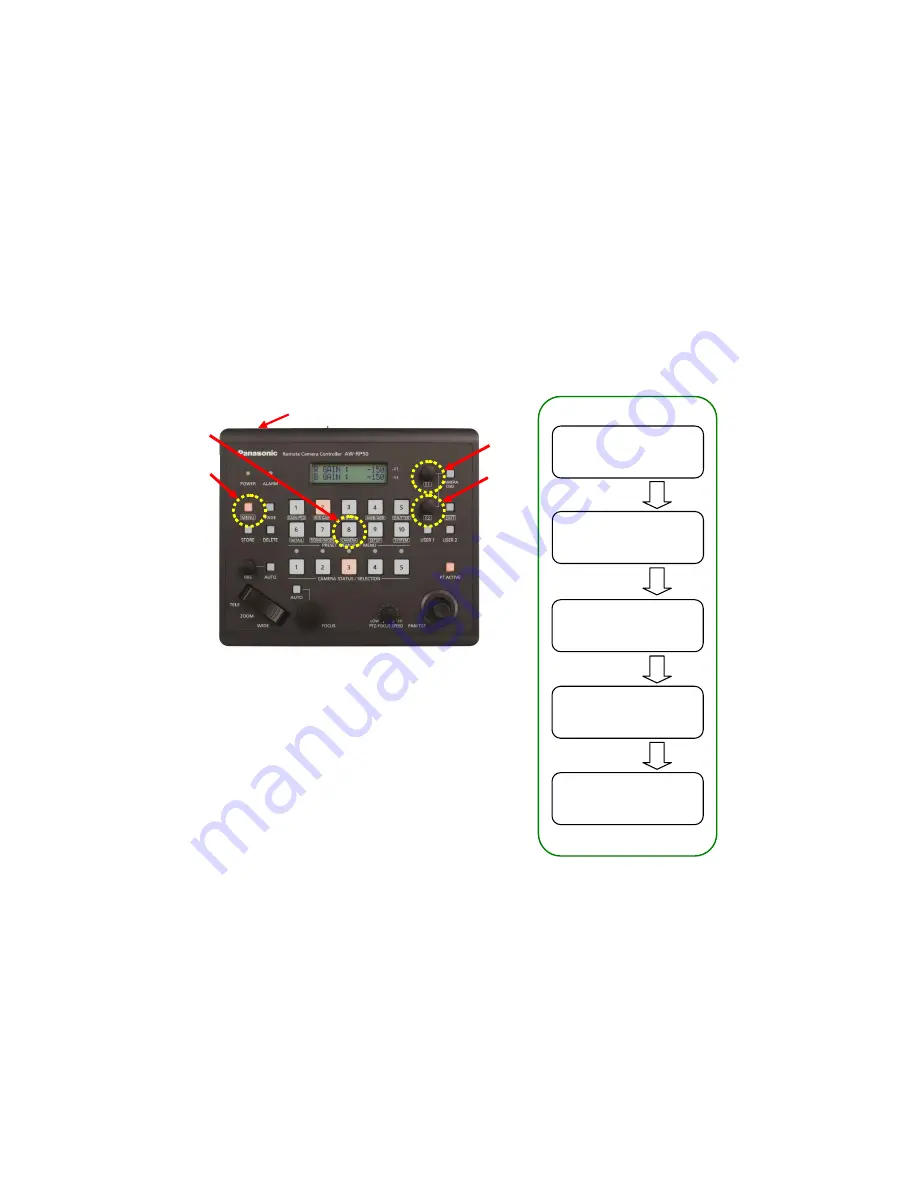
1
.
Turn the MENU button
– (Fig.6-A) ON. (Its LED lights up.)
2
.
Press the LED button 8 (CAMERA)
– (Fig.6-B) at PRESET MEMORY/MENU area.
3
.
Turn F1 dial
– (Fig.6-C) to display [2] POWER menu – (Fig.7), and press F1 dial.
4
.
Turn F1 dial
– (Fig.6-C) to display 2. AUTO ON menu – (Fig.7).
5
.
Turn F2 dial
– (Fig.6-D) to select [On], and press F2 dial.
* Default: [On]
<Note>
・
Make sure that the remote camera is in STANDBY mode when AW-RP50 controller is turned ON.
・
AW-RP50 controller does not have the function of switching the remote camera to STANDBY mode by turning OFF
its power switch.
Press F2
Press Button 8
(
D
)
(
B
)
(
A
)
(
C
)
(Figure 6: AW-RP50 Control Panel)
(Figure 7: AW-RP50 LCD Panel)
[1]GROUP
[2]POWER
1
.
CAM POWER
ALL
OFF ↓
2
.
AUTO ON
O
ff
↓
2
.
AUTO ON
On
↓
Turn F1
Turn F1
Turn F1
Turn F1
Rear Panel: AW-RP50 Power SW


