38
3. Setup
3-7. Network settings
Set up the network for transmitting image files by Ethernet. For details on image transmission method, refer to
“5. Image transmission functions”.
The network initial setup is: IP address: 19.168.0.10, subnet mask: 55.55.55.0 and gateway: 0.0.0.0 (unused).
When using the host computer with settings matching the network setup, it is not necessary to setup via the
menu.
For the setting to take effect, the system must be rebooted. Turn the system’s power off and then back on.
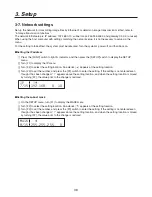
Setting the IP address
1
Press the [FUNC] switch to light its indicator, and then press the [SETUP] switch to display the SETUP
menu.
2
Turn [F1] to display the IP menu.
3
Turn [F] to select the setting location. An asterisk ( ) appears at the setting location.
4
Turn [F3] to set the number, and press the [F3] switch to enter the setting. If the setting is not entered even
though it has been changed, “ ! ” appears above the setting location, and when the setting location is moved
by turning [F], the value prior to the change is restored.
*1
Setting the subnet mask
1
On the SETUP menu, turn [F1] to display the MASK menu.
2
Turn [F] to select the setting location. An asterisk ( ) appears at the setting location.
3
Turn [F3] to set the number, and press the [F3] switch to enter the setting. If the setting is not entered even
though it has been changed, “ ! ” appears above the setting location, and when the setting location is moved
by turning [F], the value prior to the change is restored.
."4,
Summary of Contents for AVHS300G - HD SWITCHER
Page 55: ...55 8 Appearance Unit inch mm 16 1 8 410 9 1 2 240 4 1 16 103 5 3 16 5 ...
Page 61: ...Memo ...
Page 62: ...Memo ...
Page 63: ......


