– 24 –
Chapter 3 Part Names and Functions — Control Panel AV‑HS60C1/AV‑HS60C2/AV‑HS60C4
3
Source name display panels
Displays applications of the crosspoint buttons. The display settings of the source name display panels can be made from the <CONF> button on the
top menu
→
[SOURCE NAME]
→
When operating other than macro bus: “crosspoint number” on the upper line, “input source name” on the lower line
When operating macro bus: “macro name” on the upper line, “input source name” on the lower line
4 PGM/A bus crosspoint buttons (AV‑HS60C1/AV‑HS60C2: 1 to 24, AV‑HS60C4: 1 to 16), PST/B bus crosspoint buttons (AV‑HS60C1/
AV‑HS60C2: 1 to 24, AV‑HS60C4: 1 to 16)
Selects the video signals of the PGM/A bus and PST/B bus.
Source can be selected using the <2nd PAGE>/<3rd PAGE> button. (AV-HS60C1/AV-HS60C2: Maximum of 96, AV-HS60C4: Maximum of 64)
(page 24)
f
Bus mode can be selected from the <CONF> button on the top menu
→
[OPERATE]
→
[Transition] tab
→
[Bus Mode] column
→
[Bus Mode].
5
<BUS SHFT> button
Press the <AUX 1/2> to <AUX 15/16>/<KEY1 F/S> to <KEY4 F/S>/<VMEM F/S>/<UTIL 1/2>/<DSK1 F/S> to <DSK4 F/S> buttons while holding
down the <BUS SHFT> button to switch the bus selection applications. For the <AUX 1/2> to <AUX 15/16> buttons, the bus selection applications
can be switched even when the selected button is pressed again.
Example) <KEY1 F/S> button
When only the <KEY1 F/S> button is pressed, the KEY bus crosspoint buttons are switched to the source selector buttons of the KEY1 fill bus.
When the <KEY1 F/S> button is pressed while the <BUS SHFT> button is held down, the KEY bus crosspoint buttons are switched to the source
selector buttons of the KEY1 source bus.
6
<2nd PAGE>/<3rd PAGE> buttons
Switch the page to select the source with the KEY bus crosspoint buttons, PGM/A bus crosspoint buttons, or PST/B bus crosspoint buttons.
f
The pages of the buses included in the corresponding ME can be switched at once. To switch pages at individual buses, assign the <2nd
PAGE>/<3rd PAGE> button to the KEY bus crosspoint buttons, PGM/A bus crosspoint buttons, and the PST/B bus crosspoint buttons. (page 131)
Button status
Displayed page
<2nd PAGE> button
<3rd PAGE> button
Off
Off
First page
Lit
Off
Second page
Off
Lit
Third page
Lit
Lit
Fourth page
7
<IMAG> button
Enables/disables image effects (paint, mono colors, mosaics, defocusing, etc.) to be added to images selected at the PGM/A bus and PST/B bus.
f
The setting to enable/disable image effects to be added to images selected in the KEY bus can be made from the <ME1>/<ME2> button on the top
menu
→
[IMAGE]
→
[Key1]/[Key2] tab
→
[Mosaic/Defocus] column. (page 85)
8 Bus tally
Indicates the output status of the buses. The buses that comprise the on-air tallies will light up.
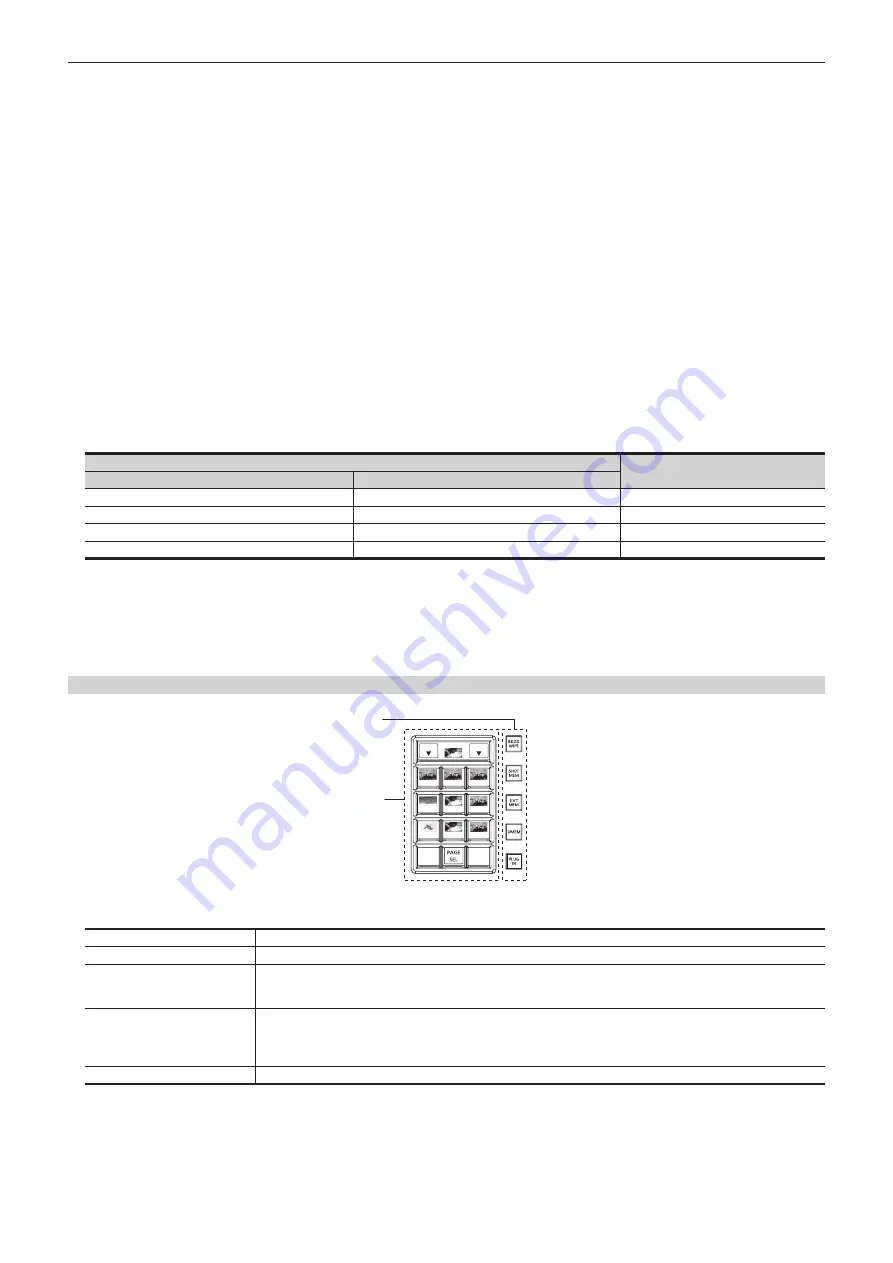
Multi‑selection panel area
RECALL
STORE
DEL
4-1
4-3
4-2
4-4
4-6
4-5
4-7
4-9
4-8
OP
STILL1
1
2
1 Mode selection button
Switches functions that can be operated on the multi-selection panel.
<BKGD WIPE> button
Selects background wipe preset.
<SHOT MEM> button
Registers/recalls/deletes register memories of the shot memory.
<EVT MEM> button
Recalls register memories of the event memory. This button is also used to select register memories during EMEM-LINK
transition.
f
Registration/editing are performed using the menu.
<VMEM> button
Records [CLIP1] through [CLIP4] (video memory) and [STILL1] through [STILL4] (still image memory) to the current
frame memories and plays them back.
f
When using the Storage Module AV-HS60D1 (optional), register memories can be registered/recalled/deleted on SSD
installed in the Main Frame AV-HS60U1/AV-HS60U2.
<PLUG IN> button*
Used as a plug-in software menu.
* This is a function to be supported in the future.
2
Multi‑selection menu panel
When the mode selection button is pressed, the menu to be displayed is switched.
For details, refer to “Basic operations for the multi-selection panel area” (page 40).
Summary of Contents for AV-HS6000
Page 5: ...Please read this chapter and check the accessories before use Chapter 1 Overview...
Page 52: ...This chapter describes menu operations Chapter 5 Basic Operations...
Page 118: ...This chapter describes the input output signal settings Chapter 6 Input Output Signal Settings...
Page 162: ...This chapter describes the difference with the Standard mode Chapter 9 3G mode 4K mode...
Page 168: ...This chapter describes the terminals and signals of the unit Chapter 10 External Interfaces...
Page 184: ...This chapter describes the setting menu table and terms Chapter 12 Appendix...
Page 206: ...Web Site http www panasonic com Panasonic Corporation 2014...


