


®
I N C .
P A C I F I C
M I C R O S O N I C S
60
Reference
Model Two HDCD
®
User’s Manual
Rev. C - January 2002
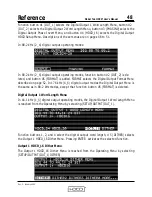
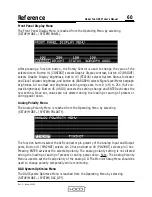
Front Panel Display Menu
The Front Panel Display Menu is reached from the Operating Menu by selecting
(SETUP/MORE.../SYSTEM/PANEL).
After pressing a function button, the Rotary Control is used to change the value of the
selected item. Button #1 (CONTRST) selects Graphic Display contrast, button #2 (BRIGHT)
selects Graphic Display brightness, button #3 (STATUS) selects System Status Indicator
and Clock Indicator brightness, and button #4 (BARGRPH) selects Signal Level Meter bargraph
brightness. All contrast and brightness setting ranges are from 0 (off) to 254 (full con-
trast/brightness). Button #5 (UNDO) cancels the setting change and ENTER activates the
new setting. Once set, values are not altered during the loading or saving of presets or
during power down.
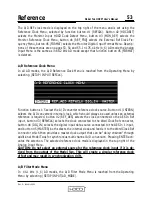
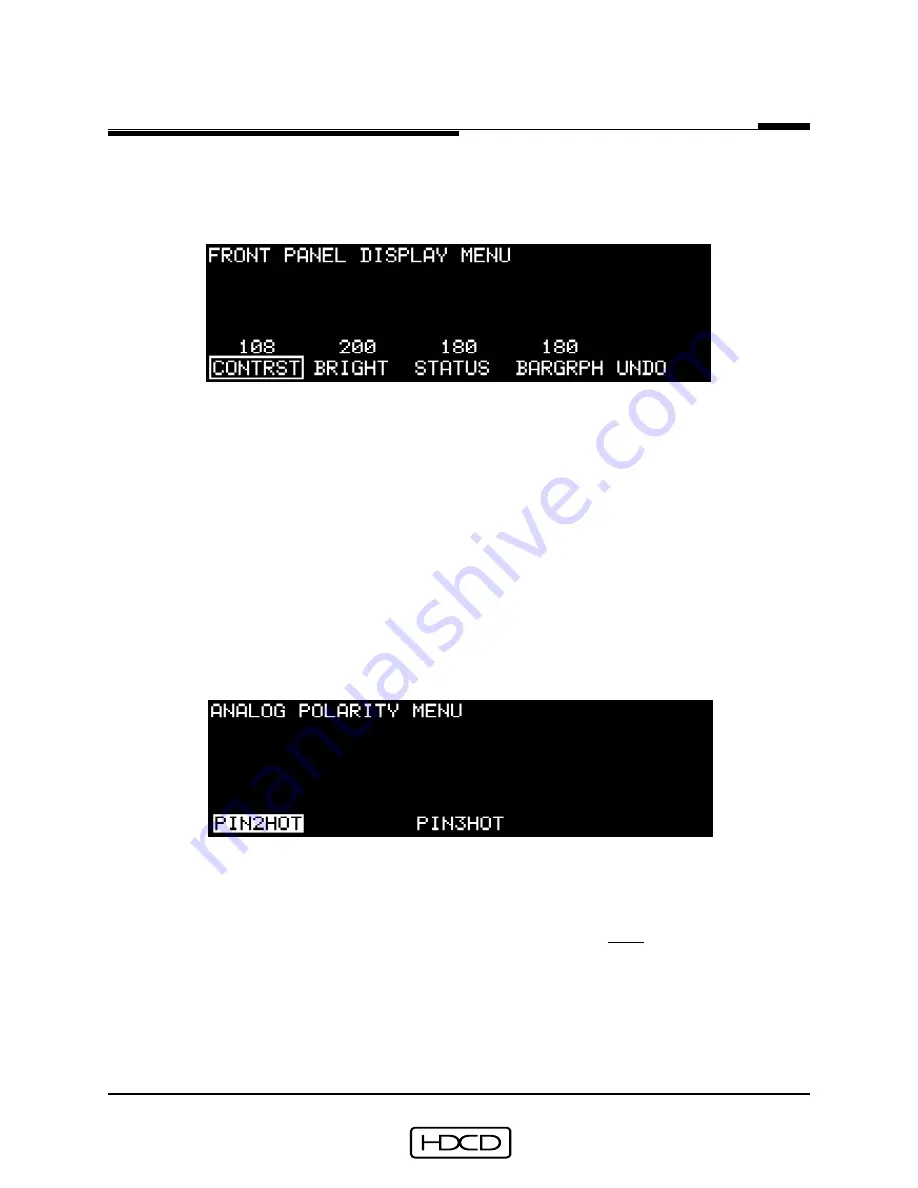
Analog Polarity Menu
The Analog Polarity Menu is reached from the Operating Menu by selecting
(SETUP/MORE.../SYSTEM/POLARTY).
The function buttons select the XLR connector pin polarity of the Analog Input and Output
ports. Button #1 (PIN2HOT) selects pin 2 hot and button #3 (PIN3HOT) selects pin 3 hot.
Pressing ENTER activates the selected polarity. The analog polarity setting is not altered
during the loading or saving of presets or during power down. Note: The Analog Polarity
Menu is used to set the fixed polarity of the analog I/O. The Monitor Setup Menu should be
used to change polarity temporarily while monitoring.
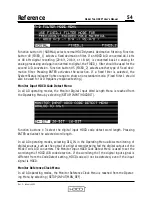
DAC-System Optimize Menu
The DAC-System Optimize Menu is reached from the Operating Menu by selecting
(SETUP/MORE.../SYSTEM/DAC_OPT).