background image


--------------------------------------------------------------------------------------------------------------------------------- 

3.5 System Installation Step 

¾

  Before installation, please read following installation attention items and other 

instructions carefully. 

¾

  Before installation, please check all the parts if have any looseness, take care the supply 

power switch if is shut down. 

¾

  System host installation well, connect with the C.O lines to the ports and also extension 

ports. 

¾

  Connect with the external supply power, open the power switch and see if the indicator 

light twinkling. 

¾

  According to the user’s requirement, enable/disable C.O.lines and do other settings.


¾

  According to the default seting, test the system. Default setting please refer Chapter 8 

and test the system if can be worked well.


¾

  Test the whole system to see if can be worked well, if not and then reset the system.


3.6 System Installation Attention Items 

Please pay attention to the important items of installation:   

1.  The telephone exchange shall be installed in a stable indoor place with dry, ventilated 

environment. (Temperature Range: 0-45  , Humidity Range :20%

-80%.Avoid straight sun 

shine or in the environment of flammable or caustic gas.) Special telephone wire is 
preferable.  

2.  A marginal space around the exchange should be remained for heat sink, inspection and 

maintenance of the system.   

3.  A wall bore is available at the underside of mainframe for wall installation. Desk installation is 

also admitted. But the contact of wall bolt and circuit board inside the mainframe should be 
avoided.  

4.  Please keep the exchange away from other equipment producing large electromagnetic 

disturbance (such as motor and large transformer).   

5.  None of the wiring of any extension should share the pipeline with power supply or antenna. 

Neither should the extension be close to antenna for air broadcasting (including short-wave).   

6.  Avoid damaging the power-supply cable. Keep it away from water. Encountering the leakage 

of water cut off the power immediately.   

7.  Please don't impact or shake the exchange at any situation. Don't remove the exchange in 

working status.   

8.  If the wiring pipeline of the extension is disturbed by electromagnetic wave while substitution 

is unavailable in site, special insulating wire for communication is suggested for substitution, 
also, the insulating net of which should be grounded.   

Warning


1.  The wiring should not be done in thundering.   

2.  Avoid to use telephone in thundering.   

3.  Please don't use the telephone in flammable and leaking gas environment.   

Summary of Contents for CDX-CP832

Page 1: ......

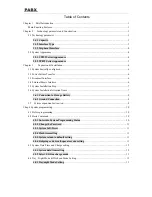
Page 2: ...6 3 5 System Installation Step 7 3 6 System Installation Attention Items 7 3 6 1 Connection to Storage Battery 8 3 6 2 Ground Connection 8 3 7 System expansion Instruction 8 Chap 4 System programming...

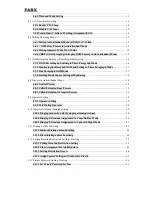
Page 3: ...cess in Auto attendant Mode 18 4 8 1 No Dial Process 18 4 8 2 Called Extension Busy Process 18 4 8 3 Called Extension No Answer Process 19 4 9 Operator Setting 19 4 9 1 Operator Setting 19 4 9 2 Fast...

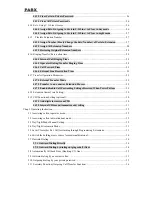
Page 4: ...Transfer to a no answer Extension Process 29 4 17 3 Enable disable Call Forwarding Settings Reserved When Power Failure 29 4 18 Extension Alarm Time Setting 30 4 19 CID Functions Setting optional 30...

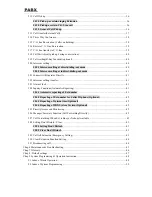
Page 5: ...Alarm Clock 41 5 24 Inquiry Functions Automatic Reporting 41 5 24 1 Automatic reporting of Ext number 41 5 24 2 Reporting of Ext number for Caller ID phone Optional 42 5 24 3 Reporting of System time...

Page 6: ...Appendix I Internal Hotline function 53 Appendix II Abbreviated dialing 54 Appendix III IP dialing 54...

Page 7: ...rmation of the company and play it to customers same as the CRBT of ISP Day Night Mode According to the class of the outgoing and the right of the incoming extensions outgoing CO lines the system can...

Page 8: ...s and two door openers you can open door through any extensions PC Charging Programming Interface optional Except for programming on extensitions also can be programmed on PC computer and can be print...

Page 9: ...ine 40V Feeding 2 Trunk Interface Type Incoming ringing current outward dual tone signal 3 Internal Exchange Construction Analog type exchange network and 8 x 16 analog switch array 4 Transport Featur...

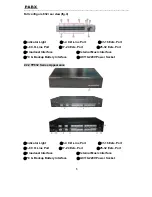
Page 10: ...interface output audio level maximum 2 0 V 2 External music Input audio level generally 500 MV maximum 2 5 V 3 PC serial DB9 Interface RS232 Connect with the PC over PC486 2 2 System Appearance 2 2 1...

Page 11: ...s Port Broadcast Interface External Music Interface PC Backup Battery Interface AC110 220V Power Socket 2 2 2 TP832 Series Appearance Indicator Light 1 4 C O Line Port 01 16 Exts Port 5 8 C O Line Por...

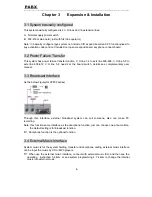
Page 12: ...e board switch details see complementary user manual 3 3 Broadcast Interface As the below Figure for CP832 series Through this interface external broadcast system can call someone also can make PC rec...

Page 13: ...is preferable 2 A marginal space around the exchange should be remained for heat sink inspection and maintenance of the system 3 A wall bore is available at the underside of mainframe for wall instal...

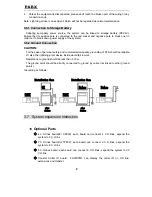
Page 14: ...l safety and communication quality grounding of KTS should be reliable Or else the lightning proof device inside would fail to work Resistance to ground should be less than 5 ohm The ground point shou...

Page 15: ...ad Second Line Long Time Operator over 60secs for each line Key Phone Expansion Board 4 Lines Key Phone Backup Battery Interface Doorphone CDX001 Stainless steel and aluminium alloy board Doorphone CD...

Page 16: ...f something wrong occurs you could press to restart z All the optional function in this manual not all the system can be have please see the function list for the detail function NOTE z Following set...

Page 17: ...s the flash time grade Description For active the hold and divert operating use In default setting L 2 1 0s Example Set the flash time to 1 2S just input 003 in programming status 4 2 5 System return...

Page 18: ...ime to set the office code to be Explanation When the extension indirect dialing out mode want to accomplish a function operation such as pick up 9 booking C o line 0 etc refer charpter 5 Operating In...

Page 19: ...Day Night Mode Weekend Mode Setting 4 4 1 Day night Mode Setting Format 0 4 0 Set day night mode to automatically mode 0 4 1 Set day night mode to manual mode 0 4 2 HH TT day mode start time HH hour...

Page 20: ...able M C O line If the machine has no C O line auto detected function You must use these commands according the actual trunk lines before using this product If you don t enable any C O line the system...

Page 21: ...ss status In this mode Caller will hear the OGM recorded message while all extensions are in MUTE mode 1 If the caller doesn t know the extension number he cans inquiry the operator The default mode i...

Page 22: ...s while playing OGM in auto attendant mode Format 1 6 7 0 Description enable directly ringing extensions while playing OGM in auto attendant mode and the ringing extensions is the first the second ope...

Page 23: ...r du you can speak in telephone and will be recorded into OGM 1 when the system use two OGM you will record the same contents into two OGM that means each pragraphs recording of two OGM is same 2 The...

Page 24: ...music Format 1 4 to monitor the external holding music Description to let you monitor the music on holding after setting music source and at the same time you can test the quality of telephone unit 4...

Page 25: ...ription when called extension no answer the call transferred to operator Format 1666 Description when called extension no answer the call transferred to the operator attendant ringing extensions Above...

Page 26: ...the ringing extensions for every five seconds these extensions is assigned to the C O line this is default setting Format 1 8 8 1 Description While the C O line come in and all the ringing extensions...

Page 27: ...No M C O line come in while system in night mode Format 3 1 M Description Disable all Exts ring when calling of No M C O line come in while system in night mode Example Setting Ext 603 and Ext 611 rin...

Page 28: ...the Exts Format 2 N 0 Example Setting Ext 602 608 is Direct dialing out mode and the other extensions is indirect dialing out mode then iput 21 2020 2080 In Direct dialing out mode extension make int...

Page 29: ...Ext in day mode 4 5 N L Assign dialing out class L for certain No N Ext in night mode Explanation N the Ext series No N 01 32 N 01 means Ext 601 N 32 means Ext 632 L class number L 0 6 Description As...

Page 30: ...up Q Clear All Restriction of Item A Format 4 1 Description to clear all the call out restriction of certain numbers of item A Example Ext 612 is be assigned dialing out class 4 in day night mode now...

Page 31: ...2041 7 4 12 4 Assign Special Calling out Number for Class 0 Format 4 3 P ABCDEFGH Explanation ABCDEFGH the initial digits of the calling number to be allowed it can be from 1 digit to 9 digits or repr...

Page 32: ...2 1 How to use private password refer to 5 10 2 This function better work for dialing out class 0 4 13 2 Clear Certain Private Password Format 5 UV Explanation UV private password sequence number Desc...

Page 33: ...702031 701060 701080 3 Eg2 C O line 1 can use at night mode by Ext 601 C O line 2 can use by Ext 607 Ext 608 Ext 616 in night you can set as follows 7111 7121 711010 712070 712080 712160 4 15 Flexible...

Page 34: ...ty it will clear the extension group numbers and disable Ext group function 4 16 Ringing Transfer Reservation time 4 16 1 Internal Call Ringing Time Format 4 9 4 TT Explanation TT seconds 01 99 00 mea...

Page 35: ...xt hold the call In default setting TT 12 reserved time are 120s 4 17 Transfer Operation Parameter 4 17 1 External Transfer Mode Format 1530 Description After 3 busy tone can connect the C O line in 5...

Page 36: ...5Nhhtt Explanation hh hour 00 23 tt minutes 00 59 Description Set alarm time of extension N Example Set extension 624 alarm time is 7 30 Input 05240730 Note you can setting alarm clock function from t...

Page 37: ...8 1 1 DTMF mode Format 1 8 1 2 FSK mode 1 8 1 3 DTMF mode 1 8 1 4 Auto mode Default setting 1 8 1 5 always FSK DTMF mode The system can auto select C O line CID mode Sometimes if system can t display...

Page 38: ...alls at auto attendant mode The system use three paragraph of OGM messages the relevant messages will be heard automatically in the follows situations A when a exterior caller call the C O line B when...

Page 39: ...ng the start and end time you have set in 4 4 1 In Auto mode the system also will switch the day night mode automatically according the Weekend mode you have set in in 4 4 2 5 4 Day Night Automatic Mo...

Page 40: ...mode 3 Once you make the command the holding music switch on time 5 7 Outward Dialing 5 7 1 Outward Dialing Directly Format Pick up the handset and dial desired number directly after hearing the C O l...

Page 41: ...line 5 to dial 57 8622373 then he will pick up and dial 15 and hear dialing tone then he can press 57 8622373 1 when the user want to dial some special number in the C O line such as or then he can us...

Page 42: ...2 You should input the Ext number within 10 seconds after patting the hook or press FLASH button and hearing the internal dialing tone otherwise you ll have to pat the hook came back to the C O line...

Page 43: ...Example Ext 607 is talking to C O line and want to transfer the C O line to Ext 618 Then Ext 605 can transfer the incoming call to Ext 618 by by patting the hook or pressing the FLASH and dialing 618...

Page 44: ...two party conversation and make a three party conference You can have only two Ext with one C O line Example Ext 605 is talking to C O line caller and he want to transfer the call to Ext 617 then Ext...

Page 45: ...to C O line Description Ext N is talking with the C O line A at this moment Ext N holding this C O line A pat the hook and input then Ext N can hear the internal dialing tone now he can dial 9 to C O...

Page 46: ...Co line hold is in the third grade 2 For key phone you should press transfer key instead of Pat the hook 3 Answer incoming waiting call by 9 and take back the first one by 9 again can be repeatable a...

Page 47: ...d input Ext number 5 23 Alarm Clock Format 4 hhtt Explanation hh is hour hh 00 23 tt is minutes tt 00 59 Description System will ring this extension on the setting time you just pick up handset and ca...

Page 48: ...al Format 64 Description After input the command and hang down telephone will ring and the system version will be displayed in your caller identify telephone 5 25 Priority Access and Monitoring Format...

Page 49: ...nswer then he want to transfer the incoming calls to the operator Ext 606 just to pick up Ext 602 input 82606 after hear Du you can hang up When power failure refer to 4 17 3 this setting will be stor...

Page 50: ...larm clock etc This command has no effect to other extension 5 31 Broadcasting call Broadcasting Pick up phone 8 6 Description After input this command the extension will connect to a broadcast port w...

Page 51: ...isplay Apply to telecommunication office No Caller ID display Wrong setting of No disturbing and it status Clear the No disturbing and set incoming telephone display CO line disconnected Connect to th...

Page 52: ...s with the first digit of 0 and 9 outward code of special trunk line in equal length is accordance with N For example 15 QQ First digit restrict group number 01 16 ABCD Concession or restriction No 1...

Page 53: ...elay mode 5 seconds Call the Central Enable UCD mode working averagely The C O line will be hung up if no dialing In auto attendant mode Door phone Disable Weekend mode disable Day night mode manual s...

Page 54: ...99 Setting year month date 01YYMMDD Setting Hour Minute 02hhtt 8 System Date Time Setting Setting week w 1 7 020000W 9 Delaying Mode Setting 03TT 10 Reverse Charging Mode setting 0300 Automatically Mo...

Page 55: ...endant for M CO line 10M First paragraph OGM 121 Second paragraph OGM 122 16 OGM Recording Third paragraph OGM 123 First paragraph OGM 131 Second paragraph OGM 132 17 OGM Monitoring Third paragraph OG...

Page 56: ...mode 1810 30 Internal CID Transmit Mode DTMF mode 1811 FSK mode 1812 DTMF mode 1813 Auto mode 1814 31 Internal CID receive Mode Double mode 1815 32 No answer transfer time No answer transfer time 184...

Page 57: ...etting 45L Internal call ringing time 494TT 43 Ringing Time Setting Operator dialing transfer ringing time 496TT Clear all 500 Setting UV group class L private password WWWW 5 UV WWWW L 44 Private pas...

Page 58: ...scription Format 1 Outword Dialing Off hook 9 phone number 2 Outgoing Call Transfer Off hook 9 phone number conversation pat hook ext No 3 Intercom Calling Off hook ext No 4 Coming Call Pickup Off hoo...

Page 59: ...ernal Call Transfer Conversation pat hook Ext No 24 Three Way Conference Conversation pat hook Ext No 25 C O Line Reservation Conversation pat hook Conversation pat hook three way conference mode 26 C...

Page 60: ...breviated Dialing numbers The longest numbers can be 16 digits How to use Operation For normal phone Pick up and dial 70 the group number 01 48 For keyphone phone Pick up and press then dial the group...

Page 61: ...d add IP prefix number to make low cost Step1 enable Normal C O line trunk line IP dial function into programming status input 8801 Step2 setting all trunk lines as the Normal trunk line into programm...

Reviews: