3
3
i
nsTalling
y
our
o
zone
g
eneraTor
:
• Both models SC-Oz and S2q-Oz will generate sufficient Ozone for
most spa and hot tub applications subject to the wide variations that
occur depending on operating conditions, chemical control and bather
load.
• model S8Q-OZ is sufficient for smaller pools and can be used in
parallel for larger applications. Sizing will also be dependent on a wide
range of variations including operating conditions, chemical control
and bather load.
• Choose a location for your generator that is accessible to an approved
electrical outlet and where the indicator light is visible.
Note:
Electrical outlets within 10 feet of the tub must have ground fault
protection.
• Leave enough space to allow for removal of the UV lamp for lamp
maintenance.
• As UV lamps can be damaged in shipping and handling, check the
lamp before installing your Ozone generator by plugging it into an
electrical outlet for a moment. A bluish light should be evident at the
ports and the LED indictor light on the SC-Oz, S2q-Oz, and S8q-Oz
should also glow.
WARNING - DO NOT LOOK DIRECTLY INTO THE PORTS.
ULTRAVIOLET LIGHT EMITTED BY THE LAMP CAN CAUSE BURNS
TO UNPROTECTED EYES.
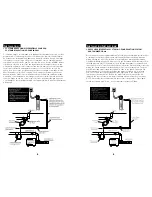
Your Ozone generator should be located in a dry area that is accessible for servicing
and at least two feet above the water level. If the unit can not be mounted at least
two feet above the water level, the tubing connecting the generator to the inlet of
the spa or pool must either be installed with a loop to raise it two feet above the
water level or be fitted with a check valve approved for ozone service to prevent
water back flow into the generator. When using an optional venturi system to
provide increased air flow, a check valve must be used to prevent back flow into the
generator in case the outlet line is blocked.
Select a location two feet above the water level and with access to a properly
grounded electrical outlet. The unit can be mounted vertically or horizontally with the
connection ports facing down. Mount the chamber to the wall using the cell clamp
and mounting screws included with your system. If mounting the unit to drywall,
use a plug or an expansion butterfly nut to secure the unit.
Some typical installation procedures are described in the following pages.
i
nsTallaTion
du
généraTeur
:
• Les deux modèles SC-OZ et S2ROZA génèrent une quantité suffisante
d’ozone pour la plupart des applications concernant une baignoire à remous
ou un spa, sous réserve des importantes variations qui peuvent survenir
selon les conditions d’utilisation, le contrôle avec des produits chimiques de
traitement et le nombre d’utilisateurs.
• Le modèle S8ROZA suffit pour les petites piscines et on peut l’utiliser en
parallèle pour de plus importantes applications. Le choix de la capacité
dépend également d’un grand nombre de variables, dont les conditions
d’utilisation, le contrôle avec des produits chimiques de traitement et le
nombre d’utilisateurs.
• installer le générateur d’ozone de façon à ce qu’il soit près d’une prise
électrique approuvée et le placer de façon à ce que la lumière bleutée soit
visible. note: Les prises électriques situées à moins de dix pieds de la cuve
doivent être munies d’une protection contre les cas de défaut à la terre.
• Prévoir suffisamment d’espace pour pouvoir retirer la lampe UV lors de
l’entretien.
• Comme il est possible d’endommager les lampes UV au cours du transport
et lors des manipulations, vérifier la lampe avant d’installer le générateur
d’ozone; pour cela, brancher la lampe à une prise de courant électrique
pendant quelques instants. On doit observer une lumière bleuâtre aux orifices
et le témoin à DEL doit s’illuminer sur un appareil SC-Oz, S2q-Oz, ou S8q-Oz
AVERTISSEMENT - LA LUMIÈRE ULTRAVIOLETTE ÉMISE PAR LA
LAMPE UV PEUT CAUSER DES BRÛLURES SÉRIEUSES AUX YEUX NON
PROTÉGÉS. NE REGARDEZ JAMAIS DIRECTEMENT À L’INTÉRIEUR DES
ORIFICES PENDANT QUE L’APPAREIL EST EN MARCHE.
Le générateur d’ozone devrait être installé dans un endroit sec, accessible pour
l’entretien et situé à au moins deux pieds au-dessus du niveau d’eau. Si cette
dernière règle ne peut être respectée, la canalisation qui relie le générateur à
l’entrée du spa ou de la piscine doit être équipée d’une boucle qui lui permettra
d’être à deux pieds au-dessus du niveau d’eau et/ou encore, être munie d’un
clapet antiretour approuvé pour l’ozone afin d’empêcher l’eau de refouler vers
le générateur. Si vous utilisez un système de venturi (facultatif) pour augmenter
l’écoulement d’air, il faut installer un clapet antiretour pour prévenir un retour de
l’écoulement à l’intérieur du générateur lorsqu’une conduite de sortie est obstruée.
Choisir un emplacement situé à au moins deux pieds au-dessus du niveau d’eau
et près d’une prise électrique munie d’un disjoncteur de fuite à la terre. L’appareil
peut être installé verticalement ou horizontalement et les orifices de raccordement
doivent être orientés vers le bas. Fixer la cellule au mur à l’aide des étriers et des vis
de montage fournis avec le système. Si l’appareil est installé sur un mur sec, fixez-le
au moyen d’une douille d’ancrage ou d’un support d’ancrage à papillon.
Des installations types sont illustrées dans les pages qui suivent.
Summary of Contents for S2Q-OZ
Page 2: ......


